Welcome to part two of my Japanese crafting adventures! If you haven’t read part one yet, which is all about the crafty places I visited in Tokyo, you can read it here.
Today I’m excited to share all the crafty sights we saw while visiting Kyoto, a city that is renowned for its traditional craft industries.
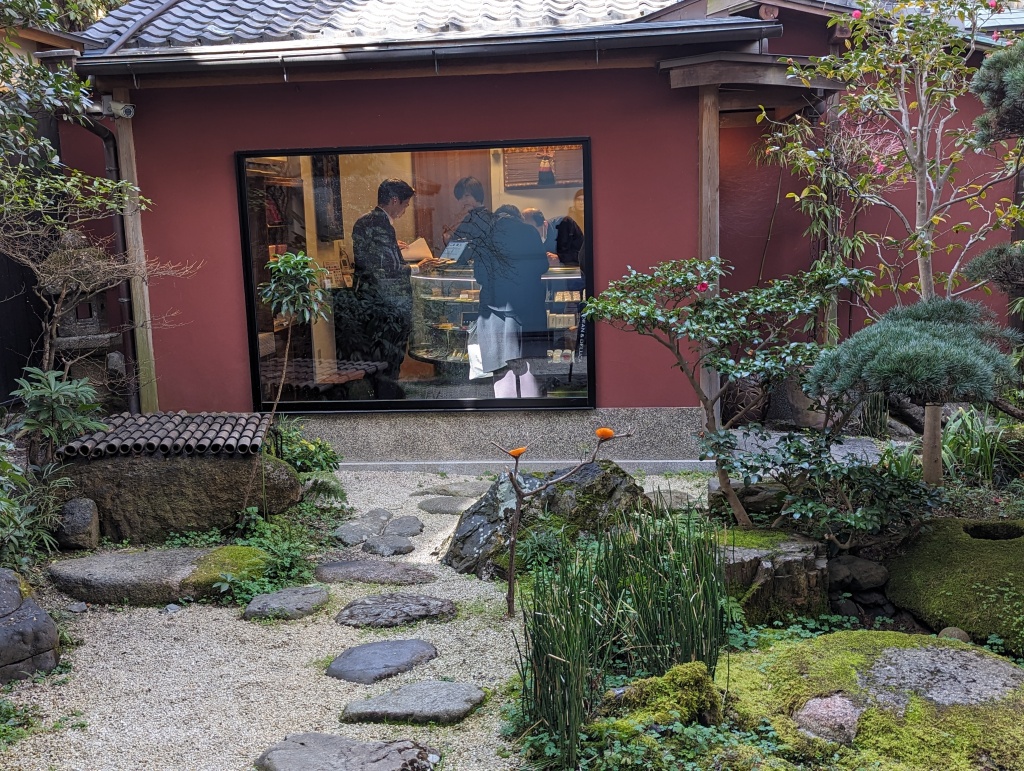
The magical little alleyway leading to the Misuyabari Needle shop – more on that below!
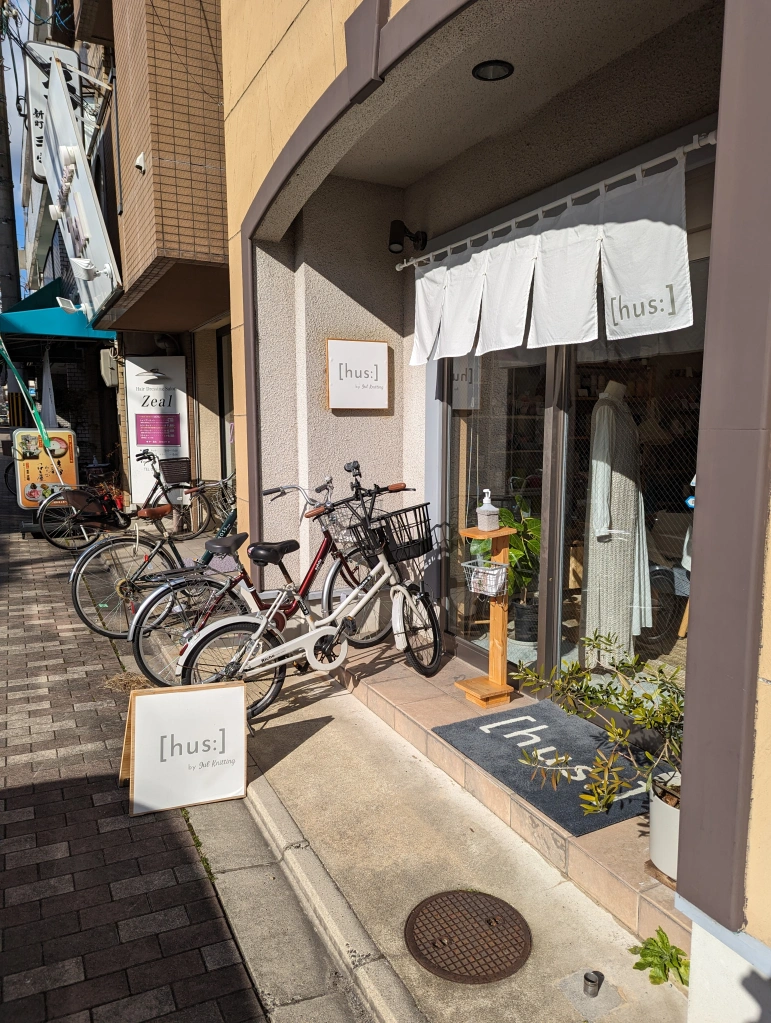
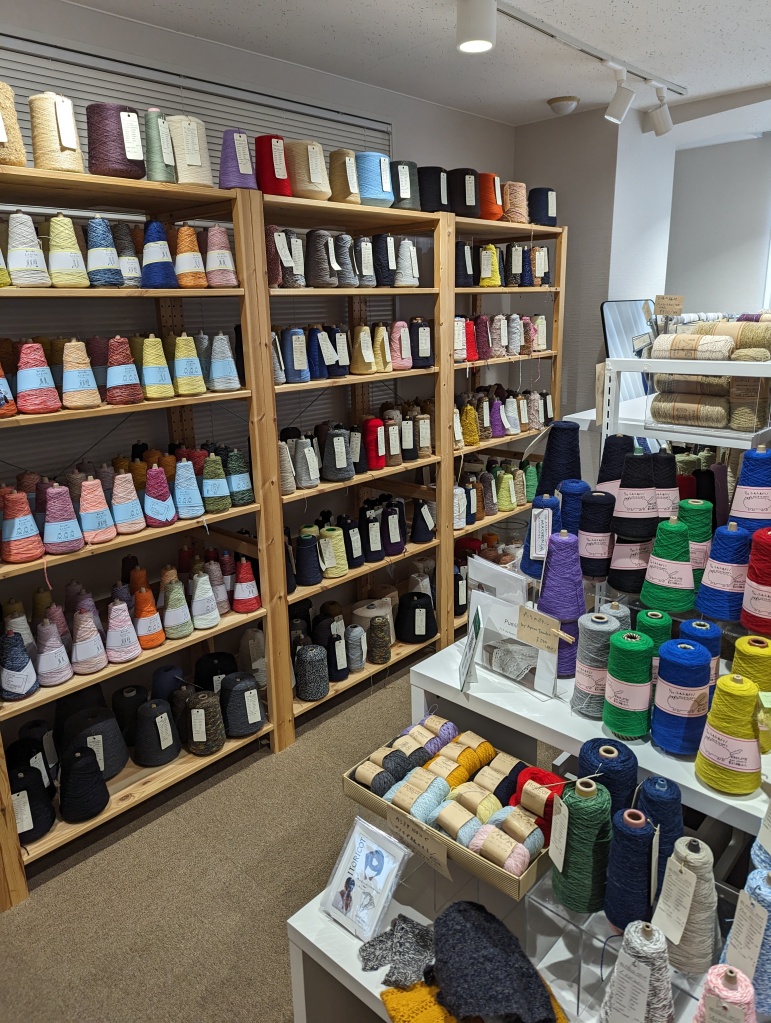
On our first day in the ancient capital, we arrived via bullet train and were fortunately permitted to check in to our AirBnB early (lugging your luggage around on public transit in Kyoto is a huge no-no, so we were grateful to be able to unload it so we could see the city!). We dropped off our things and went straight to [hus:], a small yarn store I had stumbled across thanks to the YouTube algorithm. They were only open on Saturday and Sunday, and considering we didn’t have a full weekend in Kyoto, I wasn’t expecting to be able to make it there, so I was glad we were able to drop by!
[hus:] was a sweet little store with a nice, clean aesthetic and kind staff. This is a great place to go if you like to make amigurumi or other small crochet items, as they have lots of neat yarns and kits suitable for those sorts of things. I fell in love with a very soft tweedy yarn, sold in cones, and bought a sweater quantity which will eventually become a cardigan for Eitan.
The next day we went to a large number of shops mostly in central Kyoto.
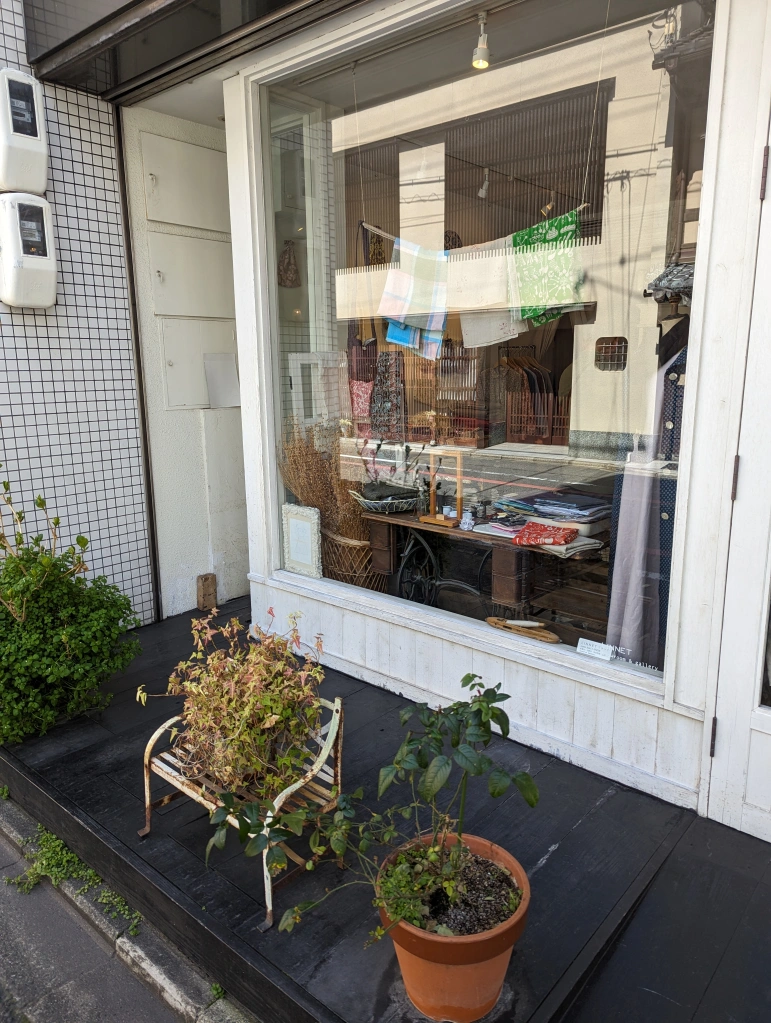
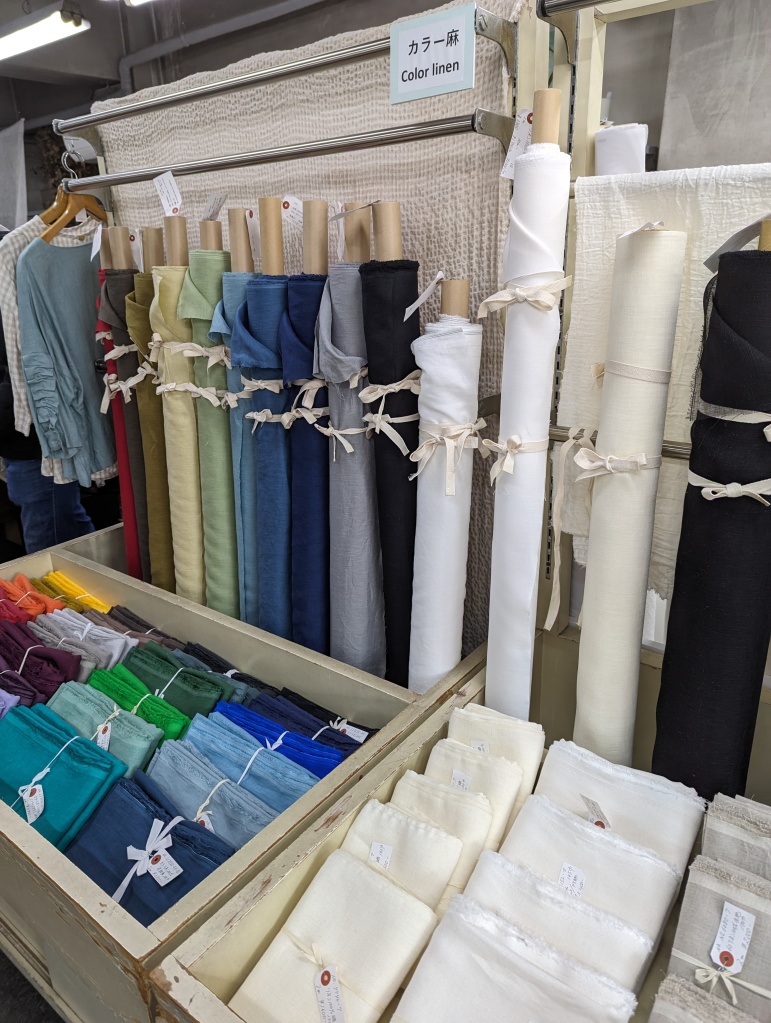
Our first stop was Linnet, a real teeny tiny little fabric shop that specializes in linens. It’s worth noting that (I’m pretty sure) the fabric is on display as fat-quarter-type pieces, and you select what you want and they cut the yardage you need from stock in the back. I didn’t actually end up buying anything, so I’m not sure this is actually how it works, but it’s something I saw in a review of the shop, and I saw very few actual bolts in the store, so I’m guessing this is the case. No staff offered to help me, but I was happy to browse and just didn’t find anything that really pulled to me.
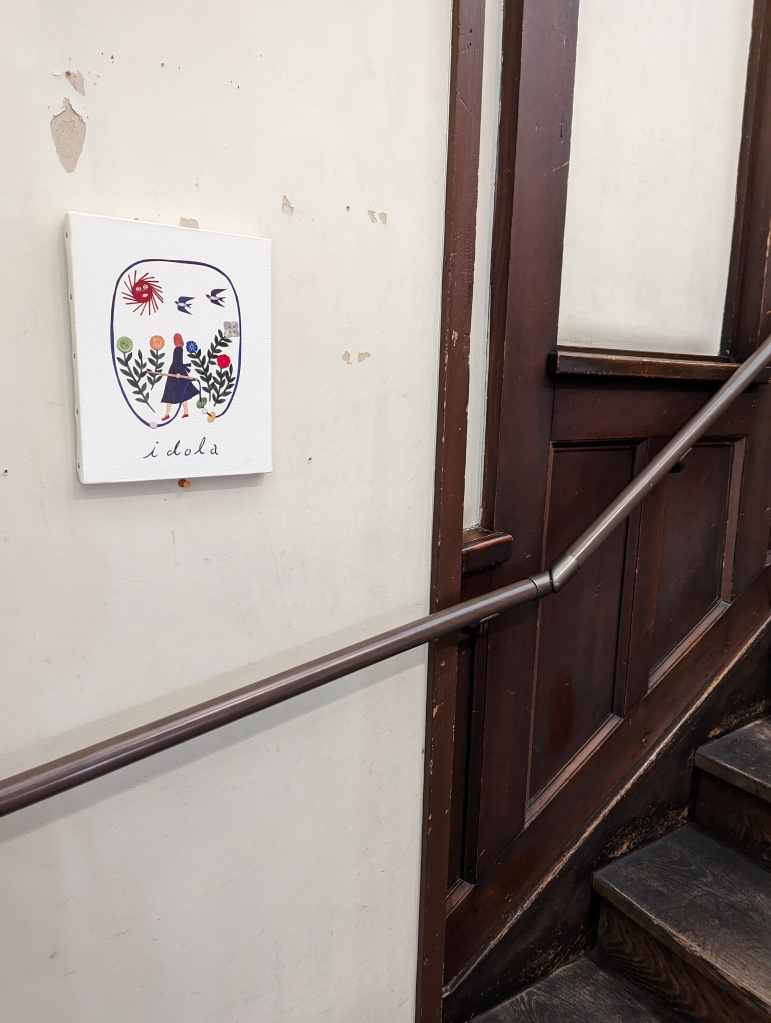
After that we went to Idola, which was an incredible button store on the third floor of this beautiful old building with a lovely wooden staircase. When you reach the landing where the store is located, they have little lockers where you can store your personal items and grab a tiny shopping basket to do your button shopping.
Idola had lots of great vintage buttons (as well as beads and sequins) but I was so smitten with the ceramic buttons by nonomura minami – they were incredible works of art and I just couldn’t resist getting a few.
After that we went to Misuyabari Needles, which I had seen on a few other sewing blog posts about Japan. Apparently it’s a very old shop – from what I’ve heard at least a hundred years old. It’s very much tucked away, and it’s very tiny (only a few people can fit in the shop at a time) and it’s surrounded by a beautiful traditional Japanese garden. The staff there were very welcoming and friendly. They really just sell one thing – needles and pins – as well as decorative storage boxes for them. They sell pins with tiny handcrafted heads shaped into different animals (think dogs and cats!) or objects (like teeny sewing machines) – there are many to choose from! I asked the man working there what you’re meant to do with them, and he told me they’re decorative; I think the Dalmatian puppy pin I chose will be an adorable addition to one of my more decorative pin cushions! I also bought a very cute felt needle book, which I was actually in need of and very happy to find.
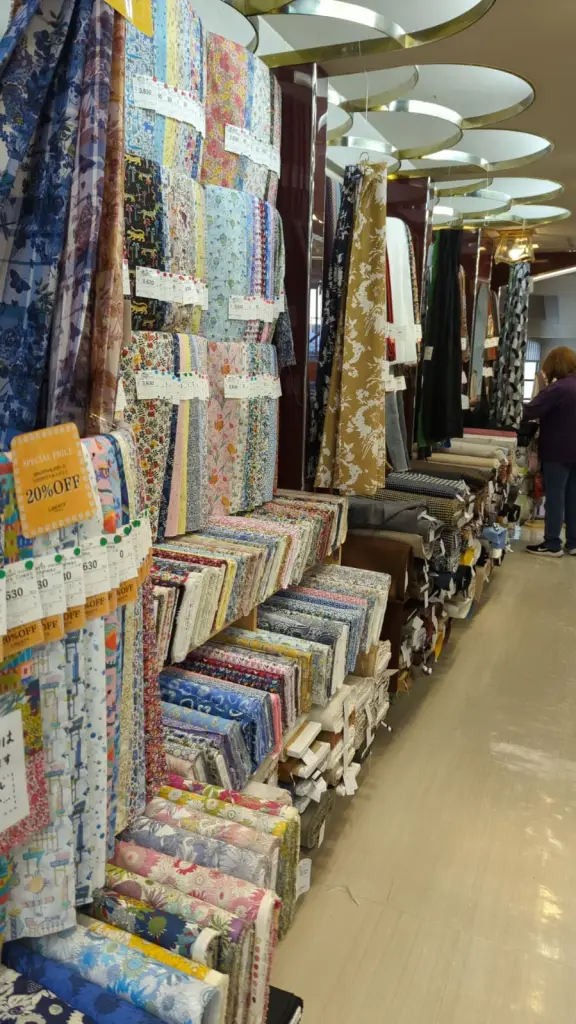
We then made our way to Nomura Tailor. This was my favourite fabric shop on the whole trip – I probably could have spent all day in there (I was in there for at least an hour before I even realized there was a third floor, where they have loads of books, notions, and kits). This was the Japanese fabric store of my dreams – interesting prints, luxurious Liberty fabrics, and beautiful linens. I enjoyed myself so much walking around and came home with some beautiful fabrics, including some Liberty prints I’ve always loved and never got around to buying.
Sorry for the blurry cell-phone image of this one!
I actually went back to Nomura Tailor the next day for another round of shopping, and to check out Nomura Tailor House, which I hadn’t known existed until after I went to Nomura Tailor (I think it’s because I realized that I had seen a different shop sign in some photos online?). It’s just a few minutes’ walk away in the nearby covered shopping arcade. I’m still not really sure what the difference was between the two shops, but Nomura Tailor House was smaller and seemed to have more quilting fabrics and pre-cut fabric pieces. Either way – don’t miss it like I almost did!
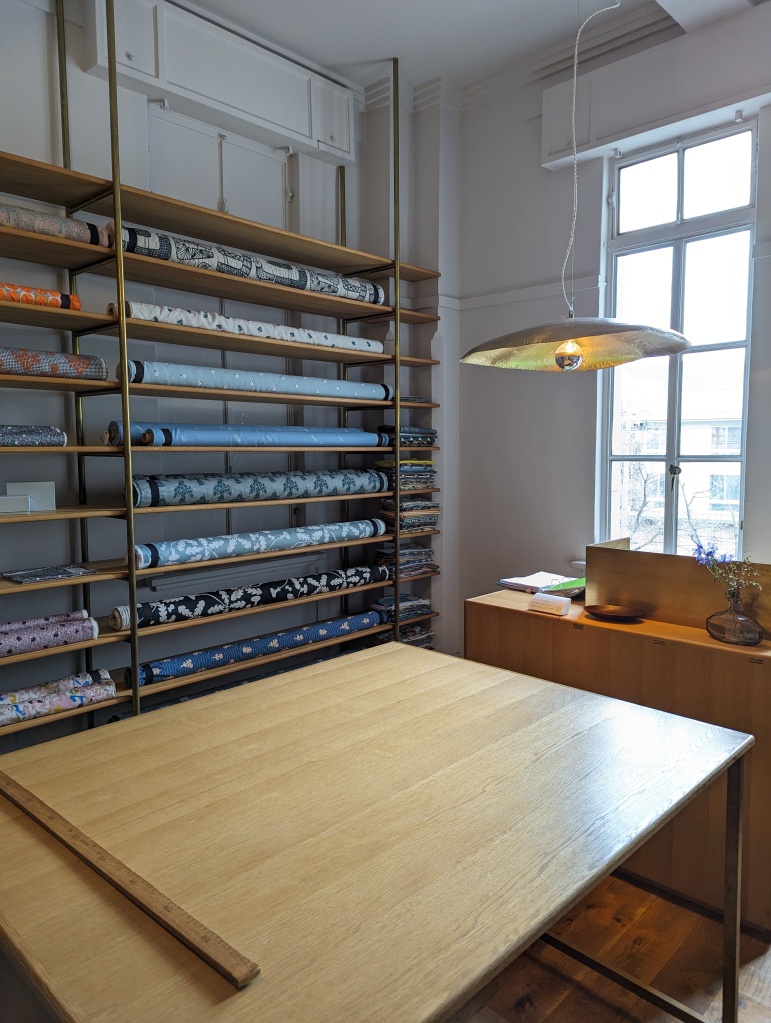
One last fabric stop we made was mina perhonen, which was an incredibly beautiful store, however it was also (at least for us) incredibly expensive (think over $100 CAD per metre…). I should have known when the employee there gave us a look, but gosh, their fabrics were indeed lovely! The fabrics there felt like they were very high quality, but there was nothing I loved so much that I was willing to splurge.
My last crafty store stop in Kyoto was Itokobaco, which is in a beautiful old house (make sure you take off your shoes before you go in!) with a very cozy vibe. It’s a good place to get solid colour yarns in many colours, or pick up some cute crochet kits. They have a nice selection of books too!
Other crafty things of note:
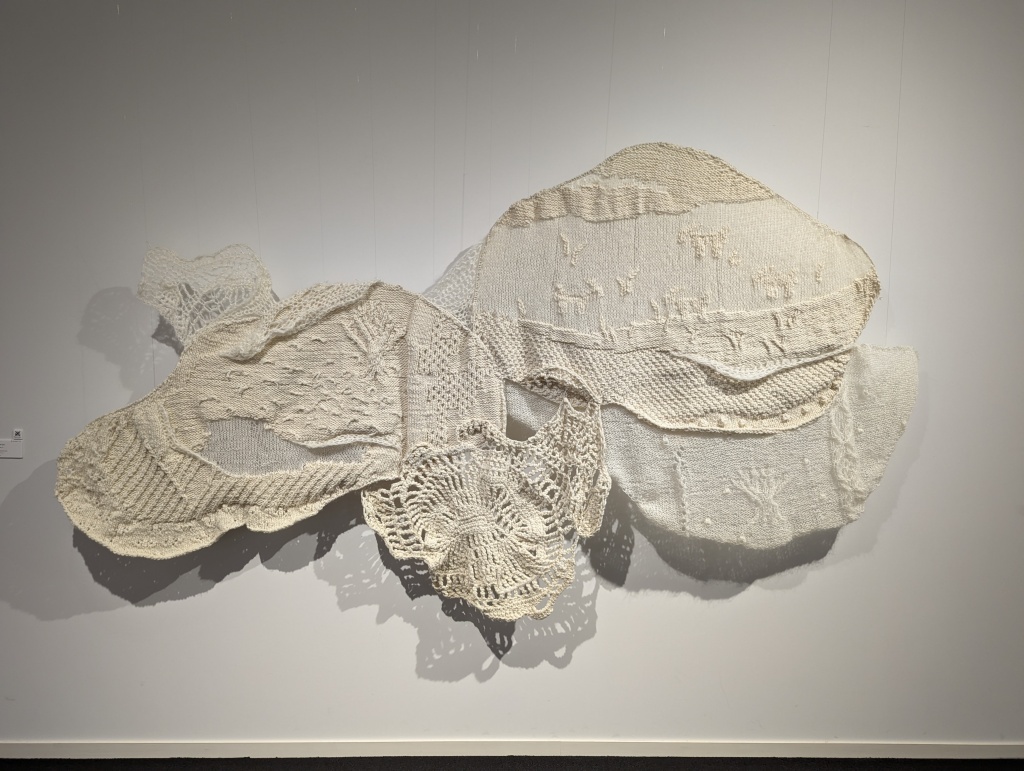
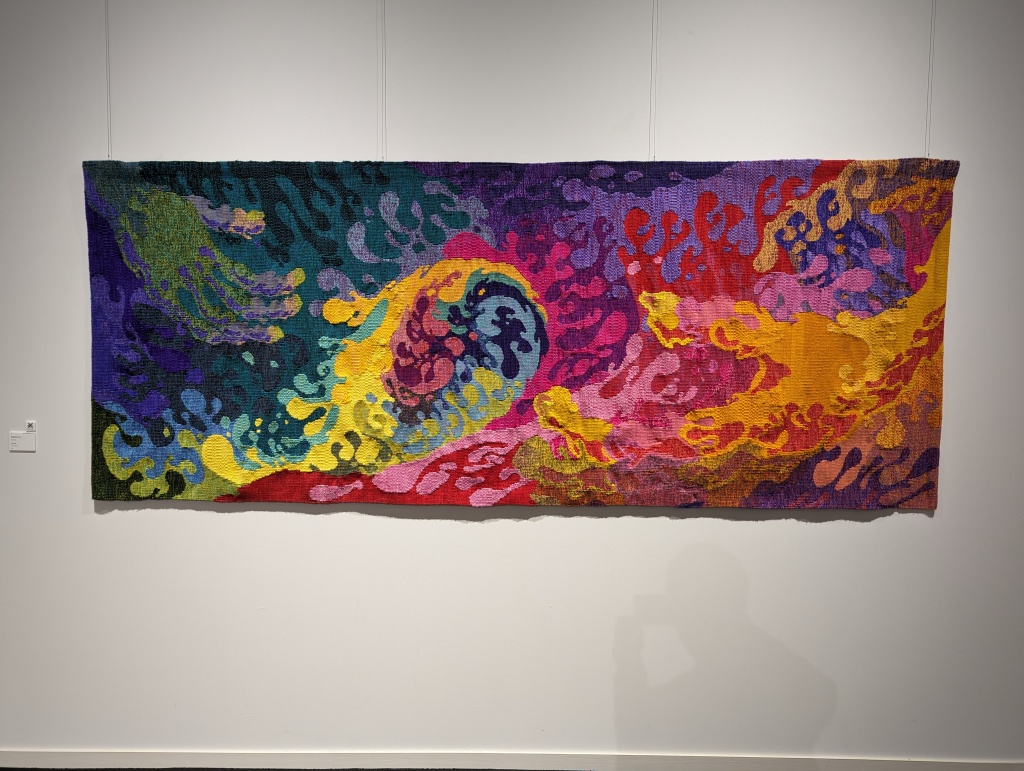
The Kyoto Museum of Crafts and Design is a great place to spend a rainy afternoon. You don’t need much more than an hour or two there, but it’s worth the stop. They have a great permanent exhibit on the traditional crafts of Kyoto, with demonstrative displays of how they are done (including some where you can try it yourself!). The temporary exhibit on while we were there was of the works of craft students (I believe from the Kyoto Arts & Crafts University), which, as graduates of an art and design university, was very interesting to look through and took us back to our art school days!
Another stop we loved was Suzuki Shofudo – if you love Japanese paper products, definitely check it out – they have incredible washi paper by the metre, but it was also a great place to load up on special Japanese souvenirs. We stocked up on lots of goodies for ourselves and family there!
That’s all, folks!
We had such an amazing time on our trip to Japan. After all that planning, it’s hard to believe the trip has come and gone!
Japan certainly is a wonderland for crafters or anyone who appreciates great craftsmanship. Which of these places would you love to visit most? Is there anywhere I missed that you’d recommend to others planning their trip?
I hope you enjoyed reading and please let me know your thoughts, questions, and comments!
Last month, I was lucky enough to finally make it to Japan for the first time ever. My husband and I initially booked a trip to go in March of 2020, and I think it’s safe to say we all know what happened to world travel then. I had created a full itinerary for that trip, and I built off of it a bit when planning it the second time around. While the wait was hard (and that initial cancellation painful), I’m glad that I had more time to do research on all the crafty places I could potentially visit on our trip.
Here, I will share that research, and where I ended up going – as well as what I discovered along the way – with you.
FABRIC & TRIM:
Our first day in Japan, we took it easy on our jetlagged selves and walked around in the Ueno Park and Tanaka neighbourhoods, which weren’t too far from where we were staying in Arakawa-ku. It was a beautiful day and the streets were quiet, and we walked by a store called Biscuit – I was very intrigued, but the lights were all off and the door shut. The sign on the door translated roughly to, “I will be opening late today”, but with no indication of when “late” would be. We decided to continue walking around the area and went back about half an hour later. I was disappointed to see the store still dark, until Eitan pointed out the shopkeeper making her way down the street to open up shop.
I had so much fun browsing Biscuit – it was full of fun little vintage knickknacks, as well as vintage fabrics, buttons, and a wall filled with spools of vintage ribbons. Unfortunately I didn’t find any vintage fabrics I liked that were in a large enough piece for me to make use of, but it was still fun to look through and see what was there. I couldn’t help walking out with a few yards of vintage ribbon, which was, in typical Japanese fashion, perfectly wrapped up for me to take home.
Now, I’m sure that if you’re into textiles and you’ve looked into or gone fabric shopping in Tokyo, you’ve heard of Nippori Fabric Town. Well, you should know that I take my fabric shopping very seriously – so much so that I booked our Air BnB about a 12-minute walk away from Nippori. I imagined carrying so many loads of fabric that I would want to easily return to the Air BnB to unload and have a snack before heading back for another round.
In truth – and maybe this is a very unpopular opinion – I actually was very underwhelmed. Sorry, I know. Nippori Fabric Town is like a mecca for textile lovers visiting Tokyo. Maybe that’s the thing – maybe it was so hyped up that my expectations were just too high. I didn’t find all that much that I didn’t feel like I could find at home (maybe I’m just spoiled with Toronto’s fashion district?). I had visions of incredible printed linens and exclusive Nani Iro prints… and, well there were cute quilting cotton prints and lots of cute canvas prints, but not the kinds of things that got me excited. Maybe this was for the best, as I didn’t feel overwhelmed and as though there was too much pressure to choose.
The star of Nippori Fabric Town is Tomato. There are a few locations, all specializing in different types of fabric. My favourite location was the “fancy” store (Tomato SELECT-KAN), where I saw some of those beautiful linens and wools I had dreamed of, and purchased what was left on a bolt of dark green floral linen. I was tempted by some fabrics in their “interiors” store (I always have been drawn in by curtain-y type fabrics for garments, à la Maria from Sound of Music), but the thought of fitting bulkier fabrics in my suitcase, and right at the beginning of the trip, had me nixing that idea.
One of the reasons I’m glad I was staying nearby was that I had a chance for a second round. When I got home that first night, feeling underwhelmed by my first experience of Nippori Fabric Town, I checked out their official website to see if there was something I had missed. Turns out, I had missed l. musee buttons, which I had had on my list of places I wanted to visit. They have a location on the main street that’s focused on beads, and I was so disappointed not to have found any buttons there. It was only after I checked out the website map again that I realized the button shop was a separate shop on one of the side streets.
Nanwa Sangyo – a beautiful linen shop. I didn’t buy anything but it was beautifully organized
I also learned from a second look at the website and map that there were more stores east of the main “strip”. My favourite of these was Humongous, a store specializing in block prints. The store is small, but very beautifully organized (photos were not allowed). The fabrics were expensive, but beautiful, and I felt they had that charming and unique Japanese quality I was after. The staff member working there was also kind and incredibly helpful, and more than willing to communicate using the translation apps on our phones.
So aside from stopping in at Humongous on our second visit to Nippori, I picked up some vintage buttons at l. musee (embarrassingly enough, I didn’t realize that the price listed was per button and not per card…) and some stunning woven ribbon from E & Son Fabric’s trim shop (which also did not allow photos – trust me, though, it was a beautiful shop). The trouble I have with trims is I love them, but have no clue what to do with them. I have a drawer full of beautiful trims…and yet, I can’t resist buying more. If you’re a fan of special trims and ribbons, you’ll have fun exploring the little trim shops in Nippori.
I think what was a little overwhelming about Nippori Fabric Town, and about Tokyo in general, is you kind of don’t know what’s down the little side streets or in the teeny tucked-away shops or in second-floor shops (many multi-storied buildings in Tokyo have shops and businesses beyond the first level!). I started to feel like there just wasn’t time to look at everything, so I tried to be selective so I could actually enjoy my time there. I’m the kind of person who doesn’t enjoy bargain hunting, or digging through dusty bolts of fabric that have been haphazardly stacked all over the place. If a store didn’t fit the sort of shopping vibe I wanted to be in, I skipped it, and spent more time perusing the stores that excited me. It almost felt like a relief not coming away with piles of fabric, especially since I knew it was just the start of our trip. What’s nice about a neighbourhood with such a large number of fabric and sewing shops, though, is that there’s a bit of something for everyone – whether you like high-end vintage buttons, or searching for that special fabric you managed to get at a steal.
Have you been to Nippori Fabric Town? And if so, did it meet your expectations?
YARN:
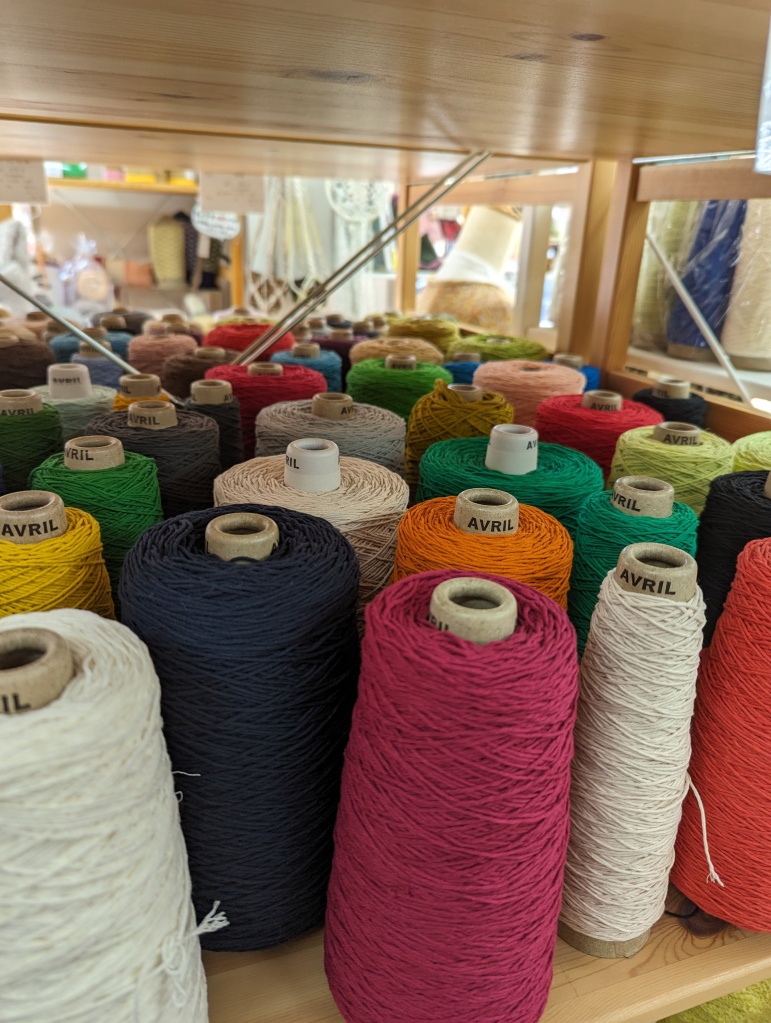
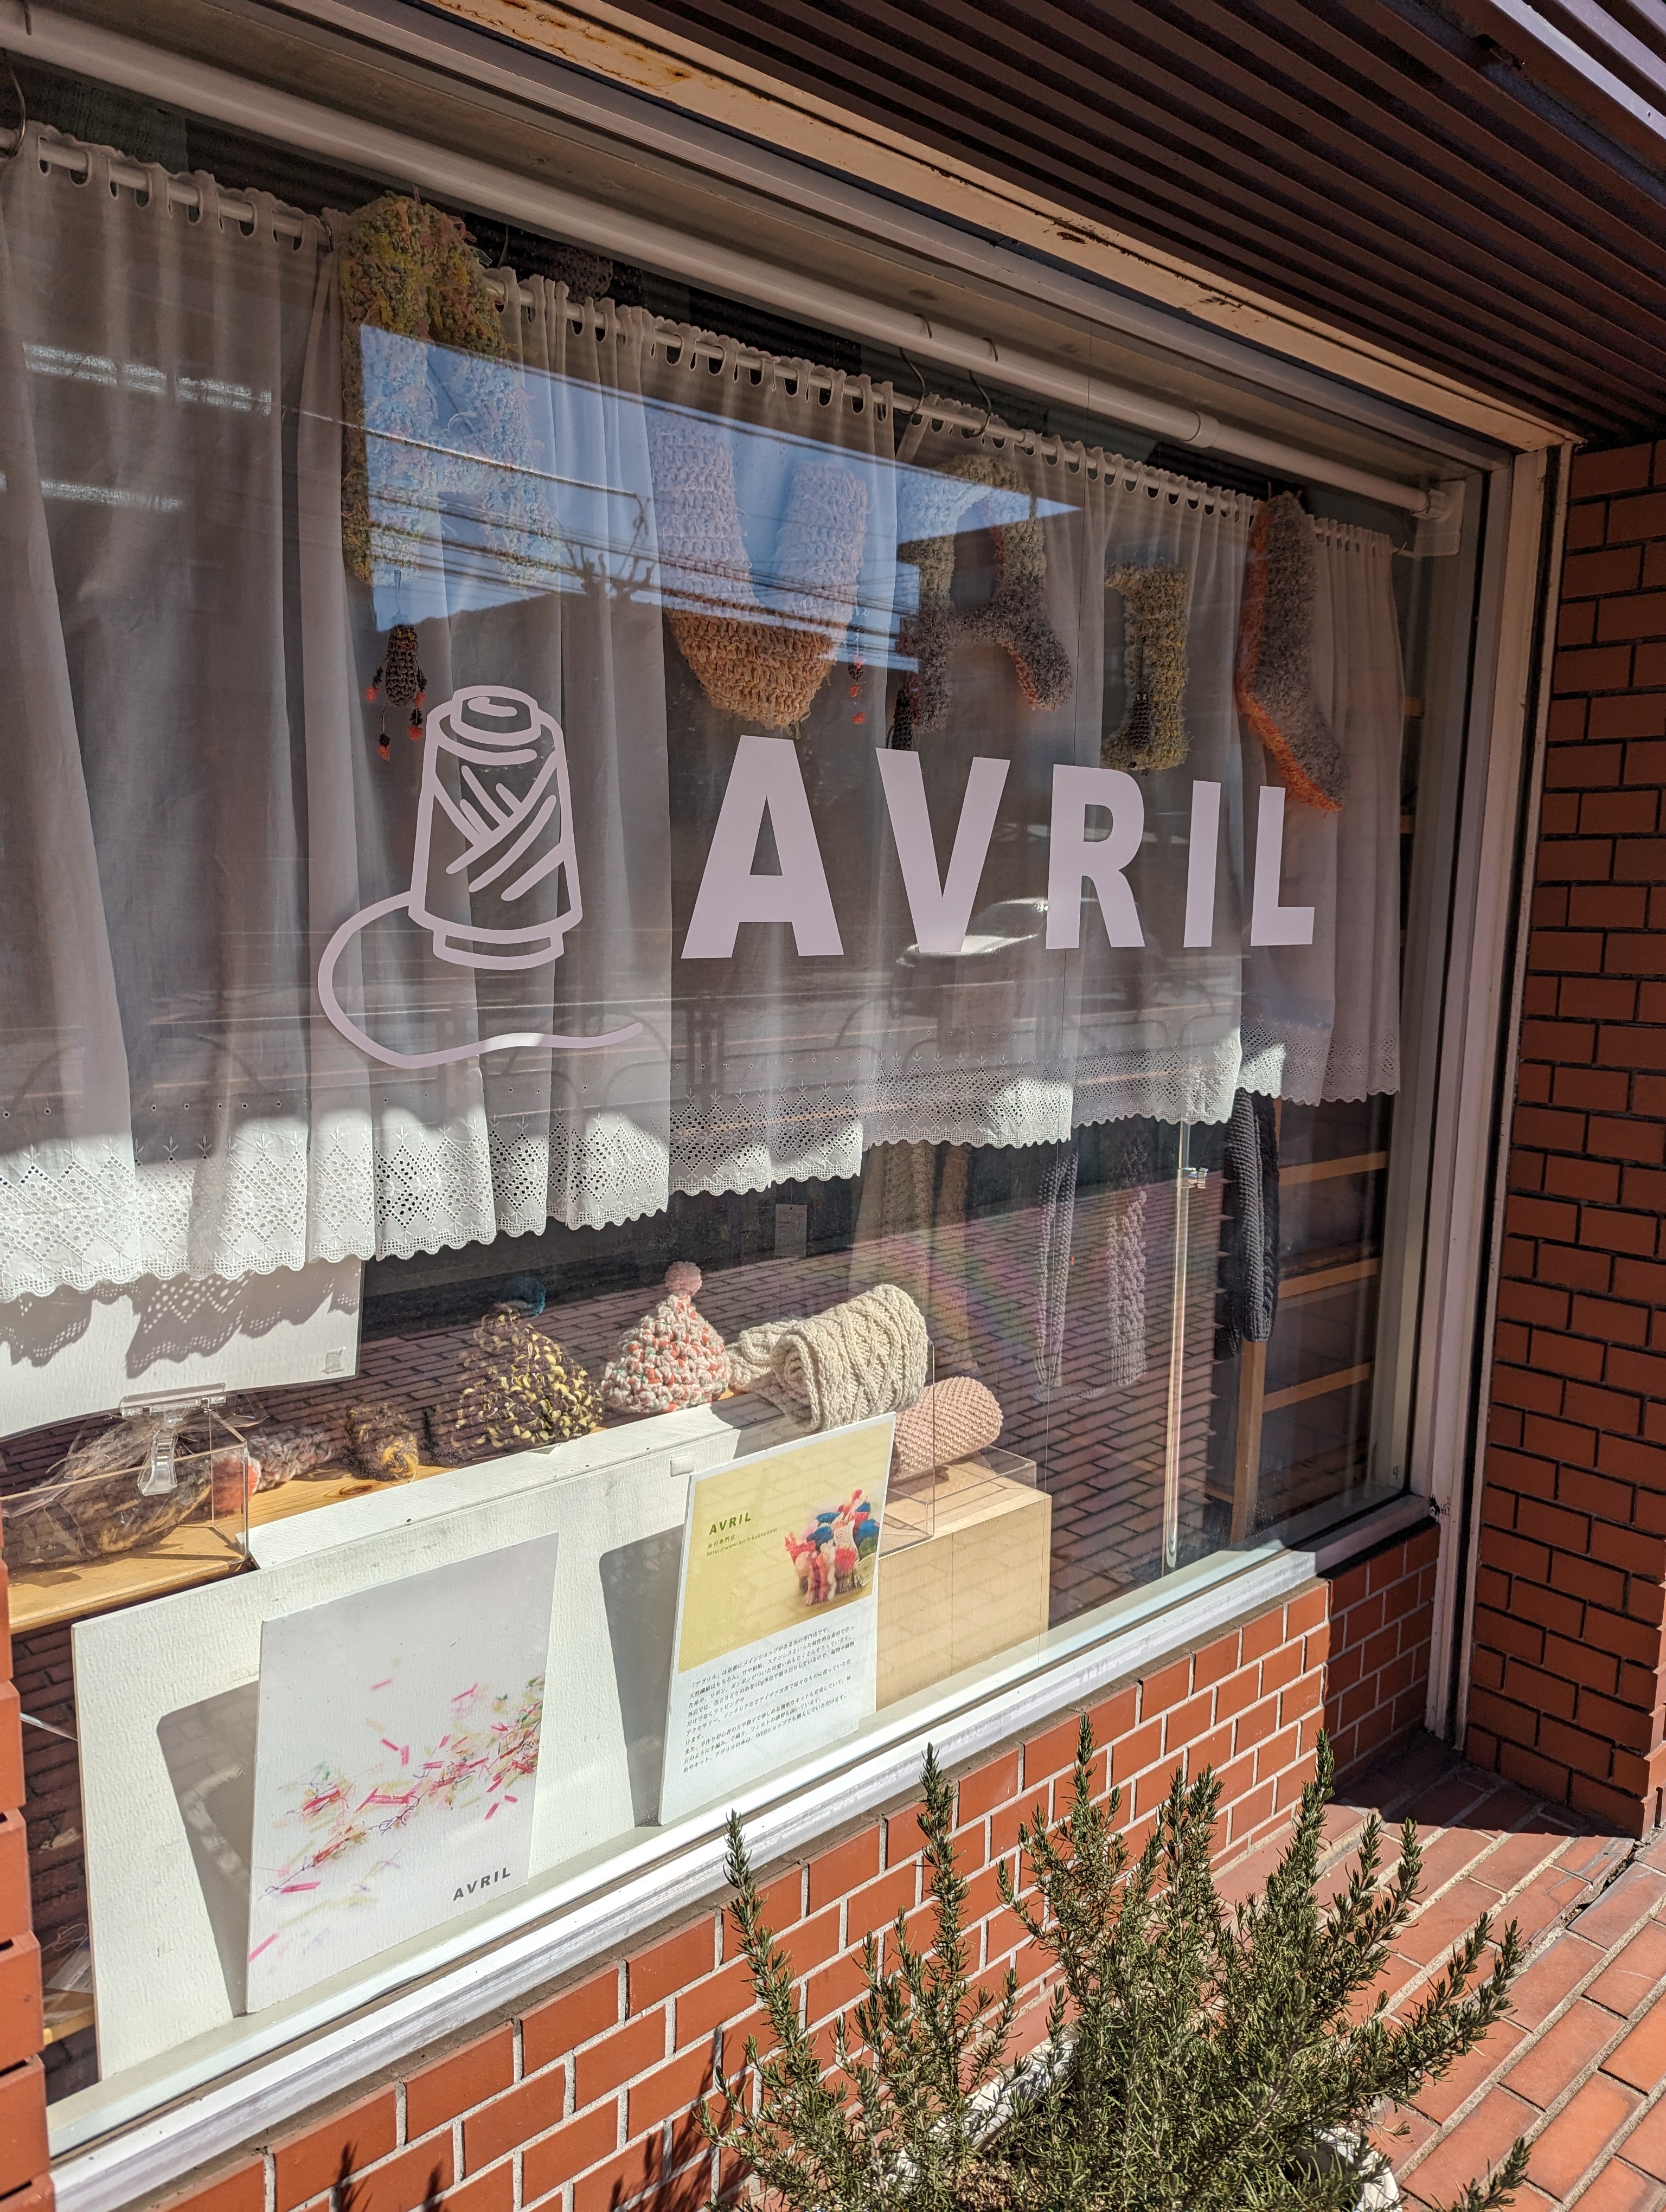
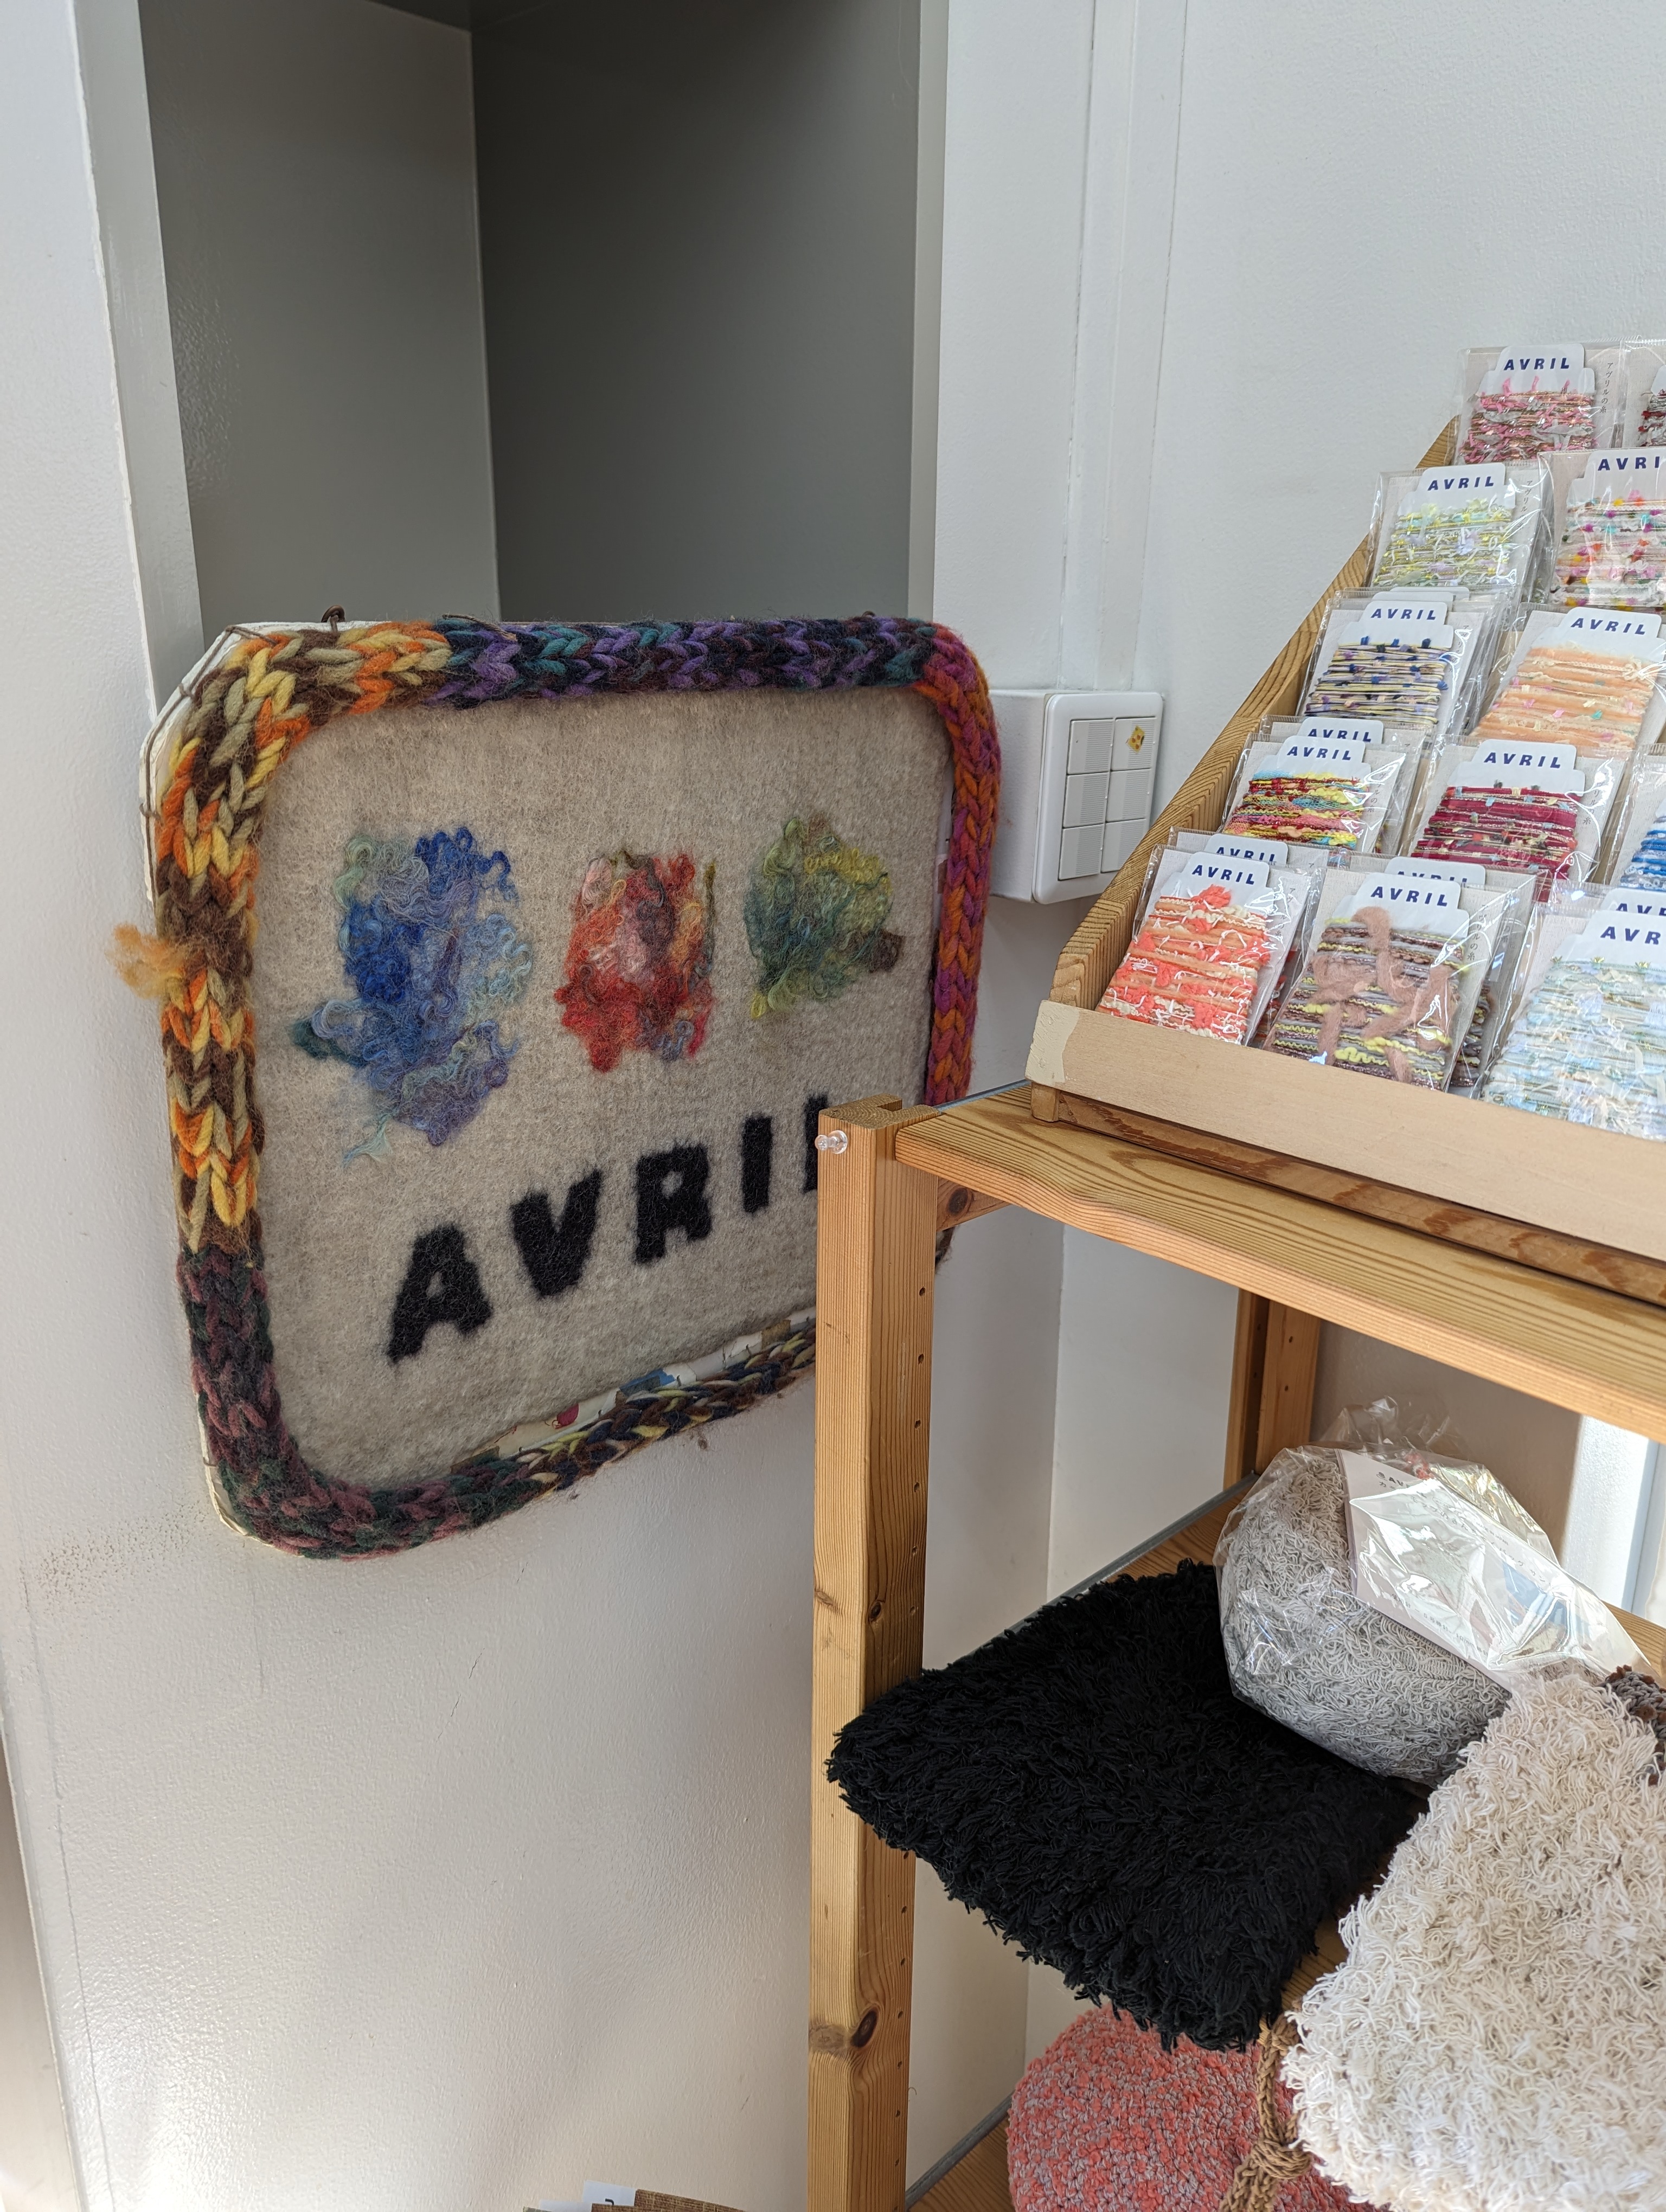
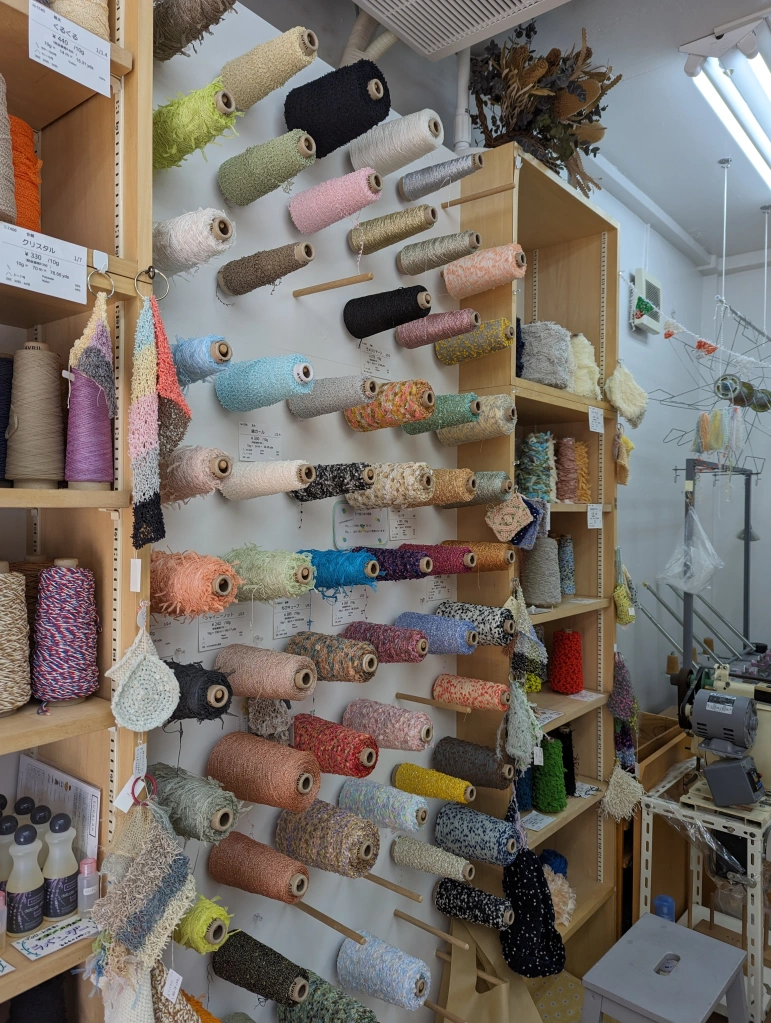
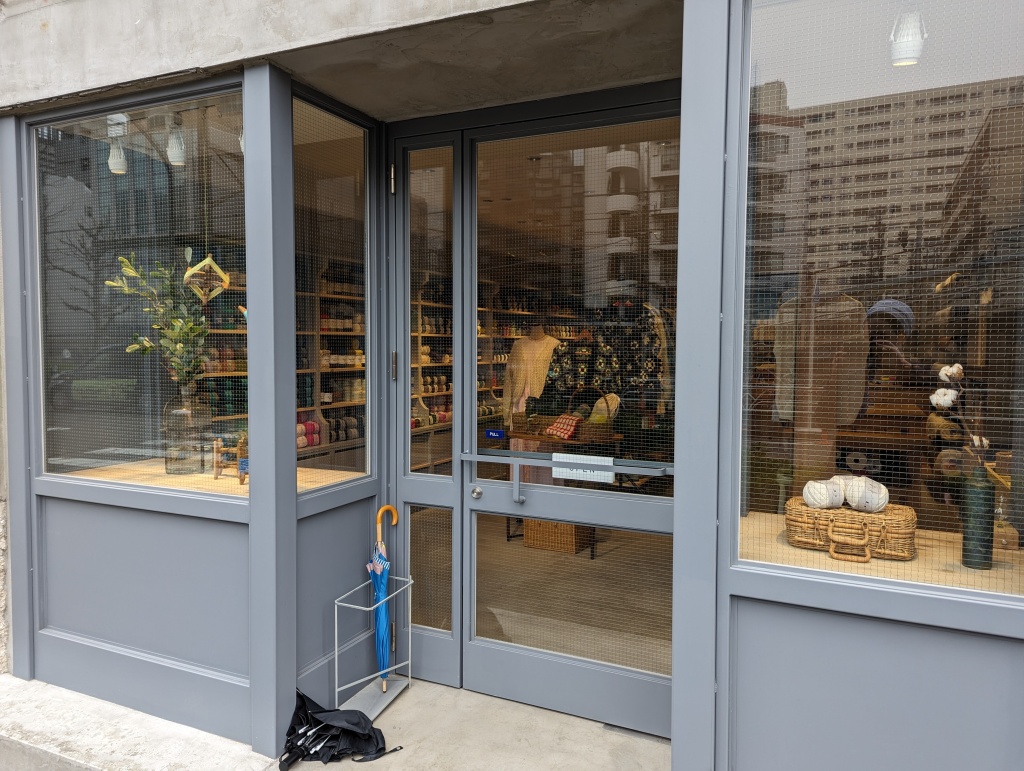
My yarn shopping adventures in Japan were hit by a bit of disappointing news early on in the trip. At the very end of February and just a few days into our trip, the famous AVRIL Kyoto (as of writing this their website is still up, though online shopping is no longer available), which I had been very excited to visit since first planning our trip in 2019, announced their store’s permanent closure. It seemed to be very out of the blue (one of my Japanese colleagues said she was so surprised she was convinced I had just misunderstood the Instagram post when I told her!). Comments on the announcement post on Instagram seemed to imply that customers were totally caught unaware by the news. I was pretty upset, and had been planning to visit their Kyoto flagship location just a few days after the announcement was made.
The Kichijoji (Tokyo) location was to remain open. Eitan and I had just been near Kichijoji to visit the Ghibli Museum, but AVRIL was closed that day – I wasn’t bothered about missing the Kichijoji location at the time, because the Kyoto location was on the itinerary for later in the trip. Kichijoji isn’t exactly in the city centre, but when I heard the news I managed to convince Eitan to make the trip back there so I wouldn’t have to leave Japan without having made a stop at AVRIL (there may have been coffee bribery involved…) I also visited l.musee’s second store location which is in Kichijoji as well and just minutes away from AVRIL. And yes, I did buy more buttons.
The majority of yarn at AVRIL is sold off of spools by weight, so I picked up a few grams of a fun pom pom yarn that they seem to be famous for.
On our day in Shibuya, we made stops at a few different yarn stores in that area.
First up was Daruma, which actually only just opened up late this past Autumn. I was really excited to hear that they were opening up a physical location that I would be able to visit on my trip, as I’ve always been a fan of their yarns and their patterns. I was even more excited to learn that one of their kits that I had been eyeing would be a part of this year’s Spring/Summer kit release, and that that kit would become available for sale on the same day that I was planning on visiting.
I did end up getting the kit (in blue, of course), but I also ended up getting one of their books and the yarn to make these cute sewing-themed mittens. The staff there were really nice and helpful too and I really enjoyed shopping there!
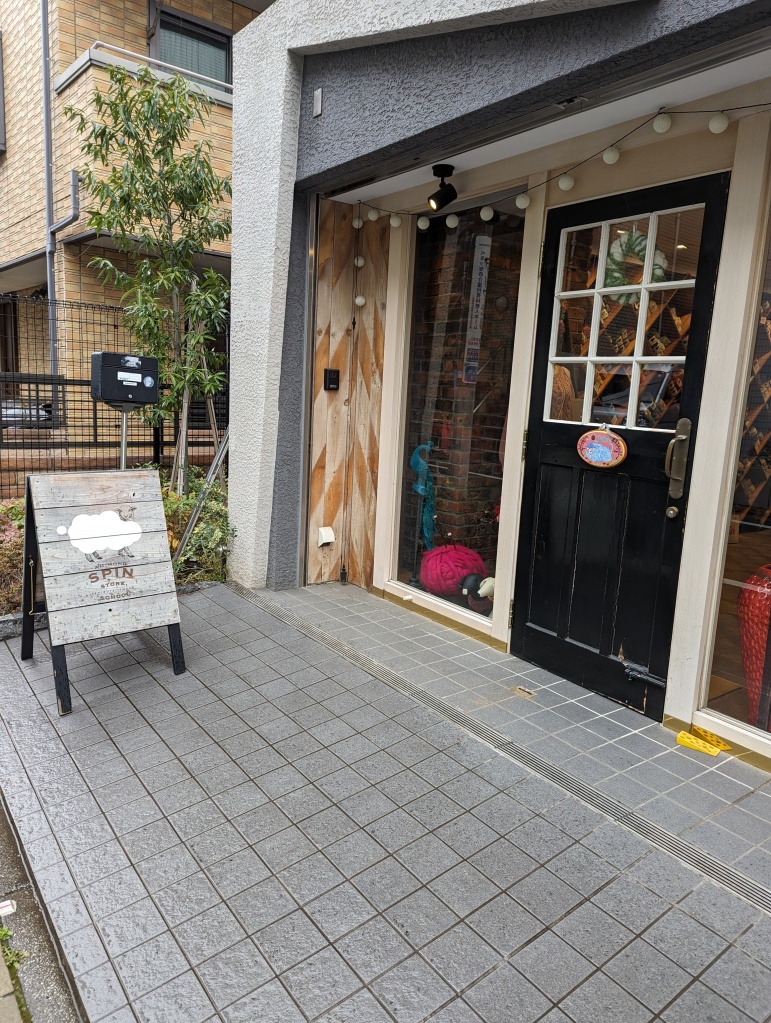
Next up was Amimono SPIN, which I think is also a relatively new shop as it didn’t come up in my initial 2019/2020 Japan research. Amimono SPIN was somewhat small, with all their yarn sold in pretty cakes (however, the labels don’t have any information about the yarn on them – I found most of what I needed on their website, though). I ended up buying some solid blue-green Aran-weight yarn to hold with the pom pom yarn I bought at AVRIL (I think that’s going to make some very cute mittens). The main highlight of Amimono SPIN was meeting some expats sitting and knitting in the lounge area of the shop, and sitting with them and chatting about knitting for a little while while we rested our weary feet.
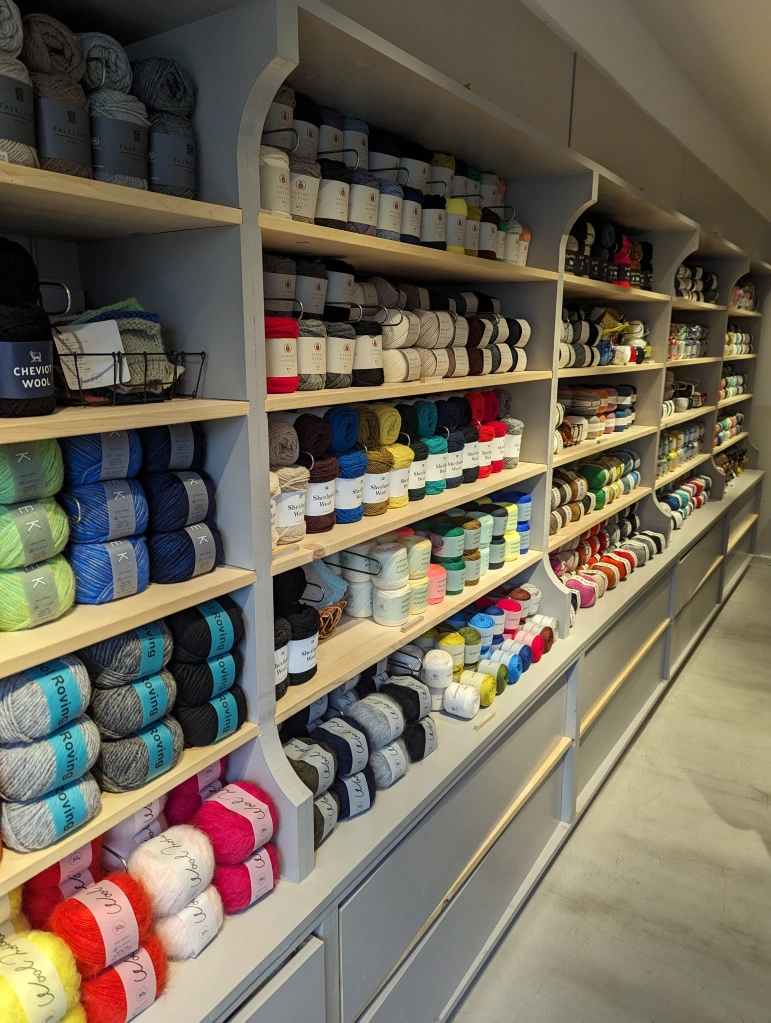
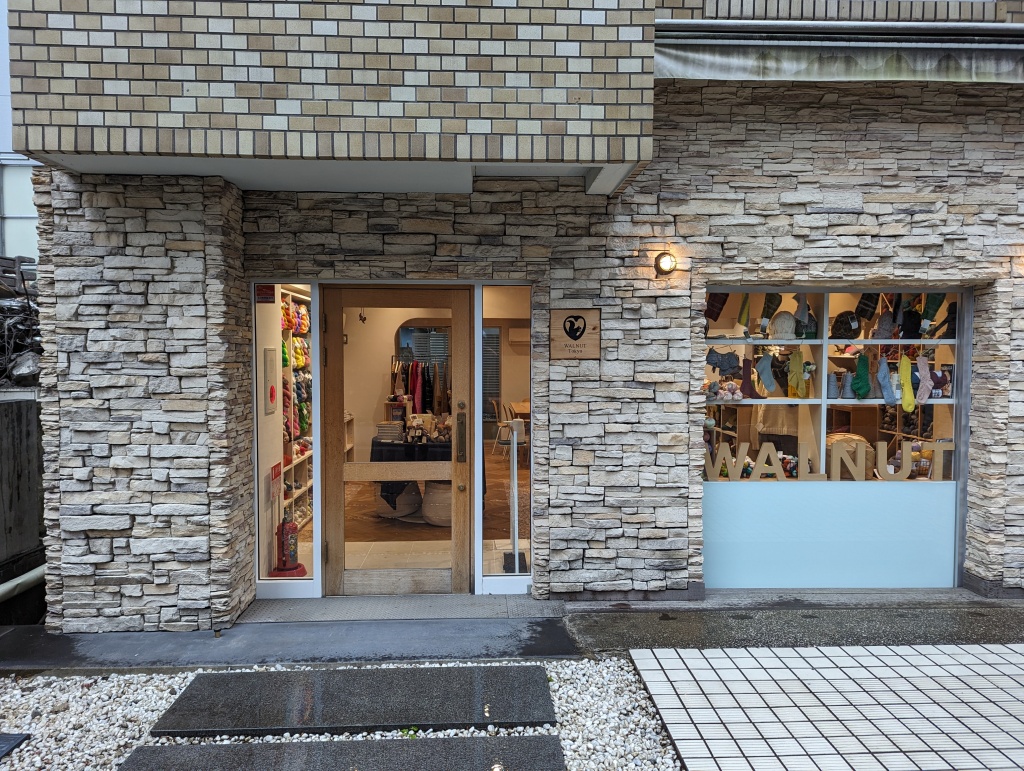
Next up was WALNUT Tokyo, which felt a bit obligatory to stop at as a knitter visiting Japan. It was a lovely shop, however maybe I’m a bit spoiled, as I found that the majority of the stock they carried I could find at The Knitting Loft back at home. I did treat myself to two skeins of their house brand yarn, because it’s nice to pick up some souvenirs, and it was pretty lovely!
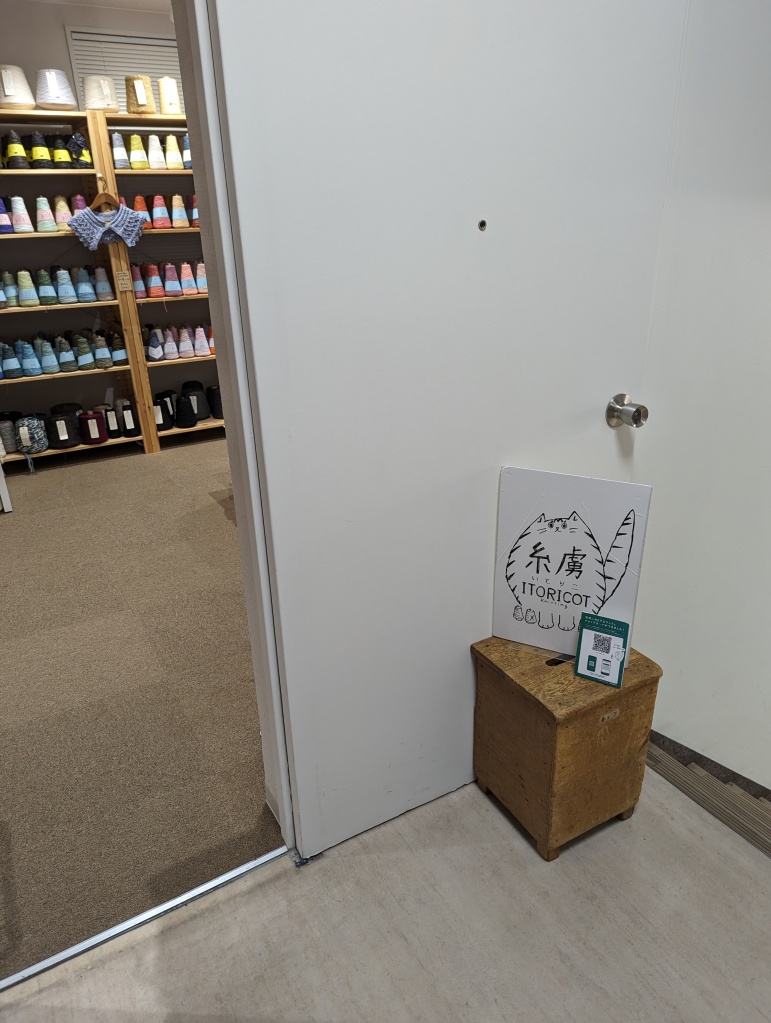
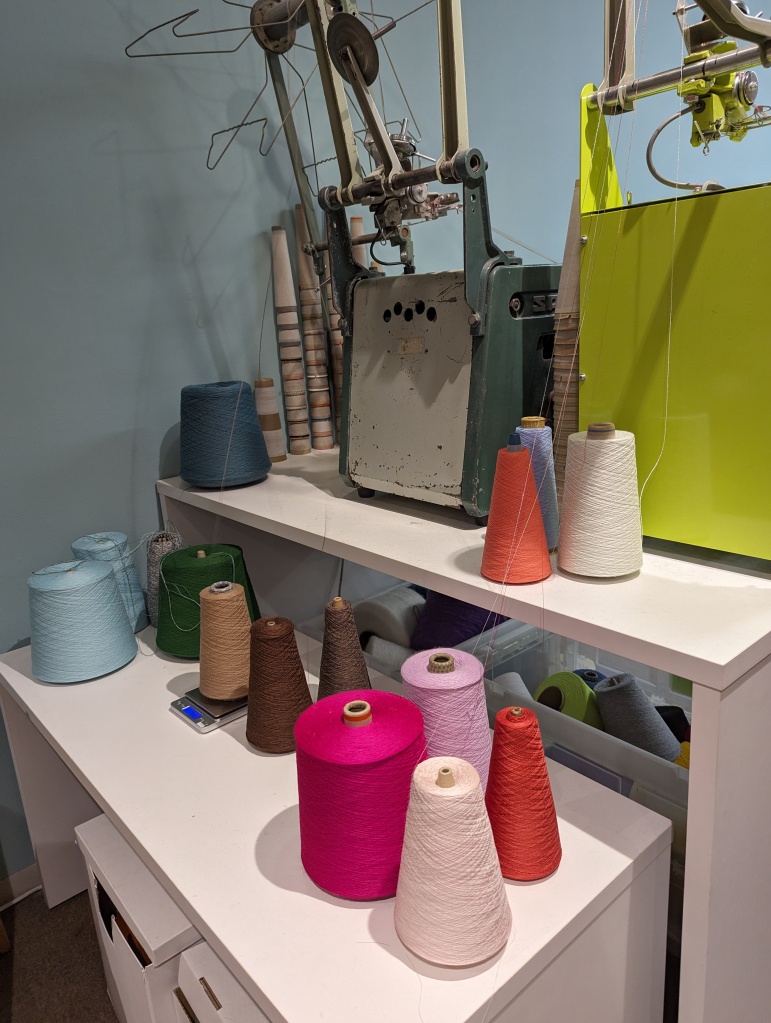
The next day we visited Itoricot, which to me was an incredible and new concept for a yarn store (maybe you know of other places like it where you are – please comment below!). How it works is that they sell yarn off of cones of factory leftovers (kind of like deadstock fabric?), and you purchase the quantity you need, which is then wound off onto a new cone for you. Since a lot of the yarns were for use on industrial knitting machines, many of them are very thin (about thread weight), but you can mix and match them and the store will wind them together for you onto a new cone (for a small fee). At first I was incredibly overwhelmed by the options and possible combinations. Fortunately, I did come in with a project in mind, and the staff there were incredibly patient working with me to get the thickness and colour of yarn and quantities I needed. Honestly it was a little stressful at times, since I had trouble gauging how many strands of very thin yarn I needed to get more to a “hand knitting” weight that I’m used to, as well as trying to envision how the colours would look once “plied” together. It was a very unique experience and in the end I’m really glad I made a stop there.
Here’s a video of them winding up my “custom blend” for me!
Other crafty things of note:
I follow Yumiko Higuchi on Instagram and have been a huge fan of her embroidery work for years, so I was thrilled that during my time in Tokyo she shared on Instagram that she would have kits for sale as part of a handcraft pop-up shop at the Japanese department store giant, Isetan. The pop-up was being hosted at the Shinjuku location, and I was almost jumping for joy at the beautiful tables of artisans we found when we arrived. I bought the sought-after kit from Yumiko Higuchi, but I also treated myself to a skein of naturally-dyed yarn from NONA Temari. I had heard of NONA Temari before, but didn’t know that she dyed yarn, and I just couldn’t resist getting a skein. Also, after all the research I had done, I didn’t know she had a brick-and-mortar location. I felt like I got my fill at the pop-up, though, so I didn’t go out of my way to visit the store.
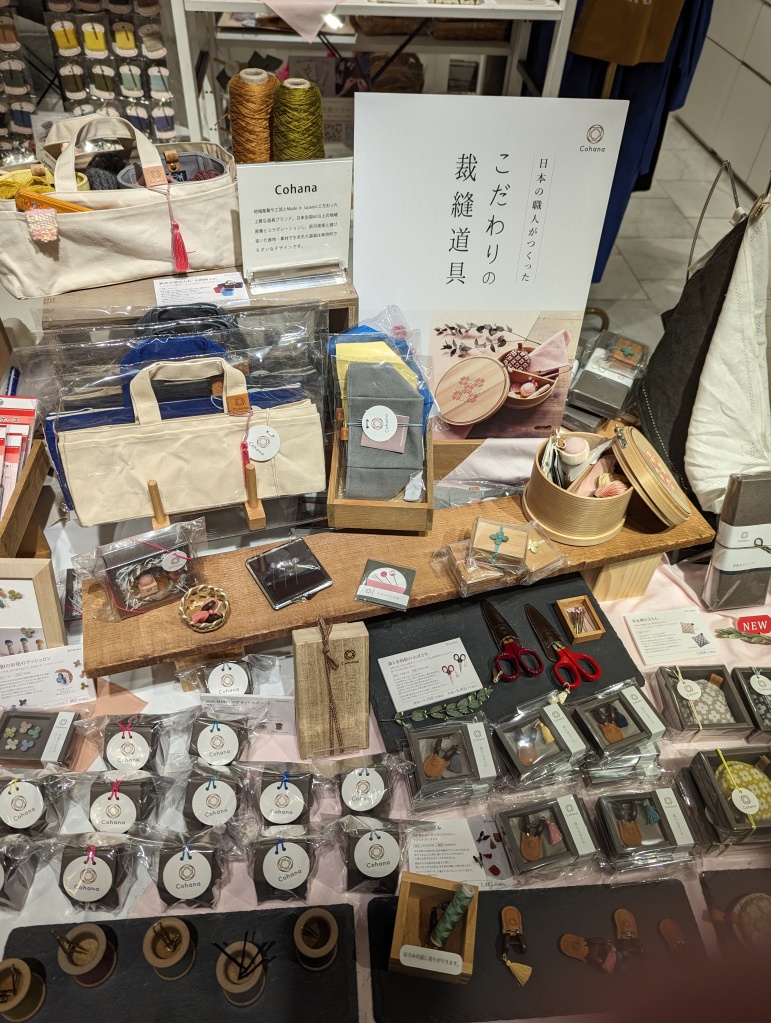
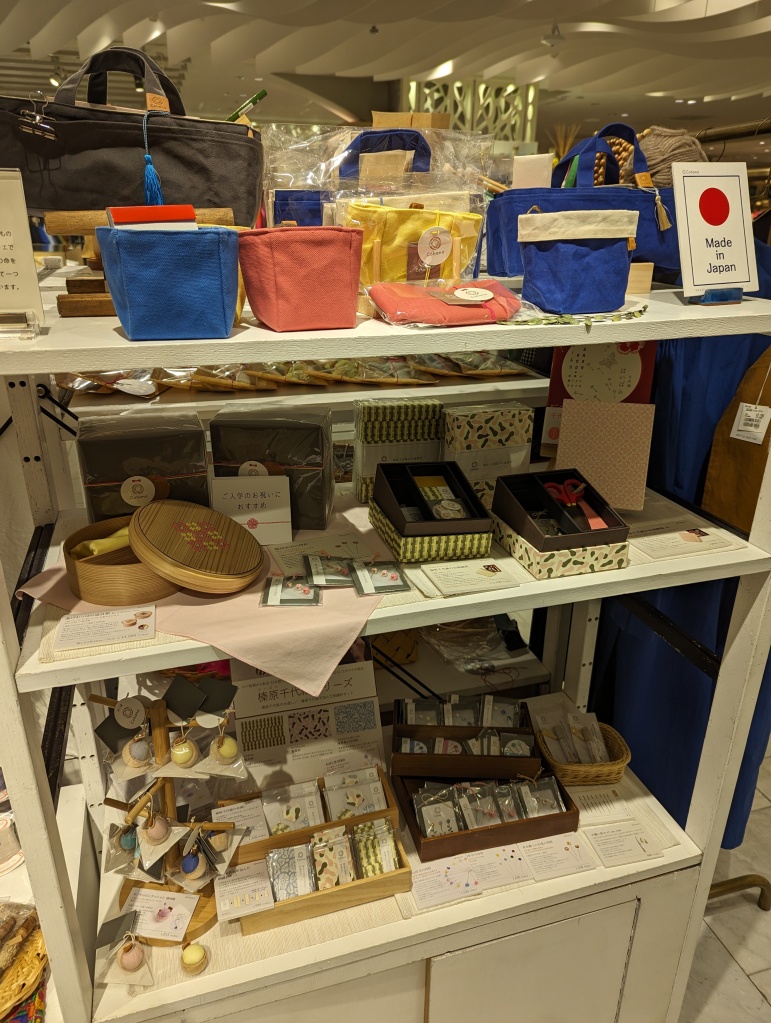
The pop-up also featured COHANA, a brand I am familiar with as they carry a few of their products at The Knitting Loft, and it was nice to see all their goodies in one place and in the country where they’re made.
Other places on the list were Yuzawaya and Okadaya, which we unfortunately just didn’t end up having time for. I had visited so many crafty places in Tokyo that I wasn’t feeling too bummed out about it, but I would still like to visit if we ever go back to Japan. The Bunka Gakuen Shop was also on the list, but it wasn’t really near any of the other places we were planning to go, and I didn’t feel a need to go out of our way to visit. We also didn’t make it to chocoshoe as the store hours didn’t line up with when we were already in the area – but again, I didn’t feel like I was missing out because I had already come away with so much great yarn.
On a little visit out to Jiyugaoka we came across a cute little shop called Hobbyra Hobbyre which had a lot of cutesy Liberty fabrics and cross-stitching kits. The store had a very feminine and clean aesthetic.
In Kuramae, Maito Design Works is a lovely shop to pick up naturally dyed threads, as well as naturally dyed garments and accessories.
Finally, one of my favourite stores that wasn’t initially on our list was Tokyu Hands. We went to the Shinjuku location and wow, I felt like I was in a crafter’s paradise – it was just floor after floor of amazing DIY products. One of the floors does have some yarns and embroidery items, but my favourite section was all the miniatures kits. Definitely check out Tokyu Hands if you can. We picked up a lot of our souvenirs for friends and family there too!
That’s all for our visit to Tokyo! Coming up next will be all about our crafty stops in Kyoto.
Have you visited Tokyo? If so, which crafty shops did you visit? If you haven’t made it there yet, what’s on your list?
Yes, I know that’s an old rhyme for a bride on her wedding day, however I think it applies pretty nicely to my process of getting ready to be a bridesmaid when I attended my brother-in-law’s wedding this past September.
I was totally thrilled when I heard the news that there would be a wedding in my husband’s family, although a bit less so when I realized I only had two months before we’d be getting on a plane and I’d need to have a bridesmaid’s dress to bring with me. Could I have bought one myself? Of course. As a sewist, though, such an idea seemed nearly incomprehensible. Where do people go to buy clothes these days anyways? I hadn’t purchased an article of clothing that wasn’t lounge or underwear in years, let alone a formal gown.
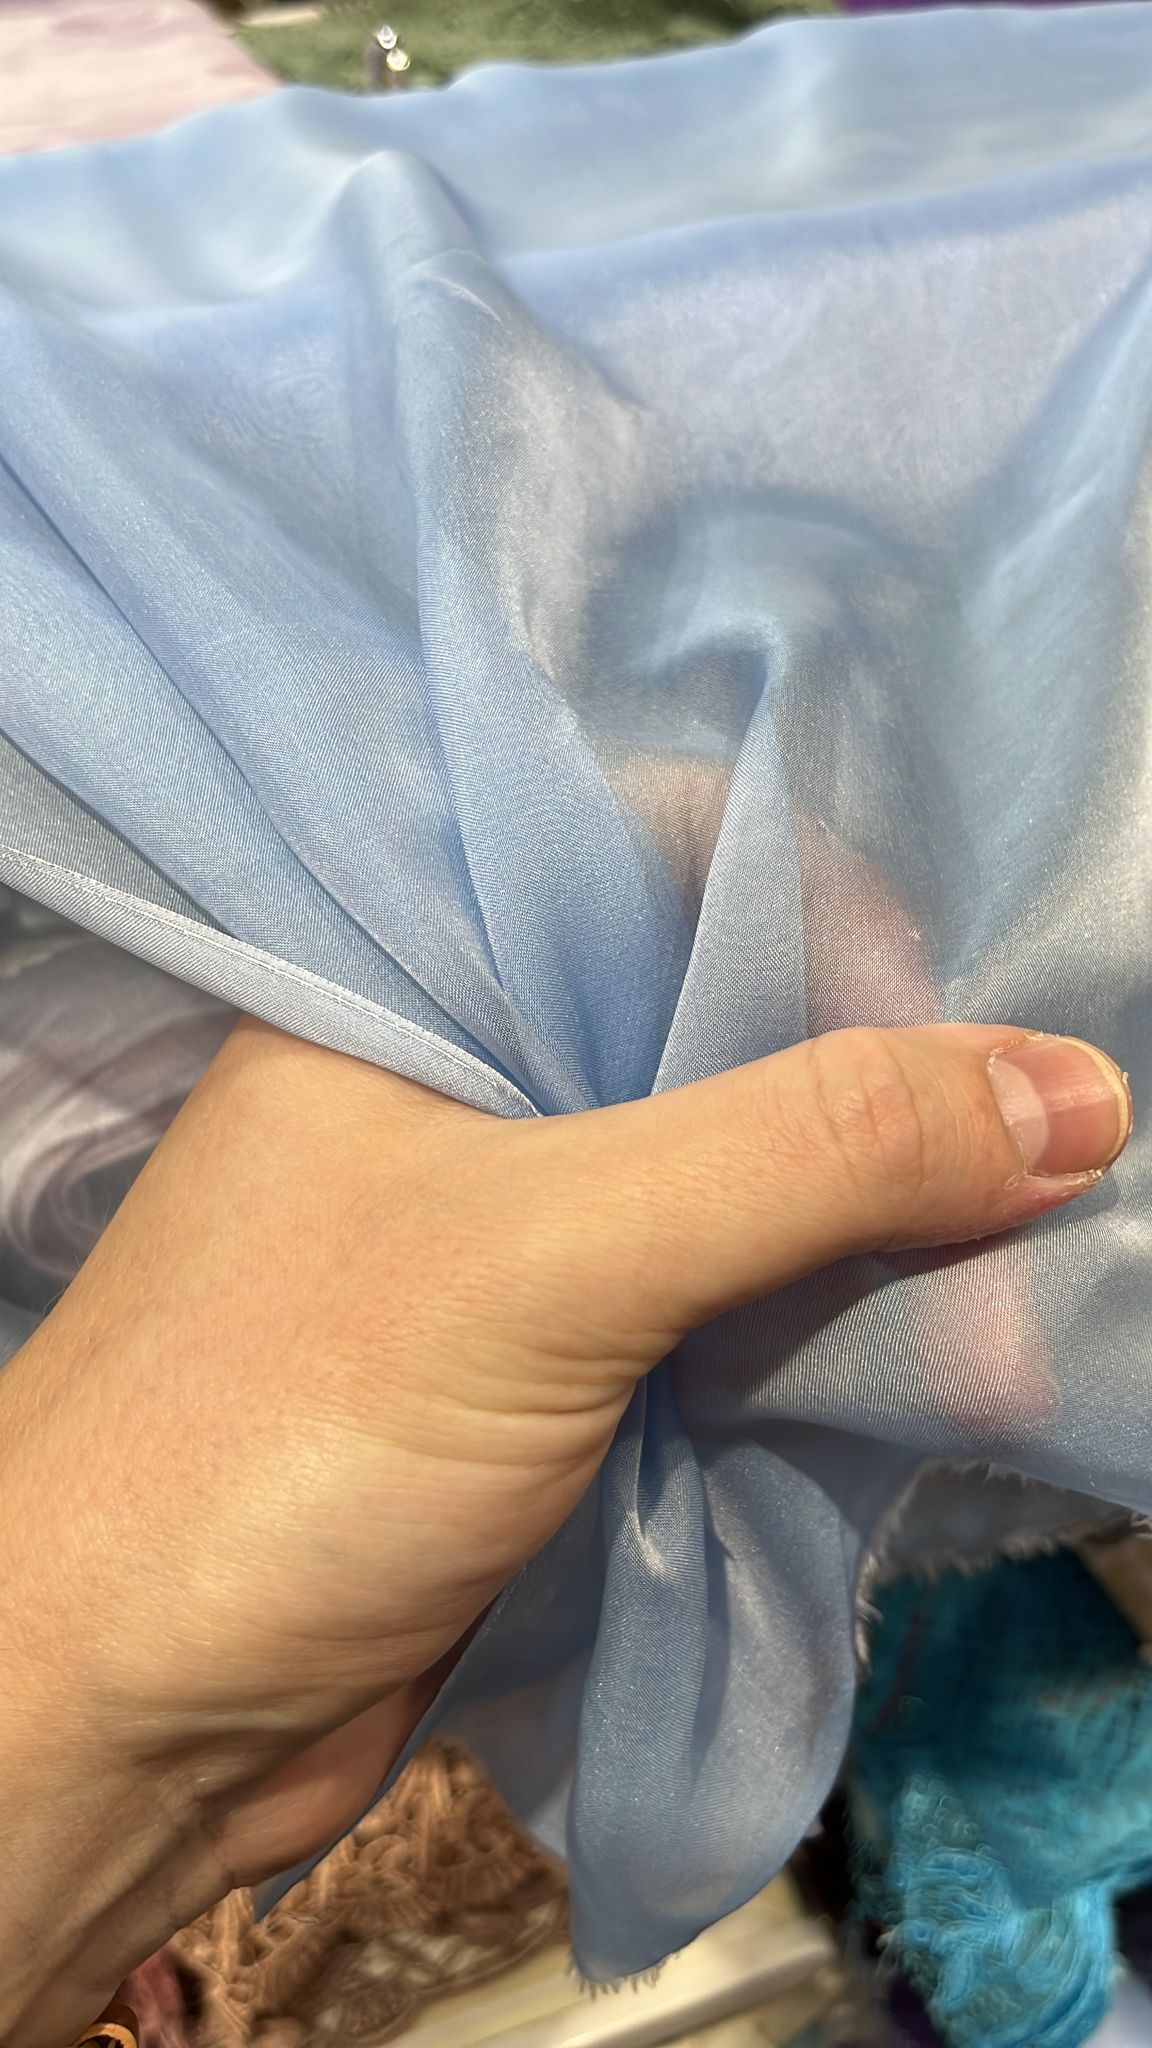
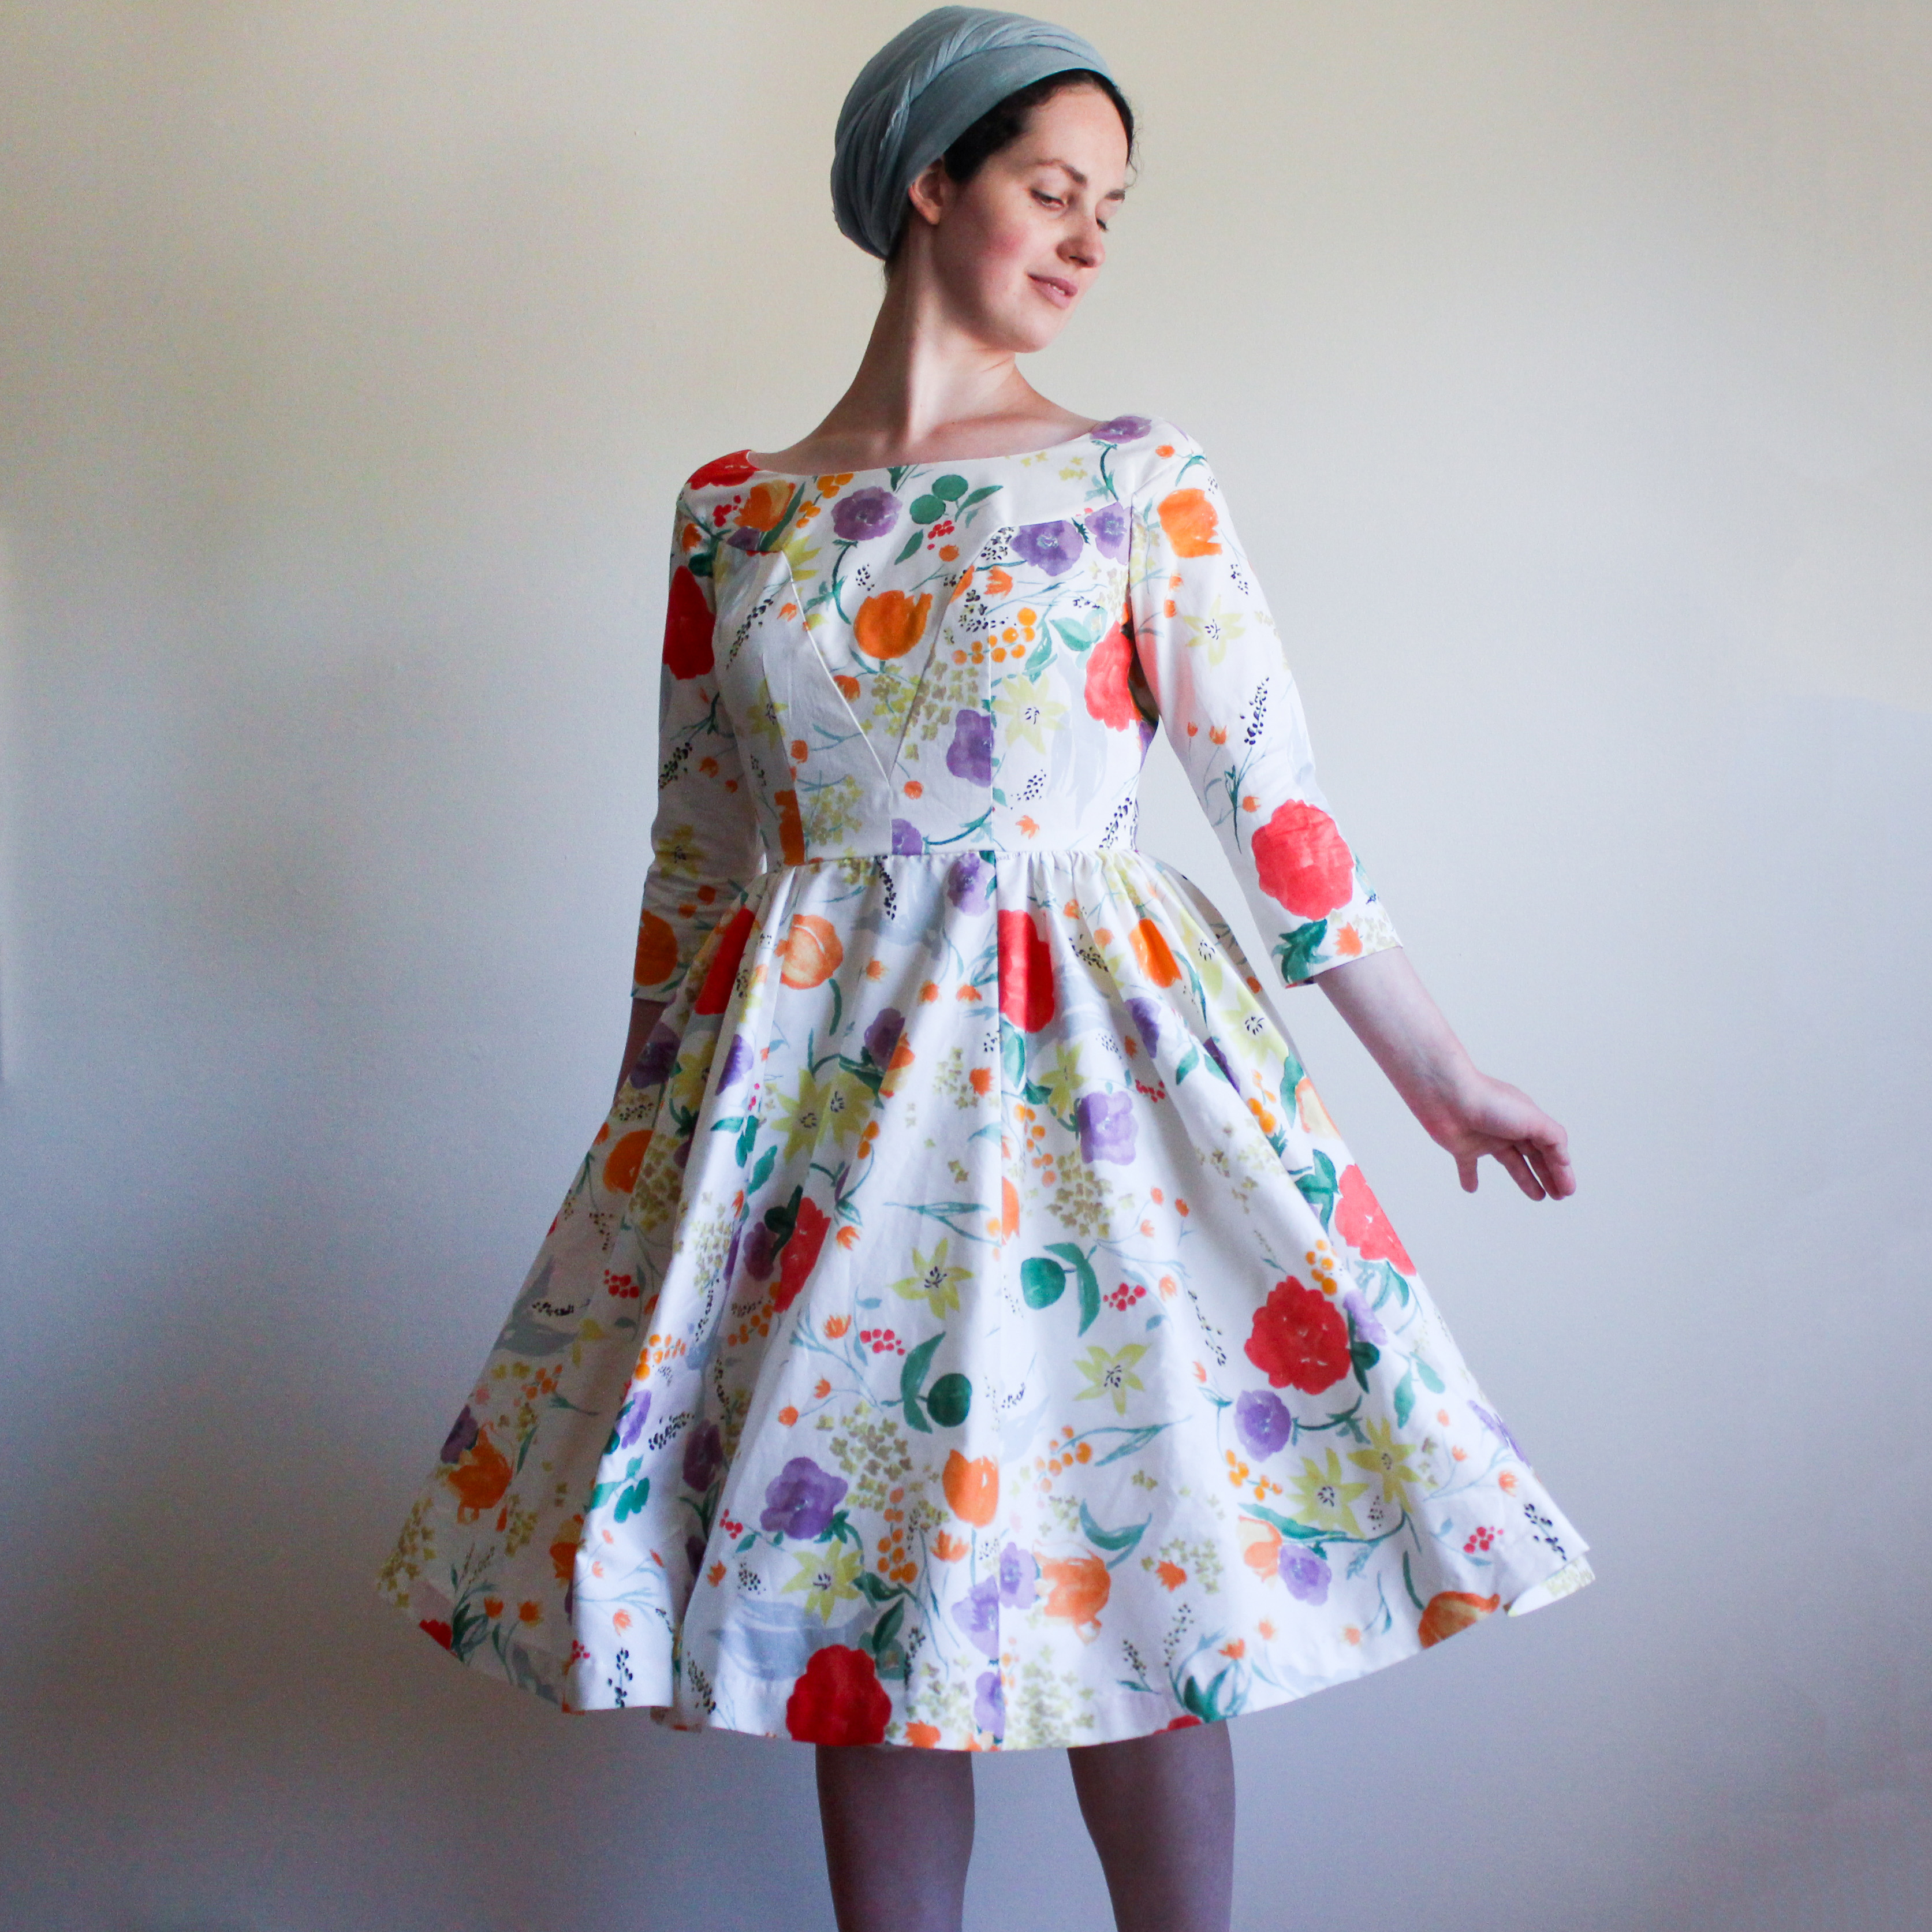
So, I steadfastly set to making my own dress. The colour for the bridal party was baby blue, so I ordered some viscose crepe from L’Oiseau Fabrics and chose out a pattern from my small collection of Burda Magazines. From the photo, it looked like a stunning, elegant dress that would be perfect for a special event such as this one.
BurdaStyle Magazine Issue 12/2012Pattern 112
Although I was ordering the fabric online based on a not-super-clear photo, it turned out to be the perfect colour. I could hardly wait to get started. Until, that is, photos starting popping up in our bridesmaids’ WhatsApp group. Elegant gowns made up of layers of organza and chiffon – much fancier than my matte and drapey viscose crepe, which was probably a more appropriate choice for everyday wear. I didn’t know what to do. I was really starting to feel that the stress was building up, but I went ahead and made a toile of the Burda pattern anyways.
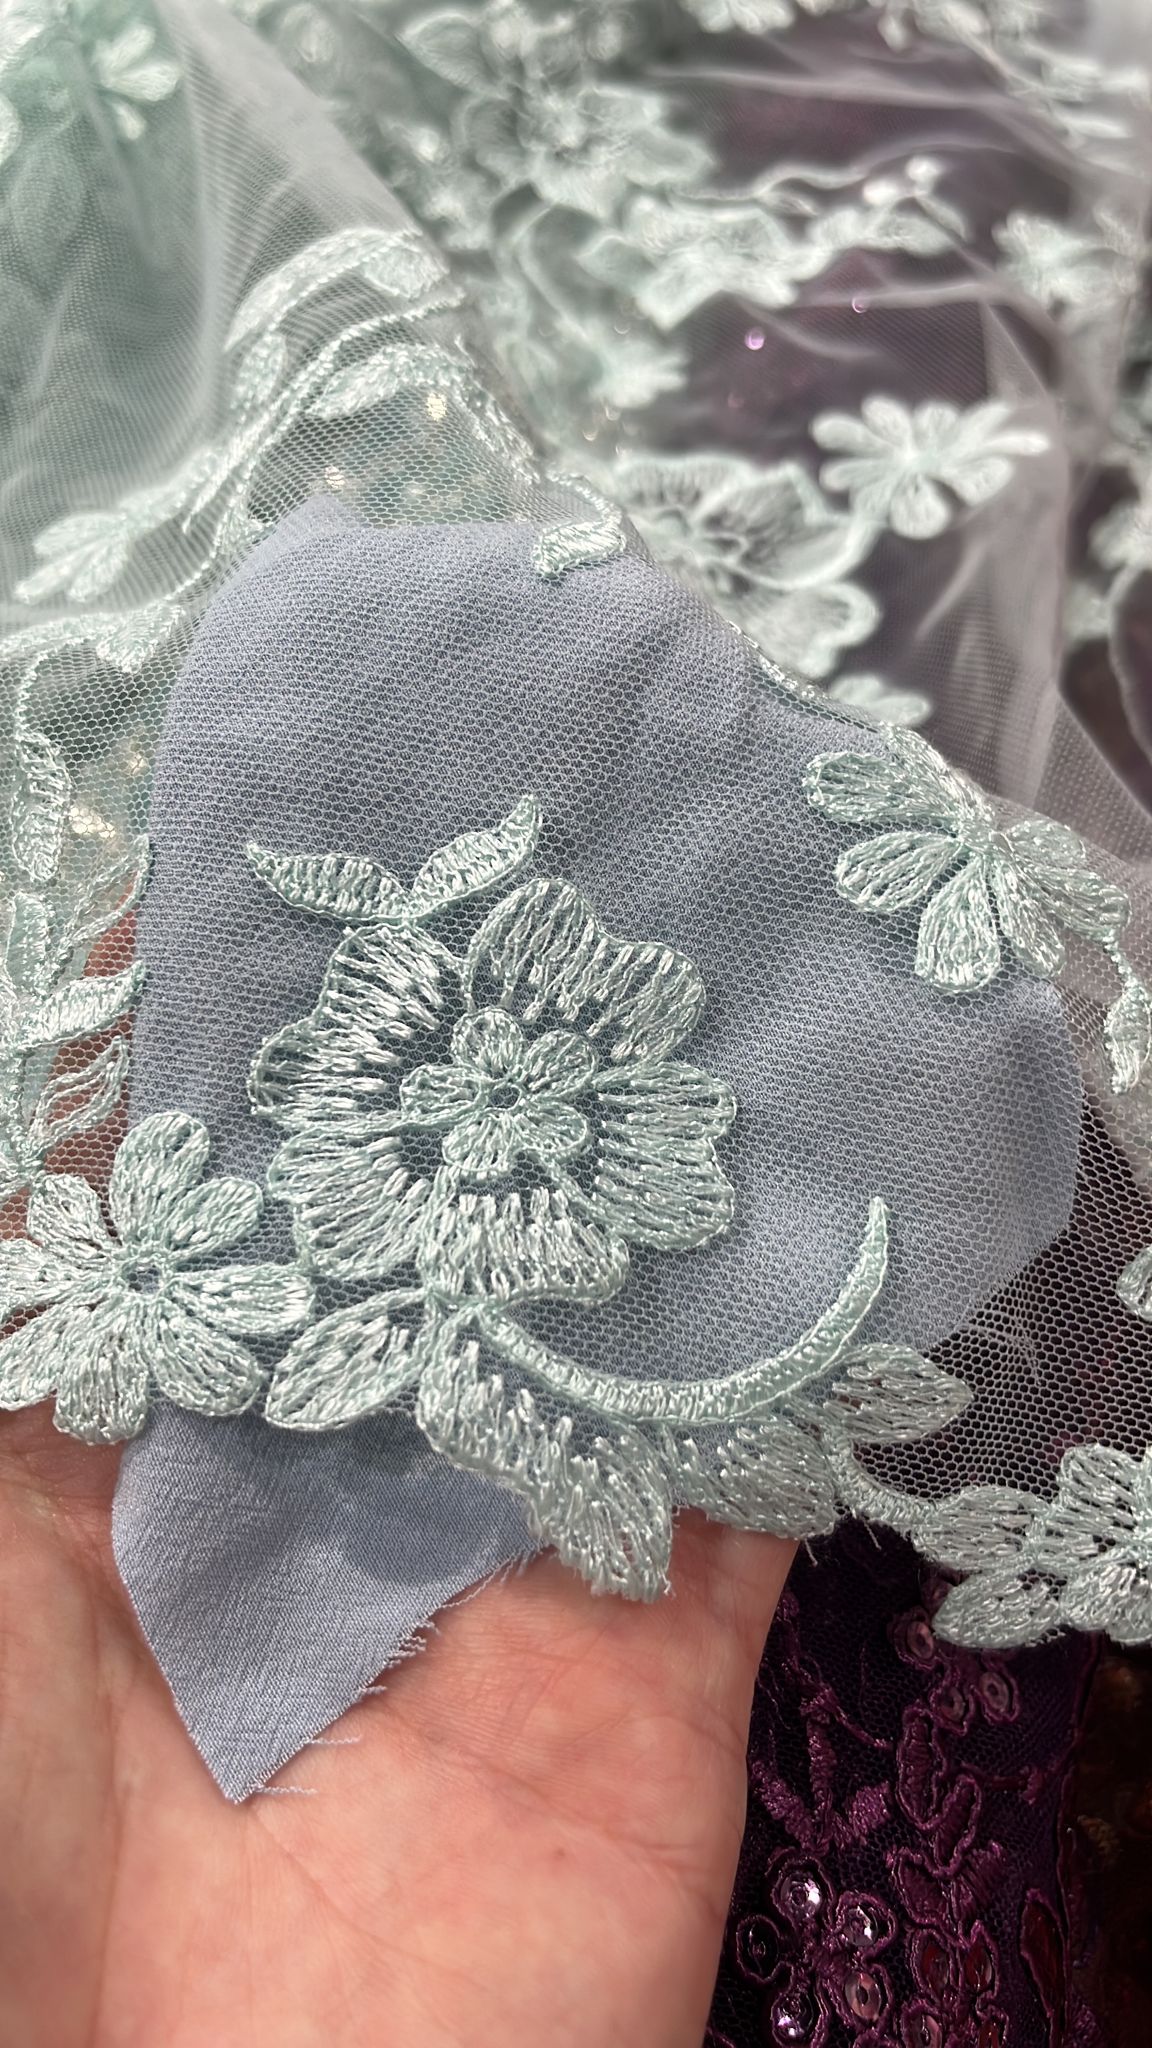
The fit of the Burda pattern right off the bat was actually fantastic. I just didn’t feel that the fabric I had purchased would do it justice. I decided at that point that I had to find a fancier fabric – a lace, sequinned fabric, or embroidered mesh that I could overlay onto the fabric I had already bought. I got to searching online at all the Canadian fabric stores I could think of (and trust me, I could think of a lot), but it turns out not so many online shops here carry gown-worthy fabrics (if you know of any, do let me know below in the comments!). I’m also lucky to live in a city full of fabric stores – none of which (other than Fabricland) were open in the evenings after I finished work or on Sundays, the only day of the week I was available to shop during daytime hours (whyyyyy????).
There was one new-to-me shop – City Choice Textiles in North York – which, based on their Instagram, seemed to be a treasure trove of laces and embroidered fabrics, and happened to be open until 7PM on weekdays (checking their hours now, they also now appear to have open hours on Sundays). One day I managed to finish work early and was able to make it up there for a visit. It really was a treasure trove (and the prices were amazing!), but amongst all the glitzy bolts, I found nothing in the colour I needed. I felt extremely disappointed, as it really seemed like if I were to find anything anywhere, this would be the place.
I was really starting to feel like I’d have to resort to buying a dress. I was at 3 weeks until our flight, and I still didn’t even have fabric.
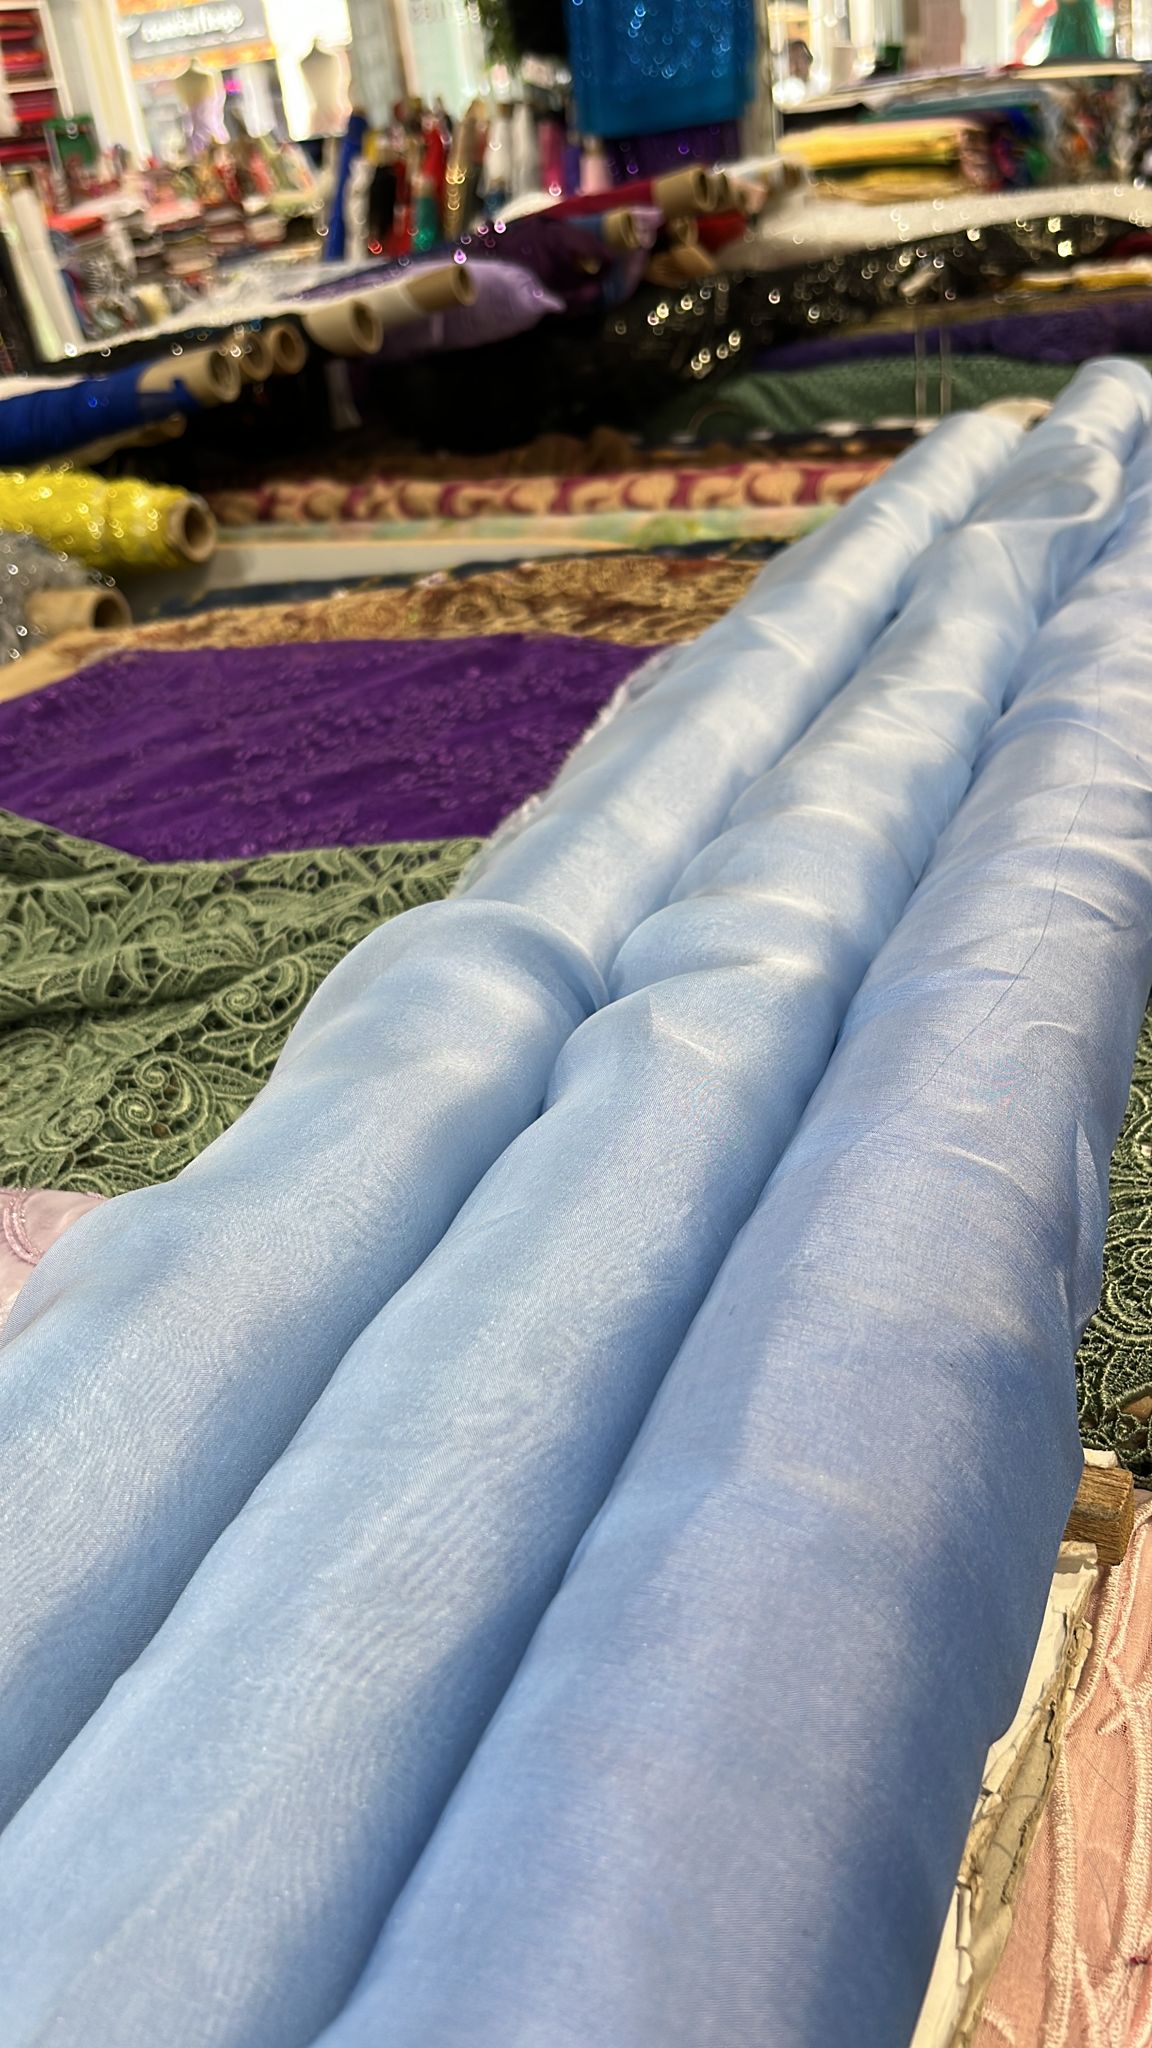
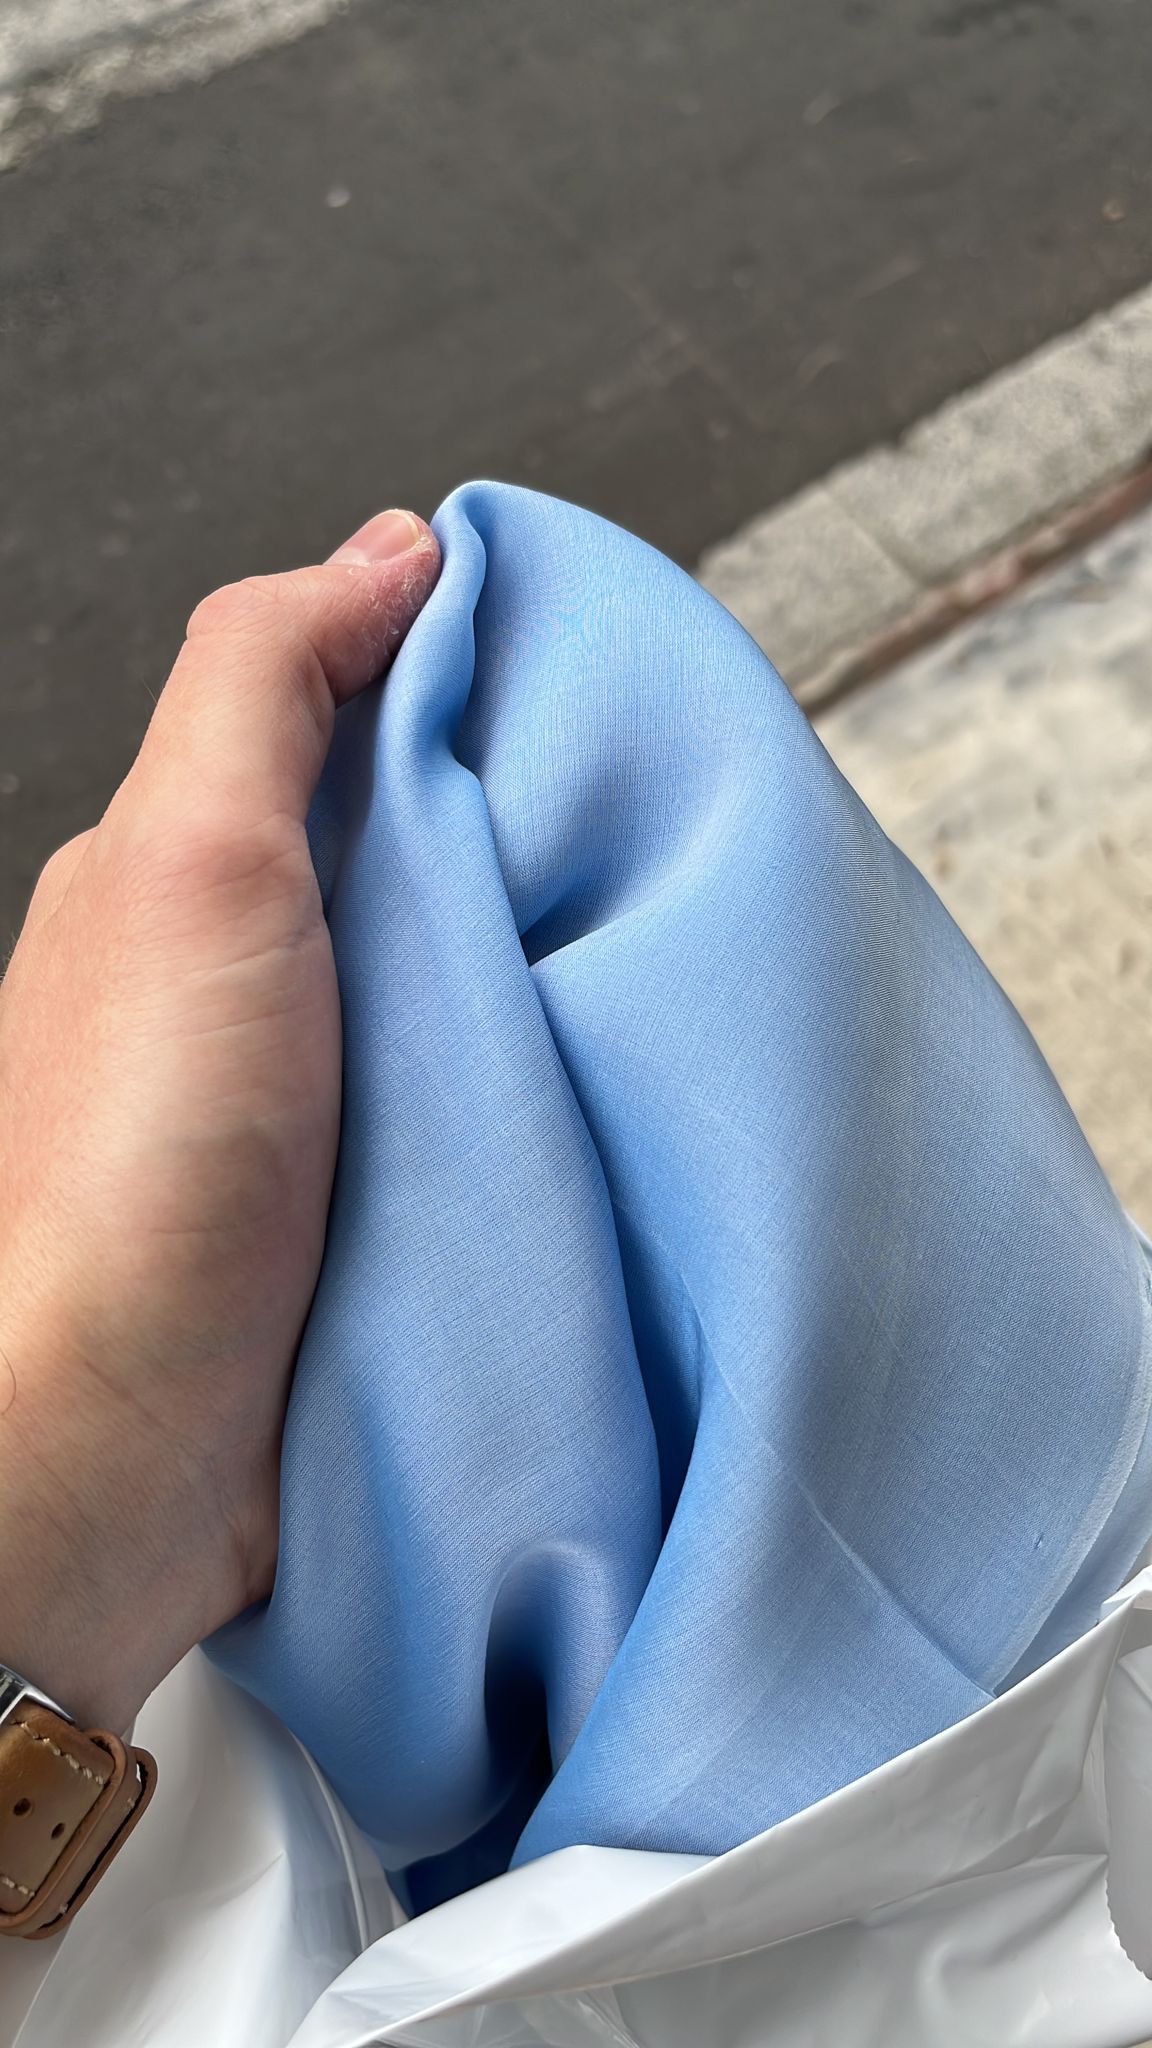
My next plan of action took a bit of convincing my husband to do the shopping for me. He works downtown some days, so I asked if he would be willing to stop by Leo’s Textiles on Queen Street and do some shopping. He was hesitant and I was desperate, and anyways I had enough confidence in his eye for colour to choose something nice. He sent me a series of photos alongside a swatch of the viscose crepe I wanted to put underneath, and he came across some beautiful blue silk chiffon. I told him to grab 4 yards of it and take it home for me.
Honestly, he chose the perfect colour and fabric. Am I lucky or what?
Next I had to figure out what type of dress I was going to make – the Burda gown was too complex to do with two layers (and the silk chiffon was much too sheer without a lining). I figured I’d keep it simple – a bodice that I already knew fit me, some flutter sleeves, and a simple gathered skirt with an A-line lining (to reduce bulk at the waist). I wouldn’t have to make a toile and I wouldn’t have to try any fancy new techniques aside from getting used to sewing chiffon (which is rather delicate and sometimes does not appreciate going through the sewing machine – spoiler: sewing the chiffon actually turned out to be the least of my worries).
I really Frankenstein’d the pieces for this dress together. I started with the bodice of McCall’s 8032, which I knew I liked the fit of, and the skirt from Butterick 6138, and by now it’s been long enough that I can’t even remember which sleeves I altered to create the bell/flutter sleeves, but I think they were from the McCall’s 8038. I was going to use the A-line skirt from Gertie’s Ultimate Dress Book for the skirt lining (which I had used previously for a bridesmaid dress – also in light blue – but alas, I grew a bit since then), but once I drafted it to be floor length I saw the huge amount of fabric that it would actually use, and realized it would be way too heavy to wear.
Instead I went with the skirt for McCall’s 8038, which is more fitted and mermaid-skirt-y. This ended up being a good decision, I think.
I got to cutting everything out. I used tissue paper laid out underneath the chiffon to make cutting it out a bit easier. I used nearly every last inch of the chiffon (lengthwise, anyways), and carefully underlined it by hand with the viscose crepe (which I still had plenty of, thinking I was going to use it with the yardage-gobbling Burda dress). This was tricky, as the chiffon bubbled and fluttered with the slightest breeze that hit it.
I finally got to sewing up the bodice and that was when I hit my next road block. I tried on the bodice – and, well, let’s just say that the darts were especially pointy. I was crestfallen. I could not wear such a, erm, pointy dress to a wedding, let alone set foot outside in it. I decided to troubleshoot the dart situation, and found many sewing articles addressing that very issue. I seam ripped the bodice darts several times (not at all an easy thing to do with delicate silk chiffon) and sewed them over and over again. I changed the curve of the dart, how I sewed the tip of it, whether I back stitched or didn’t back stitch or tied knots or didn’t – every time they came out pointy. I figured it boiled down to the bubbly nature of the chiffon and there was no getting around it.
I was pretty much out of fabric. I didn’t have much time left. Starting over wasn’t really much of an option. The stress was really starting to set in. That’s when I decided to pull out the big guns – I was going to convert the bodice to a princess seam bodice. I used the bodice pattern and drafted it into princess seam pattern pieces. I used the existing bodice pieces for the larger centre portions of the princess seam pieces, and I scraped together the smaller side pieces out of the largest scraps I could find left of the silk chiffon.
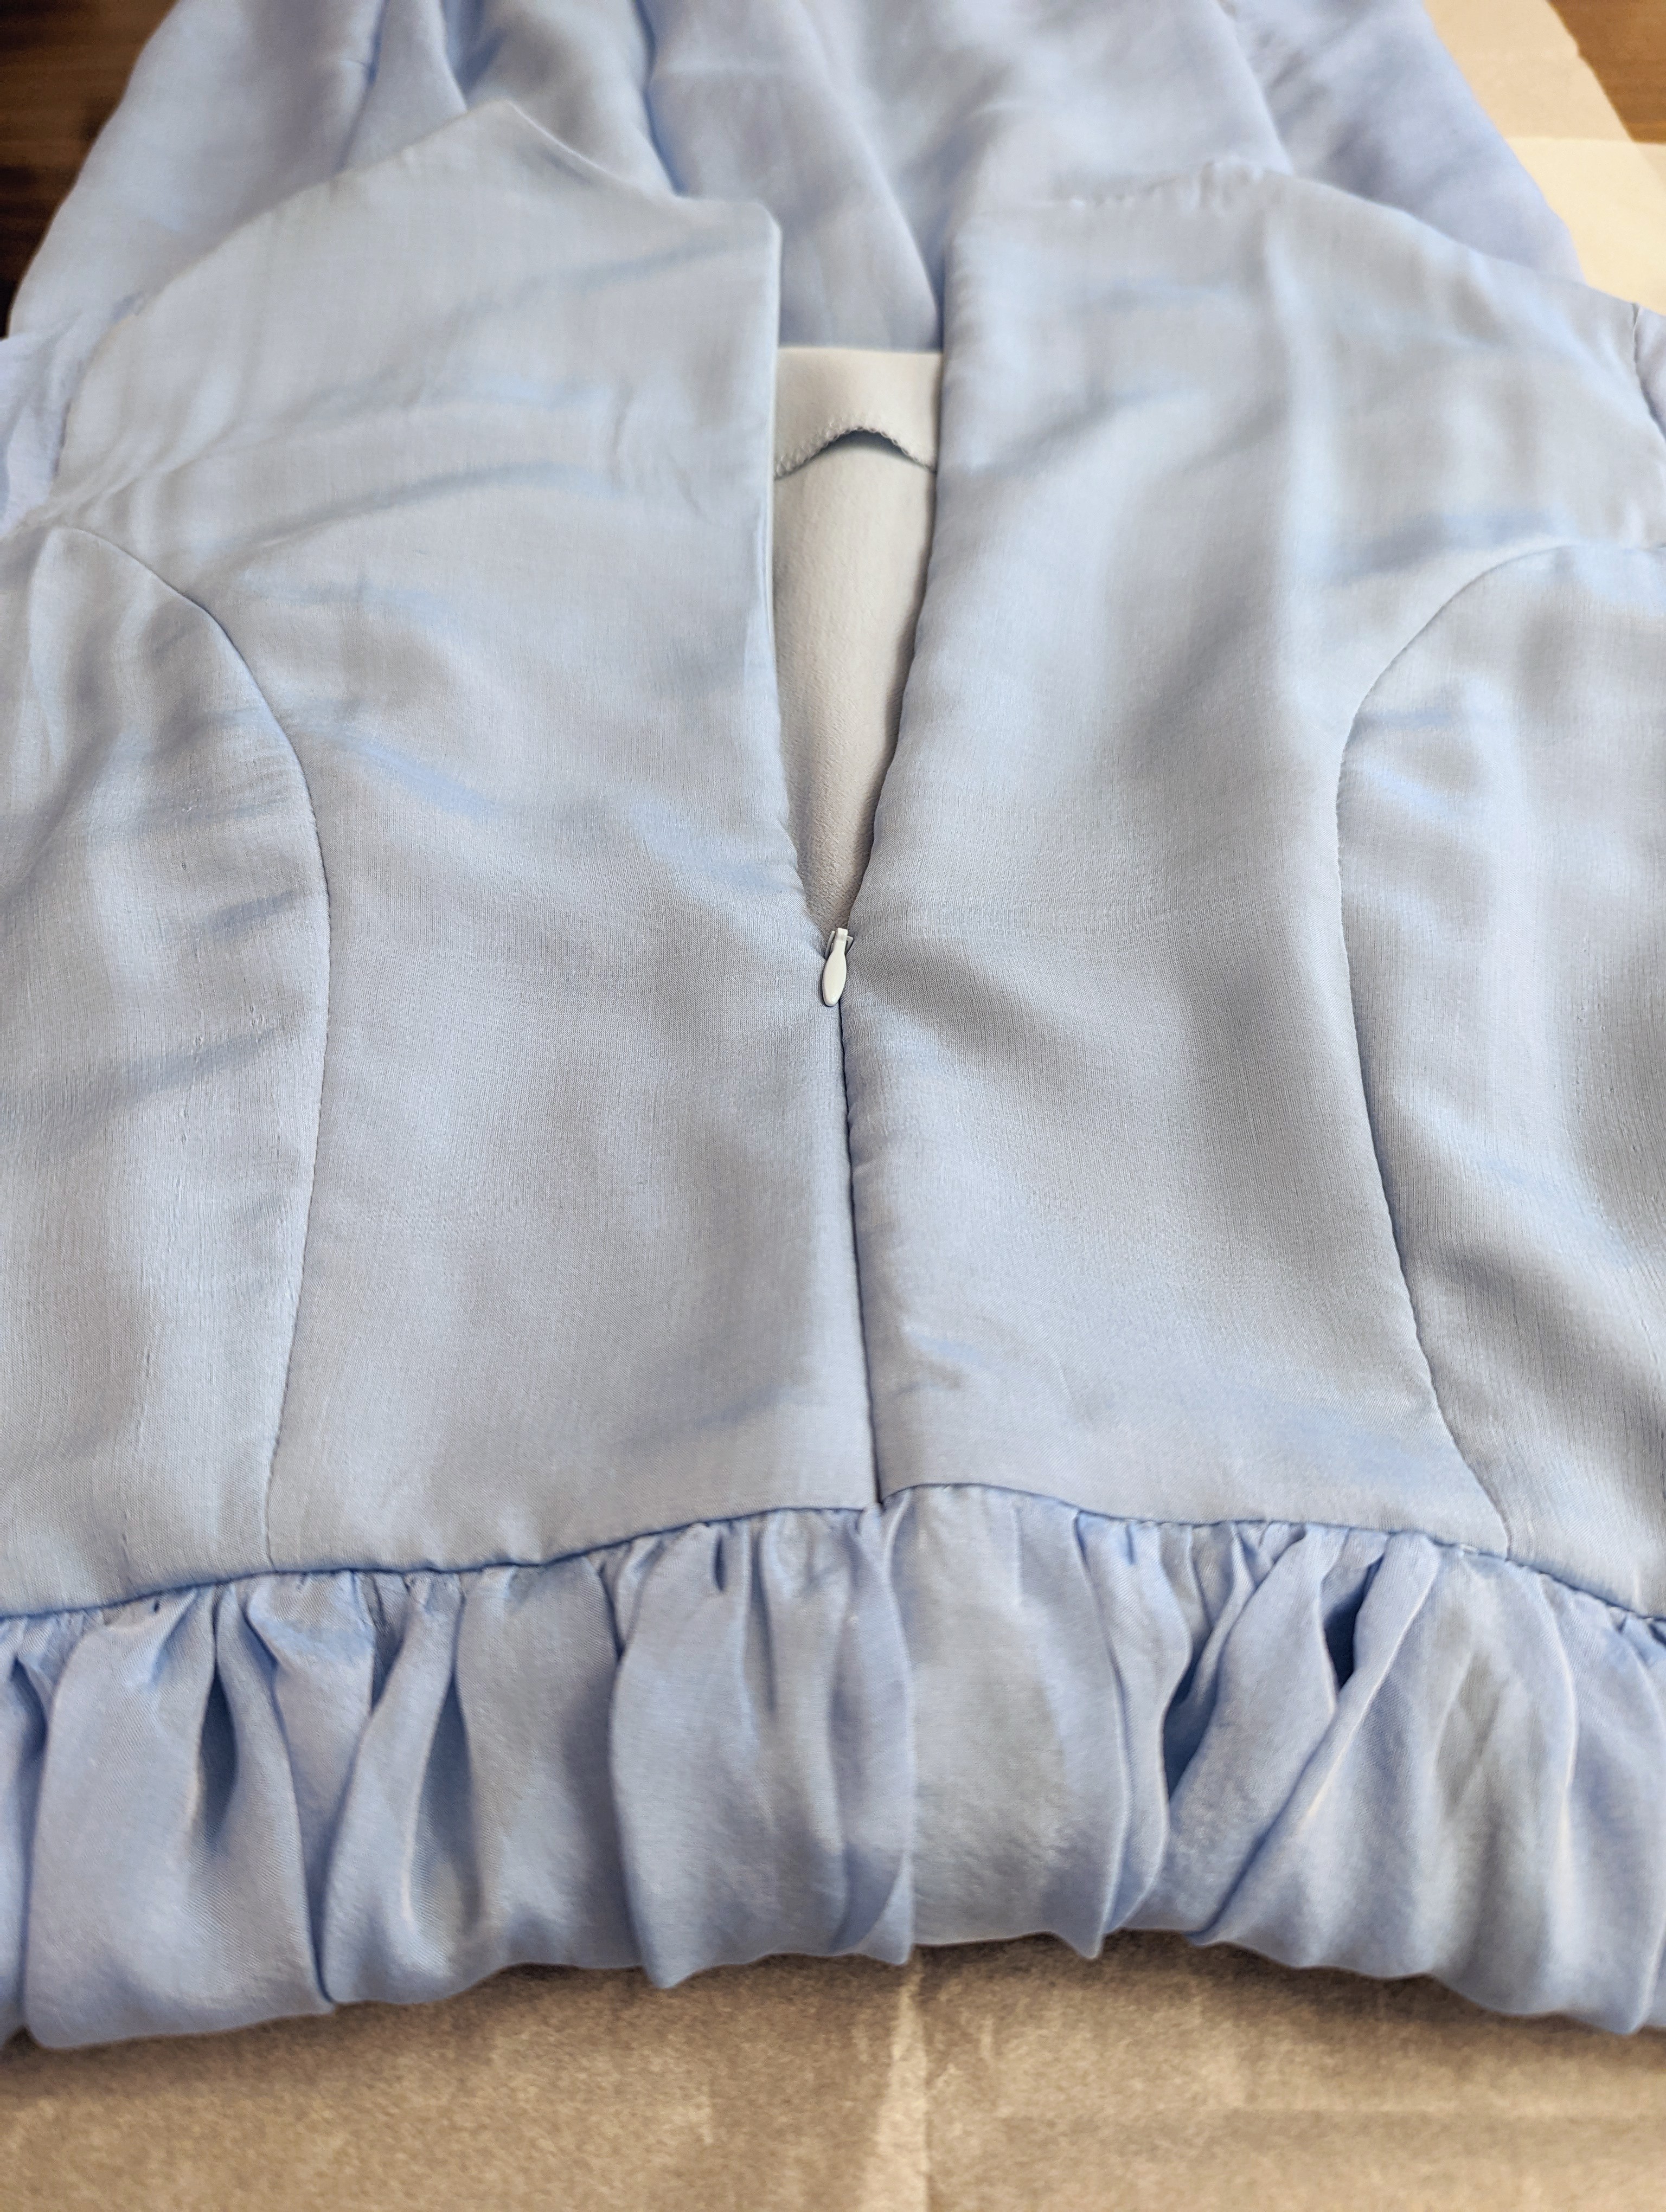
And by golly! I did it. The princess seams were so much better. Not perfect – no. The chiffon still bubbled in places, and if you look closely, you can see the holes left from seam ripping the darts out. But I felt happy when I put it on, and that was enough.
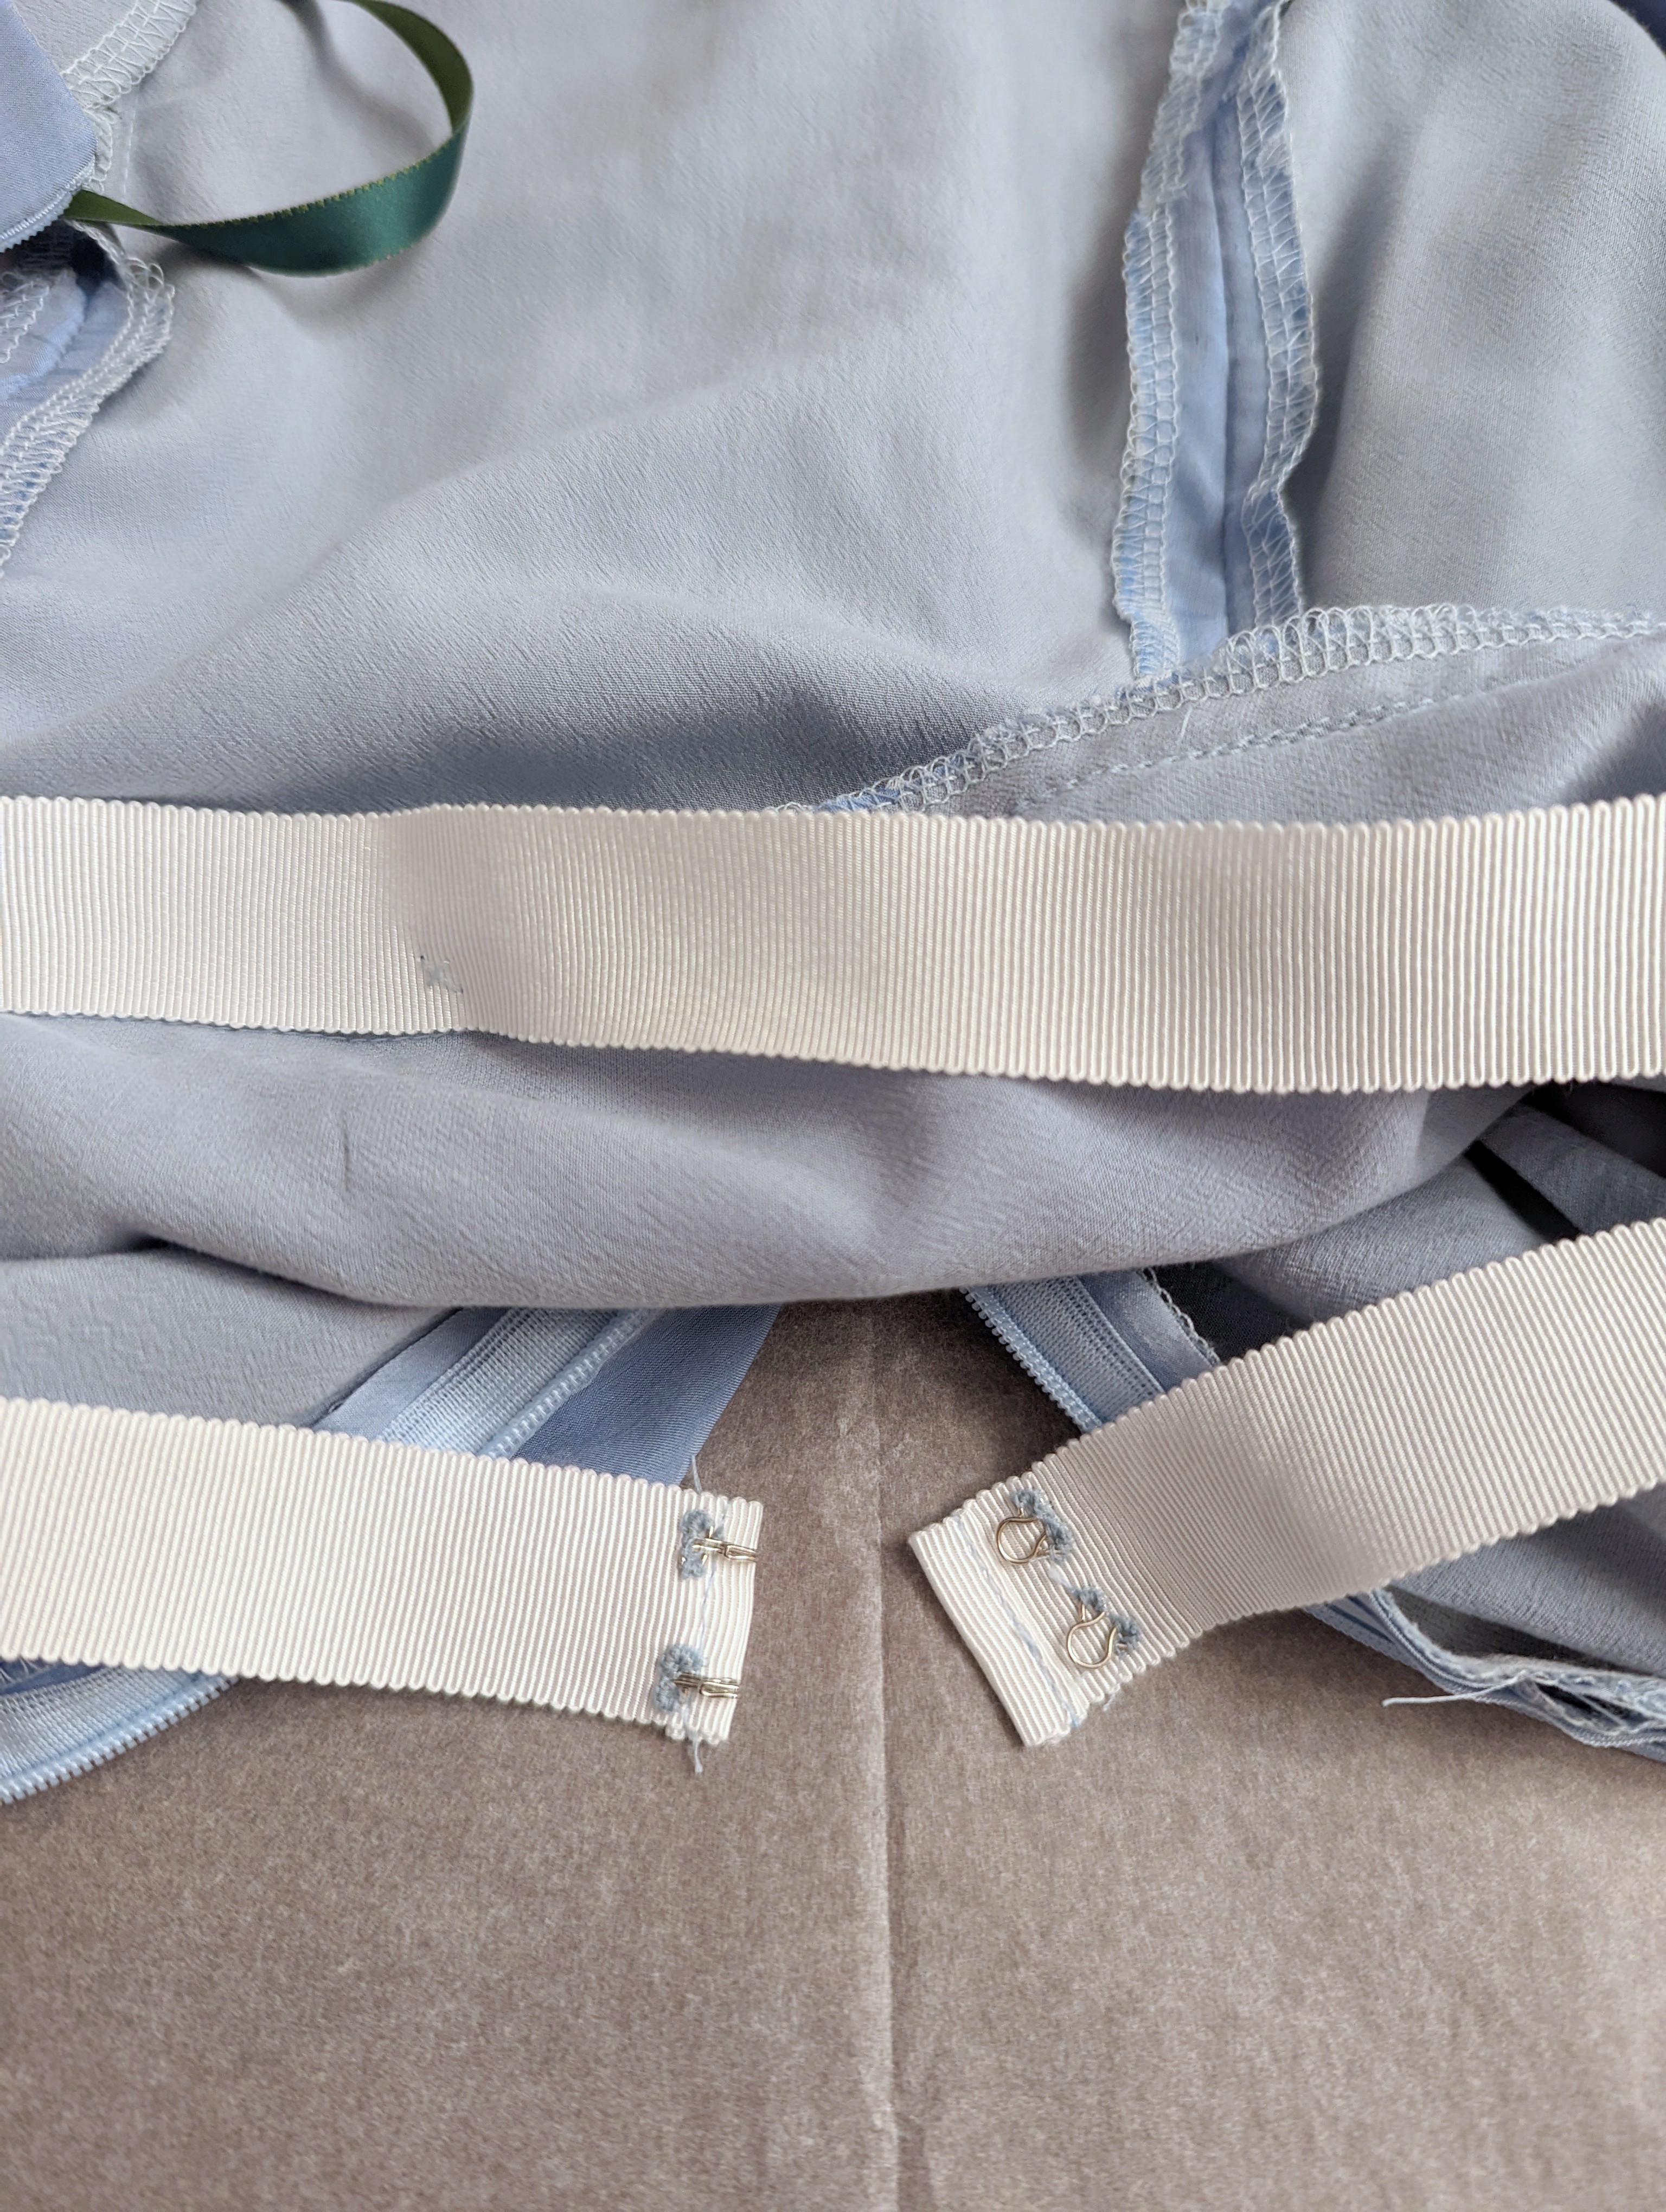
The skirt was relatively easy after all that. I used French seams for it, so the seams would look nice as they were visible through the sheer fabric. The zipper area was tricky, as it’s hard to install an invisible zipper and also do a French seam. So, I did a sneaky thing and used the pieces of the fabric that were cut on the selvedge (which is already “finished”, technically!) so I wouldn’t have to worry about it finishing that seam.
I made the sleeves out of two layers of the chiffon rather than a layer of chiffon and a layer of viscose for a more ethereal look. I cut one layer shorter than the other so that the layers were apparent. They came out kind of uneven (because that chiffon is just so darn SLIPPERY and shifty) but at that point it was the kind of imperfection I could put up with.
I hemmed the whole thing and inserted a waist stay to help hold up the skirt, which was a little on the heavy side, and it was finally done! I ended up later adding another row of hooks to the waist stay so that I could make it even snugger, allowing for any possible weight fluctuation. I also added some ribbons tacked down at the waist that could go on the hanger to provide a bit of extra support when the dress is hanging in a closet for longer periods of time.
To accessorize, my sister-in-law lent me the perfect silver heels which fit just right, and I had a fascinator from Lilliput Hats which I bought for my sister’s wedding and just happened to be the perfect colour to go with it.
After the long flight and before the wedding, I gave the dress a good press (how lucky was I that the apartment where we were staying had a fresh new iron?) and it was good to go.
Honestly, I was so happy with how it came out in the end. I felt like an absolute princess. The fabric was so wispy and floaty. The fit was elegant but comfortable. After all the stress and worrying, I was so glad with how it turned out. I got lots of compliments throughout the night, and people could hardly believe I had made it myself.
Here are some awkwardly-cropped photos from the photographer since I have no other full-length photos of me in the dress and didn’t want to include other family members without their consent (photo credit goes to Shmuel Diamond Photography). Not sure why I ended up in the same spot in every family photo but okay! I chose the one on the right because I like how you can see the flowy skirt blowing in the wind, hehe.
Anyways, that was a lot of talk about one dress! Honestly it was all a bit stressful getting such a big project done with a time crunch, and during the process it really seemed like all I could think or talk about was this dress (do other sewists experience the same thing? No?). In the end, I’m so glad it worked out and I could float around for the evening in such a special dress 🙂
Thanks for reading the first post I’ve written in a very long time 🙂
Please let me know if you’ve ever made a special garment for a special occasion that wasn’t quite as easy as you thought it would be! Did it all turn out in the end?
It’s hard to believe we’re halfway through December and just weeks away from a new year. When I wrote Part I (about using up my fabric stash), I already had Part II in the back of my mind, and it seemed like it would be a very long time until I reached it.
Once I got writing today, I actually thought I hadn’t written Part I that long ago, and was surprised to see that it had been a full year since. Isn’t that just time for you, though.
Anyways, Part II is about my yarn stash. I set a goal for myself last year that I wouldn’t buy new yarn until I had used up what I had in my stash. I started out having set this goal with about 4 sweater-quantities worth of yarn, plus some random skeins here and there. Considering I spend, on average, 2 months on a sweater, I knew it would be at least an 8-month endeavour. It seemed a long ways away, but I was determined to stick to it. I made this goal with a caveat – that I could buy yarn I needed to finish a project using yarn I already had, and that I wasn’t required to use up yarn that was leftover from making something else.
During that time, I began a job working at a yarn store. Customers gawked when I told them that I was on a “yarn fast” until I used up what I had. The truth is, it was hard to resist the yarn all around me, but it wasn’t that hard. This is mainly because having a large yarn stash stresses me out.
Yup. I get a bit anxious having a lot of yarn on hand. This is because I know how I function when it comes to my projects – I’m fickle. Sometimes I change my mind every day, sometimes even every hour, regarding what I want to make next. I also only work on one project at a time (the knitting community calls this “monogamous knitting”). So, if I buy yarn to make a certain project when I’ve already got something on the go, I may have changed my mind by the time I’m ready to use that yarn.
Remember how I mentioned starting this “challenge” with about 4 sweater quantities (to you non-knitters, this means enough yarn in one type and colour to use for a sweater project – usually requiring upwards of 3 skeins of yarn)? Of those, I ended up making something different with 2 of those, and spent a lot of time puzzling over what to do with it once I had decided that I no longer liked the projects I had bought them for.
I didn’t want to be doing that anymore. I didn’t want to have yarn I had purchased weighing on me. My goal was to get to a point where I would finish a project, and the next day I could go to work and buy yarn for what my heart desires at that moment. And I could cast on that project that night, not having to worry about more projects already waiting to be started.
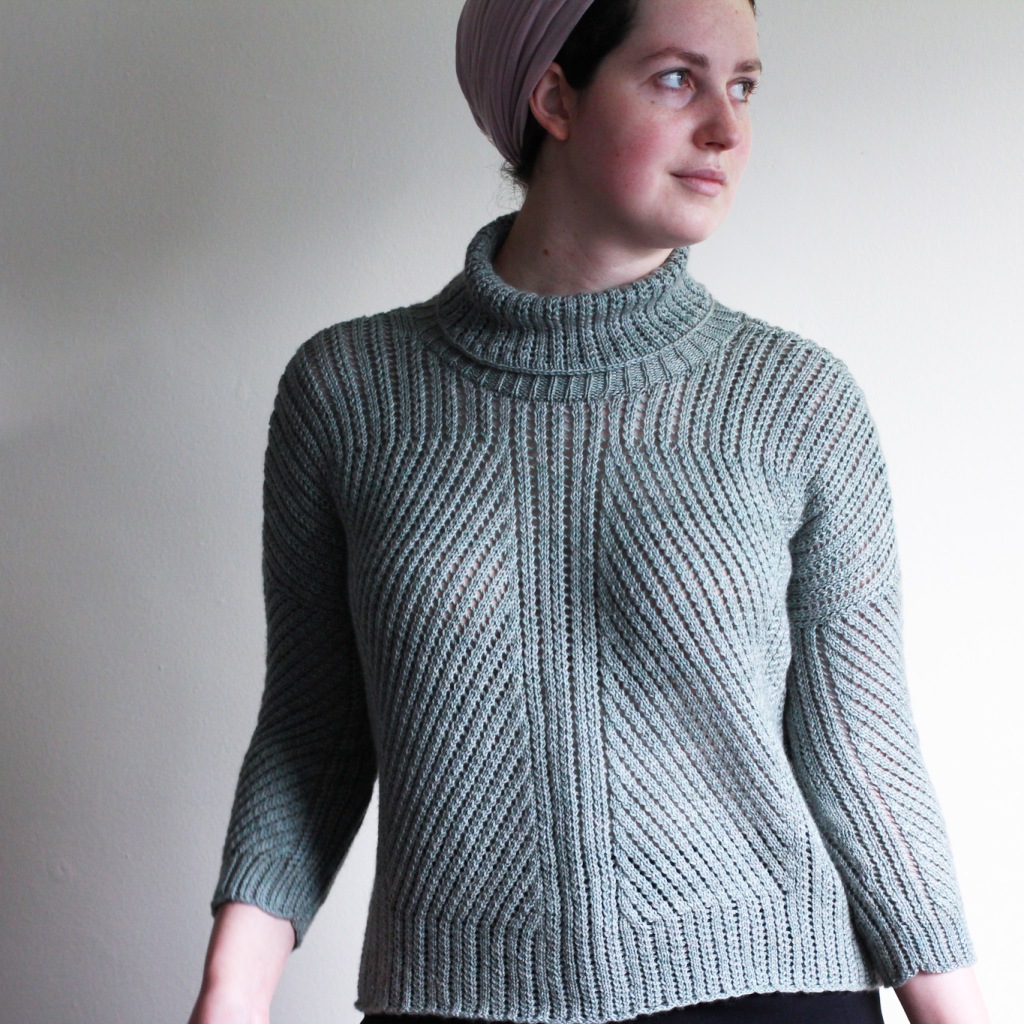
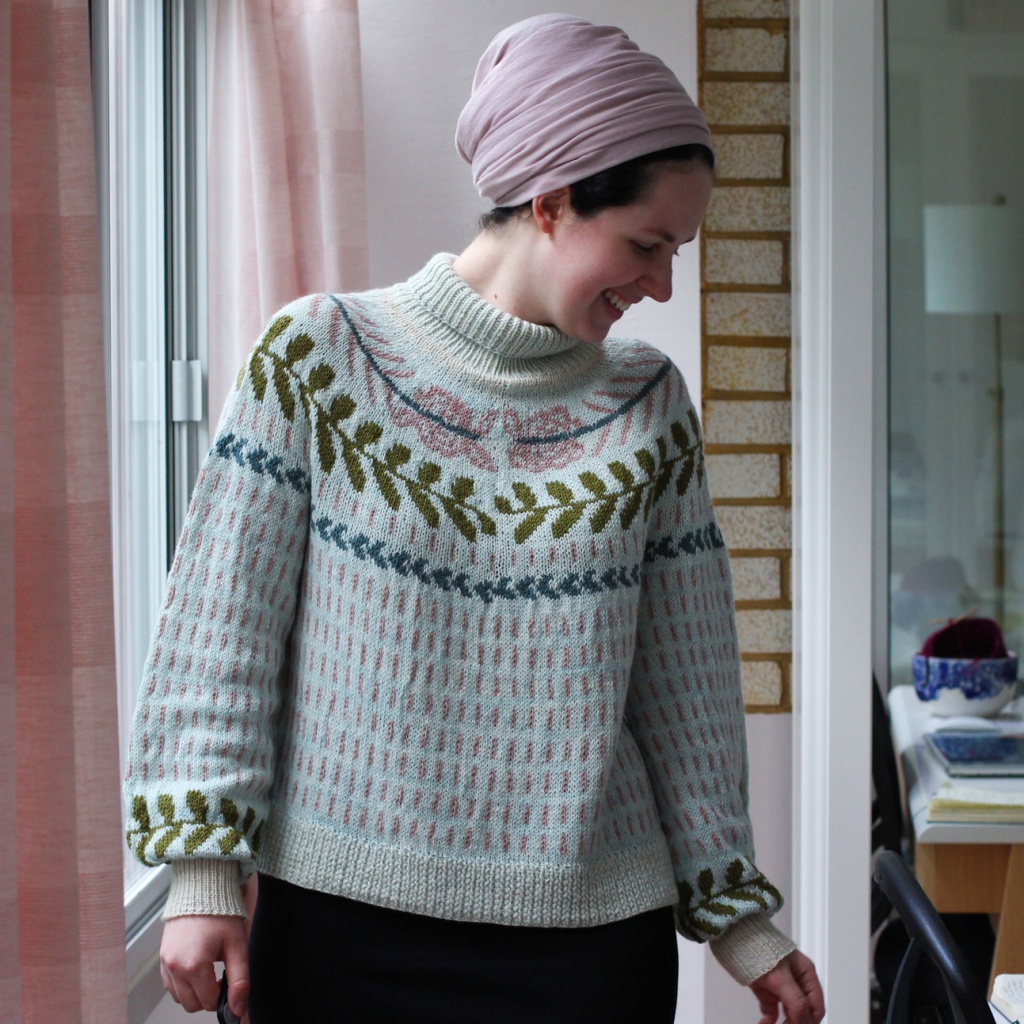
I kinda slipped up once. But not really, because it didn’t delay my goal of finishing up my stash before the new year. In the summer, just as I had finished my Tensile sweater, Caitlin Hunter had released the Misurina tee. See, it was about timing. I had just finished a sweater that took me a good two months. It was hot. It was August. And my next (and last) project was a long-sleeved turtleneck that I was not planning on wearing any time soon. I had fallen in love with the Misurina tee, and I also knew I could wear it while the weather was still warm.
My Tensile sweater
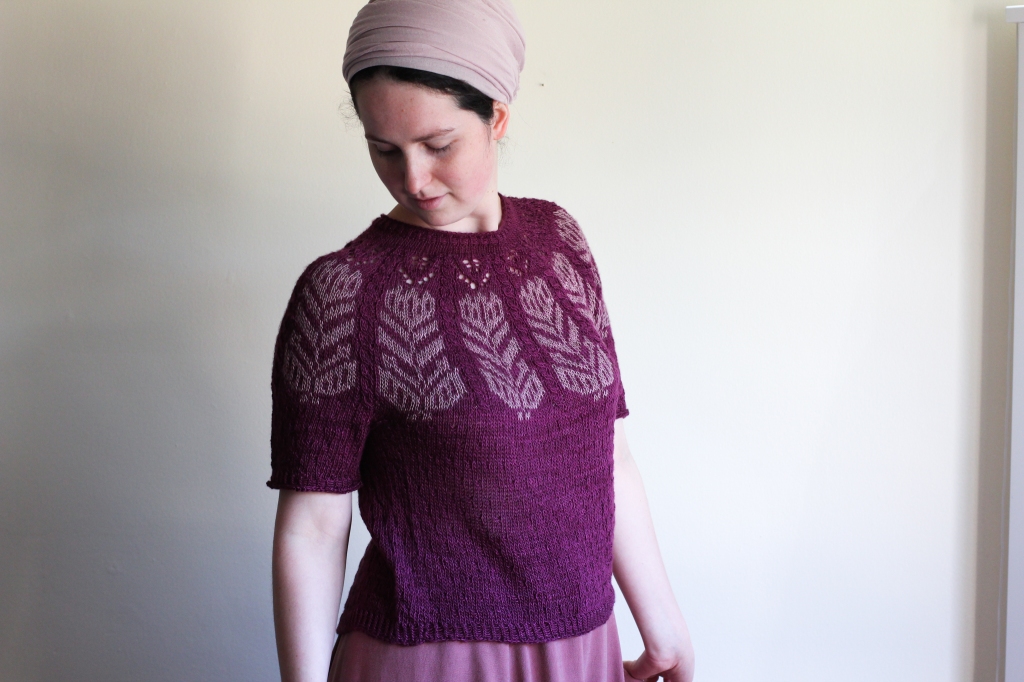
I bought the yarn and the pattern and the whole thing was finished in 3 weeks – I was still able to start my turtleneck Rosier at my aimed starting date of mid-September.
My Misurina teeMy Rosier sweater – the last one on my stash-busting list!
I also had another small slip-up (I’m only human, after all) and bought yarn to make a Ranunculus tee while it was still summer and I was craving another lightweight knit tee. It doesn’t weigh on me, though, because now that it’s cold I don’t feel I need to knit it right away. I also expect it to be a relatively quick project.
Anyways, I haven’t yet gotten to have the experience of popping in to the store ready to pick what I want to make next. That’s because I pre-ordered yarn to make the project I’m currently working on, knowing it would arrive as I finished the last sweater on my list.
But once I’m done? My stash conscience should be clear.
I treat my yarn stash so differently from my fabric stash because I can use up a piece of fabric in a day, and decide on a whim which of my fabrics I’d like to use. I’m okay with having a lot of fabric on hand, so I can make what suits my mood that day. Ironically, I’ve had so little time to sew lately that my fabric stash bin has been remaining quite full and hasn’t been seeing a lot of activity.
But with my yarn stash, I move through it more slowly. My knitting time is limited and therefore very precious to me. I put a lot of thought into what I make and what yarn I choose to buy to make it.
I think I’m not like most knitters. Most knitters I’ve met love to add to their stash and see each skein of yarn as part of a collection. And I get it, I see my fabric collection the same way. But when it comes to yarn, a lot of thought goes into it before it comes home with me, and impulse purchases just don’t jive with me (I will admit, though, that I have been impulse buying knitting books over the past months – what! I like having a resource library).
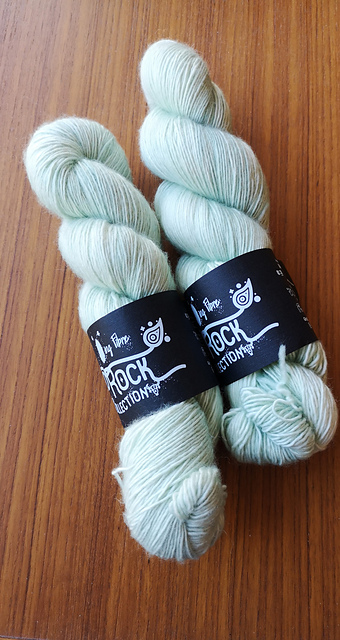
So, dear reader, what sort of yarn stash do you have? Do you see a beautiful skein and buy it just to have, or do you buy yarn only when you’re ready to use it? I’d love to know!
The beautiful skeins I just had to have for a Ranunculus top
A few years ago, soon after I had developed the chronic pain I still cope with today, my physiotherapist told me I had to take a break from knitting. I found it really difficult to think about putting my knitting down and giving up (at least for a little while) the sensation of wool running through my fingers. I still wanted to find a way to work with wool, so that February, at the first LandMADE event (run by the Upper Canada Fibreshed), I carefully chose a sweater quantity of locally grown lambswool yarn to dye at home.
I found the yarn at Lickety Spit Fibre Farm’s booth, and I was surprised by its softness. I was used to “farm yarns” being more stiff and itchy, and unpleasant to wear – but this was smooth and bouncy and soft (though still not as soft as a merino yarn, of course). The labels on the skeins had pictures and names of the sheep who had grown the fleeces that eventually became the yarn, and I found that incredibly special. The yarn I was drawn to came from “Miney and ‘the boys'” (I do believe there also exists two sheep named “Eenie” and “Meenie” – though I don’t think they were “the boys” referred to).
I thought it would be even more special if I not only dyed the yarn myself, but used natural dyes to do it. I had learned natural dyeing in school (it was probably my favourite course) and I really wanted to do more of it. There was a sweater I had in mind that (called “Grow” from Slow Knitting by Hannah Thiessen), in the photo, was a beautiful green, and I wanted to dye a yarn just like it. It uses a structured and woolly Brooklyn Tweed yarn and I thought the yarn from LandMADE would be a great substitute. As far as I know, the best way to get a vibrant green in natural dyes is to dye the fibres yellow and then indigo (apparently dyeing in the reverse order wears away the indigo, as indigo doesn’t penetrate the fibres and only colours the surface). I ordered indigo and weld (a yellow-dyeing flower) from Maiwa in BC, which is an amazing Canadian source for natural dyes. Then I made a trip to Home Depot to stock up on large buckets and containers, dowels, and rope.
This little project was done at my parents’ house, where there is a larger kitchen, a laundry room with a sink, and a backyard, so it would hopefully be easier to maneuver everything. I started by simmering the yarn in the weld, but my large dyeing stockpot had a lot of trouble fitting the water, dyestuff, and seven skeins of yarn, and the dye stock frequently spilled over when I tried to stir it. I also didn’t realize that much more weld was needed to get a very saturated yellow, so with the amount I had I could only really get a buttery light yellow. Rinsing the weld-dyed yarn was also quite difficult as I hadn’t realized how hard it is to carry seven wet skeins of yarn from the kitchen to the laundry room (wool absorbs a lot of water and can be very heavy when saturated with water). It was a bit of a mess, but the yarn still had to be dipped in indigo.
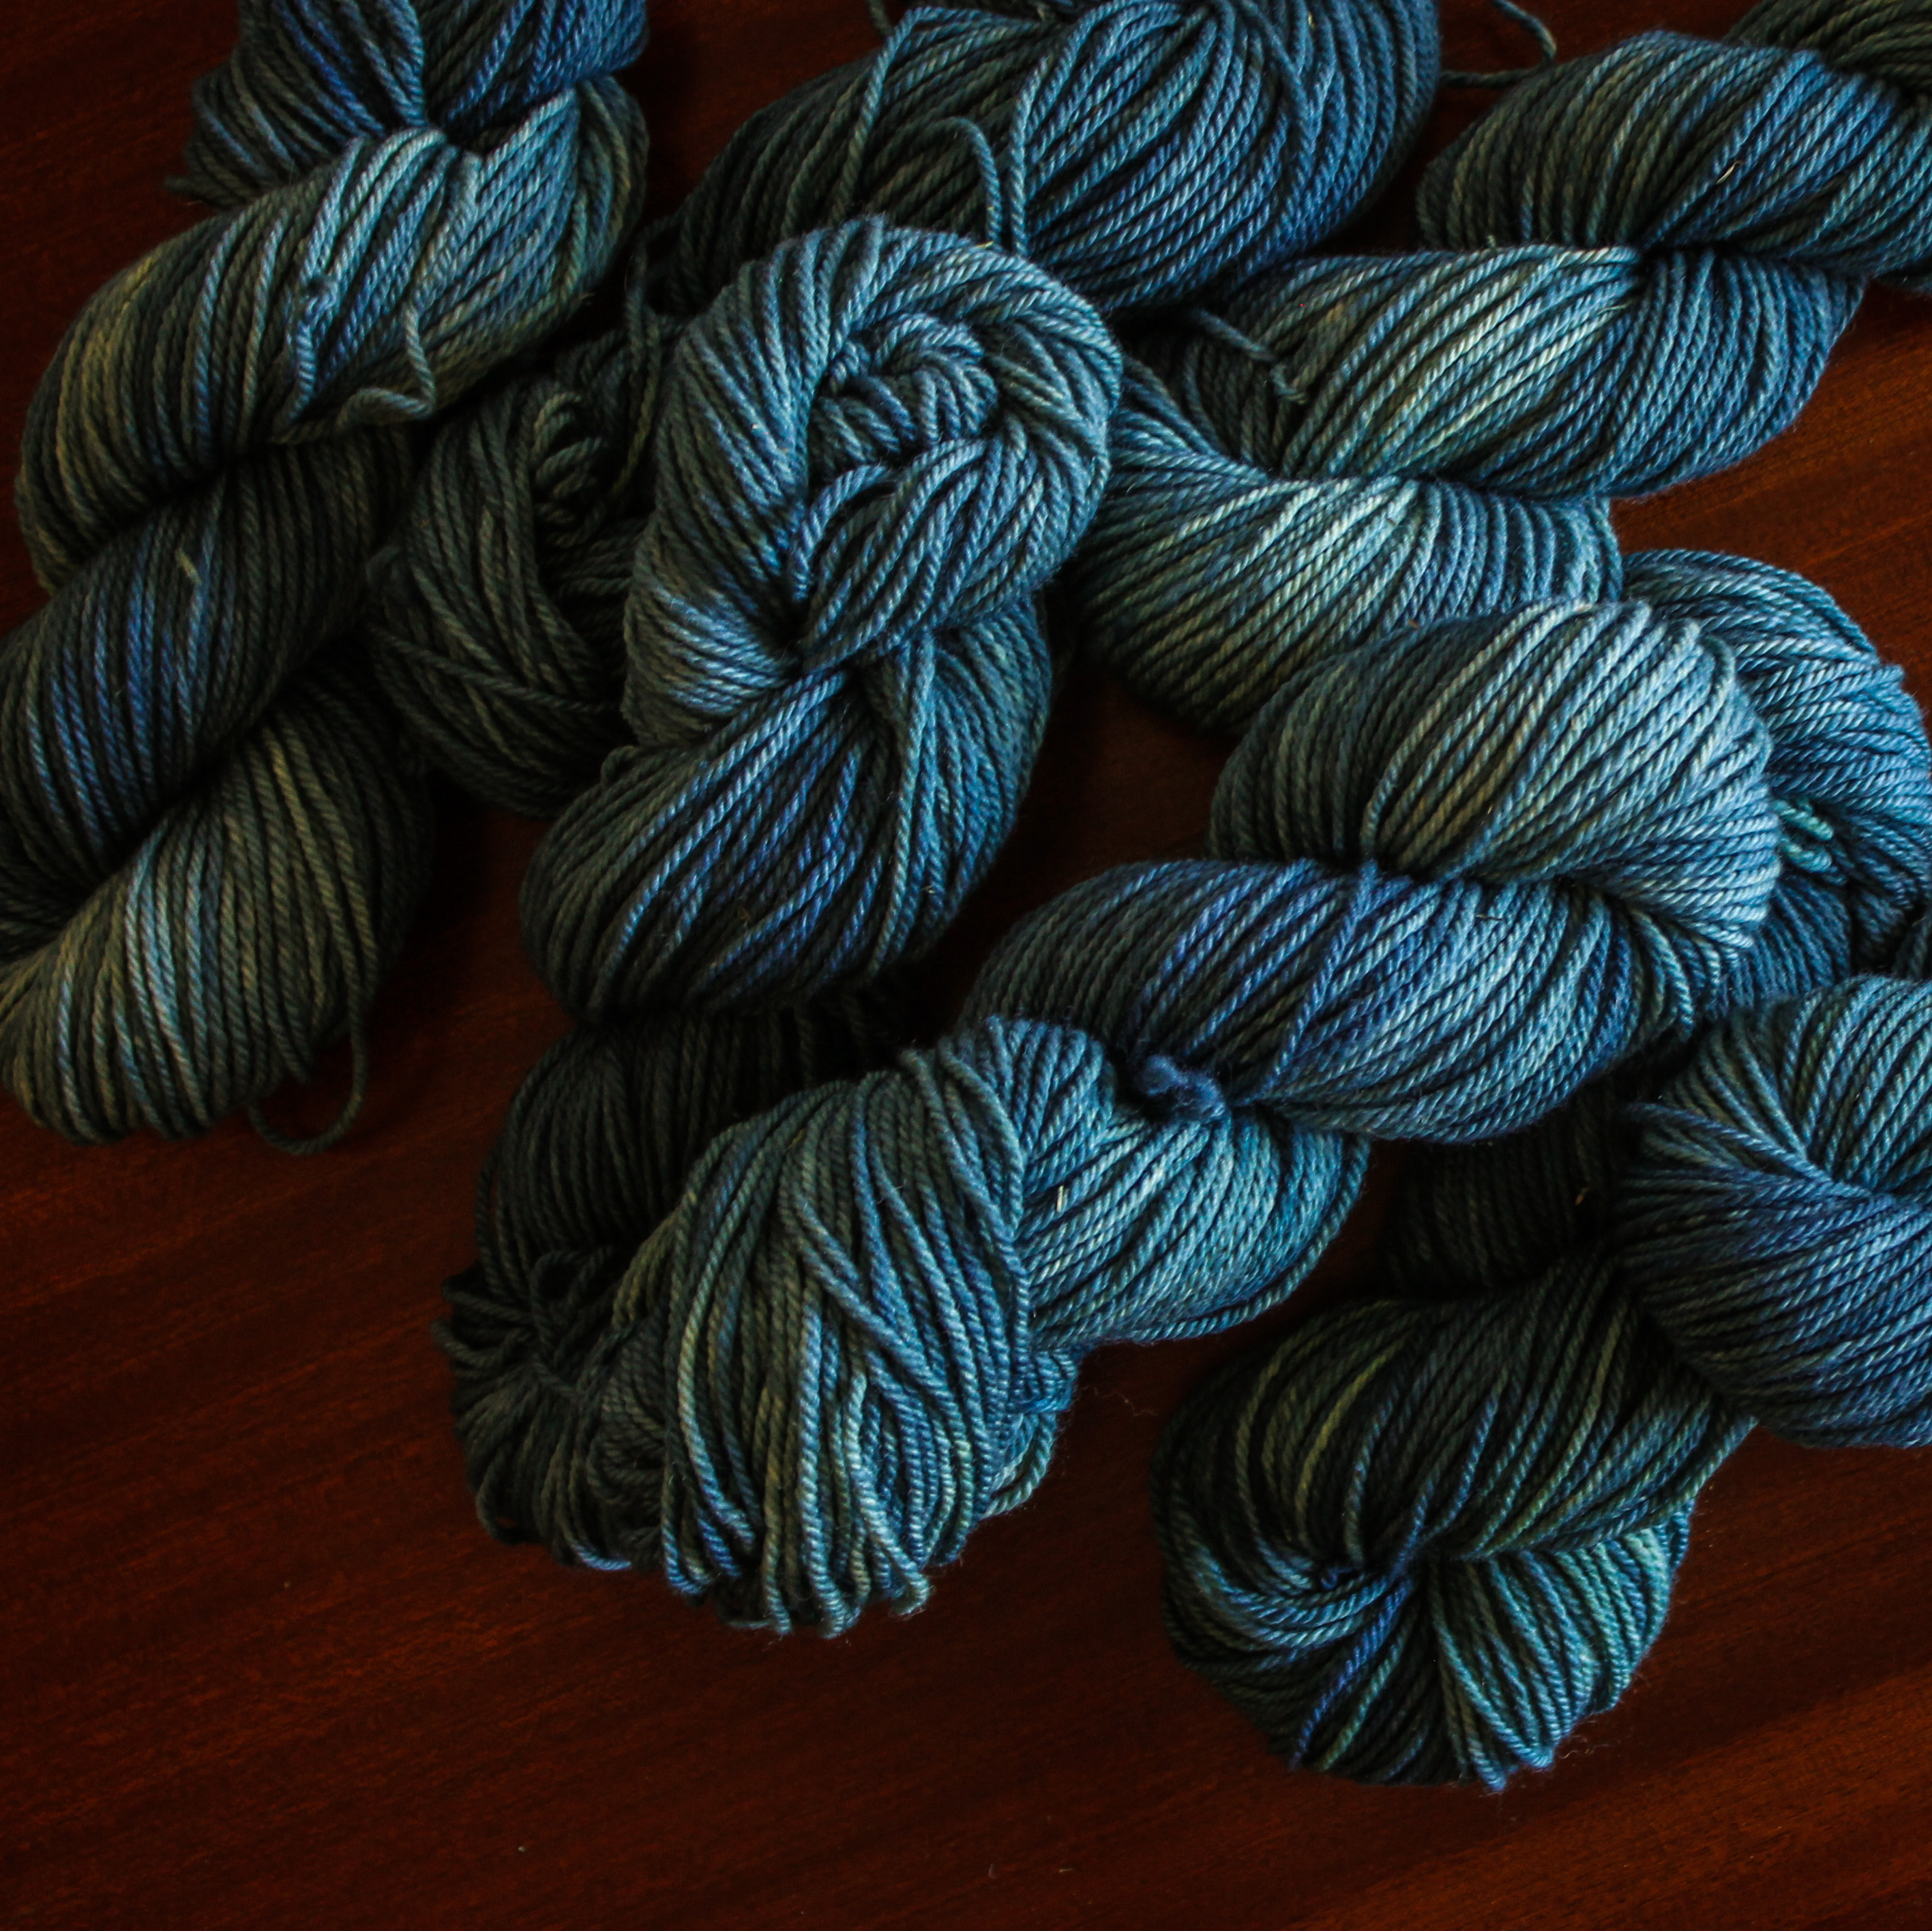
I had already prepared the indigo “stock” at my apartment, so getting it going in a bucket wasn’t too difficult to do, other than the fact that it was well below 0 degrees outside. I tied the still-wet and rinsed skeins to a large dowel and dipped the skeins in the indigo bucket all at once. When I pulled them out they were the green I was aiming for, but of course once indigo oxidizes it turns into that famous indigo blue.
Unfortunately, the indigo overpowered what was already a pretty weak yellow, and the yarn came out much more blue than green. Still, I did love the little hints of green where the indigo didn’t reach the fibres quite as well, and the yarn turned out quite variegated.
I actually think my yarn was dyed shortly before I started my blog and it was used for the “About Me” page – shows you how long I can take to get around to these things…
Time passed and I got back to knitting, and, as most knitters do, I got distracted by newer and shinier yarns and new and exciting patterns. My dyed yarn sat untouched, and I figured I would get around to it eventually, but I no longer wanted to make the original green sweater I had planned, seeing as the yarn had not come out that luscious green.
I went through a phase of feeling guilty for holding onto it, with little intention of knitting it up. I attempted to sell it but turns out people aren’t really interested in yarn with no labels and dyed by a person you’ve never heard of (or at least, that’s my theory). I honestly didn’t know what to do with it – I considered donating it but I had spent so much time and money on it that it seemed a shame to give it away.
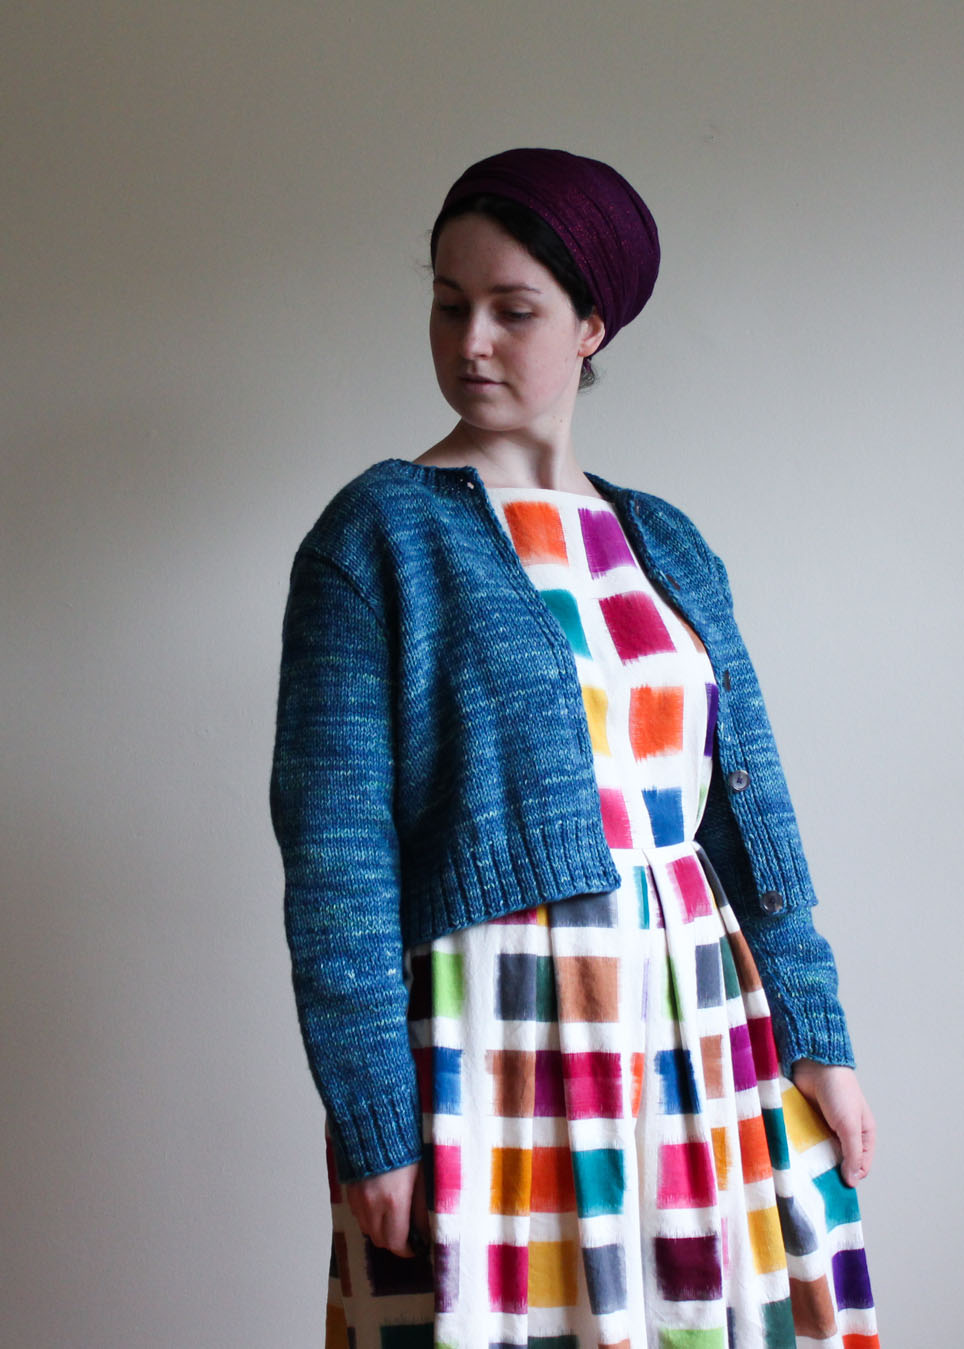
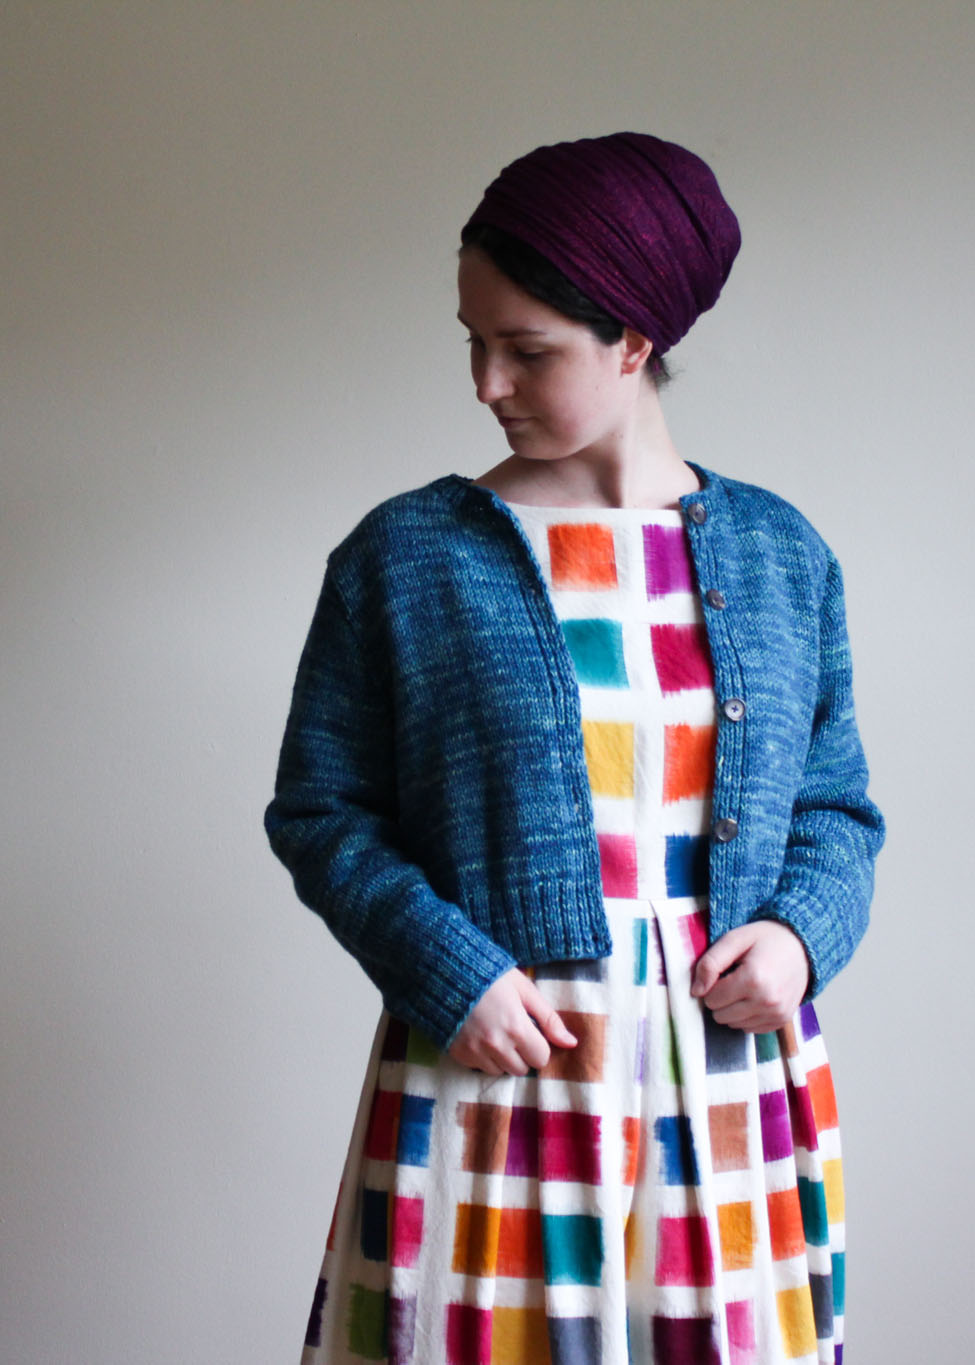
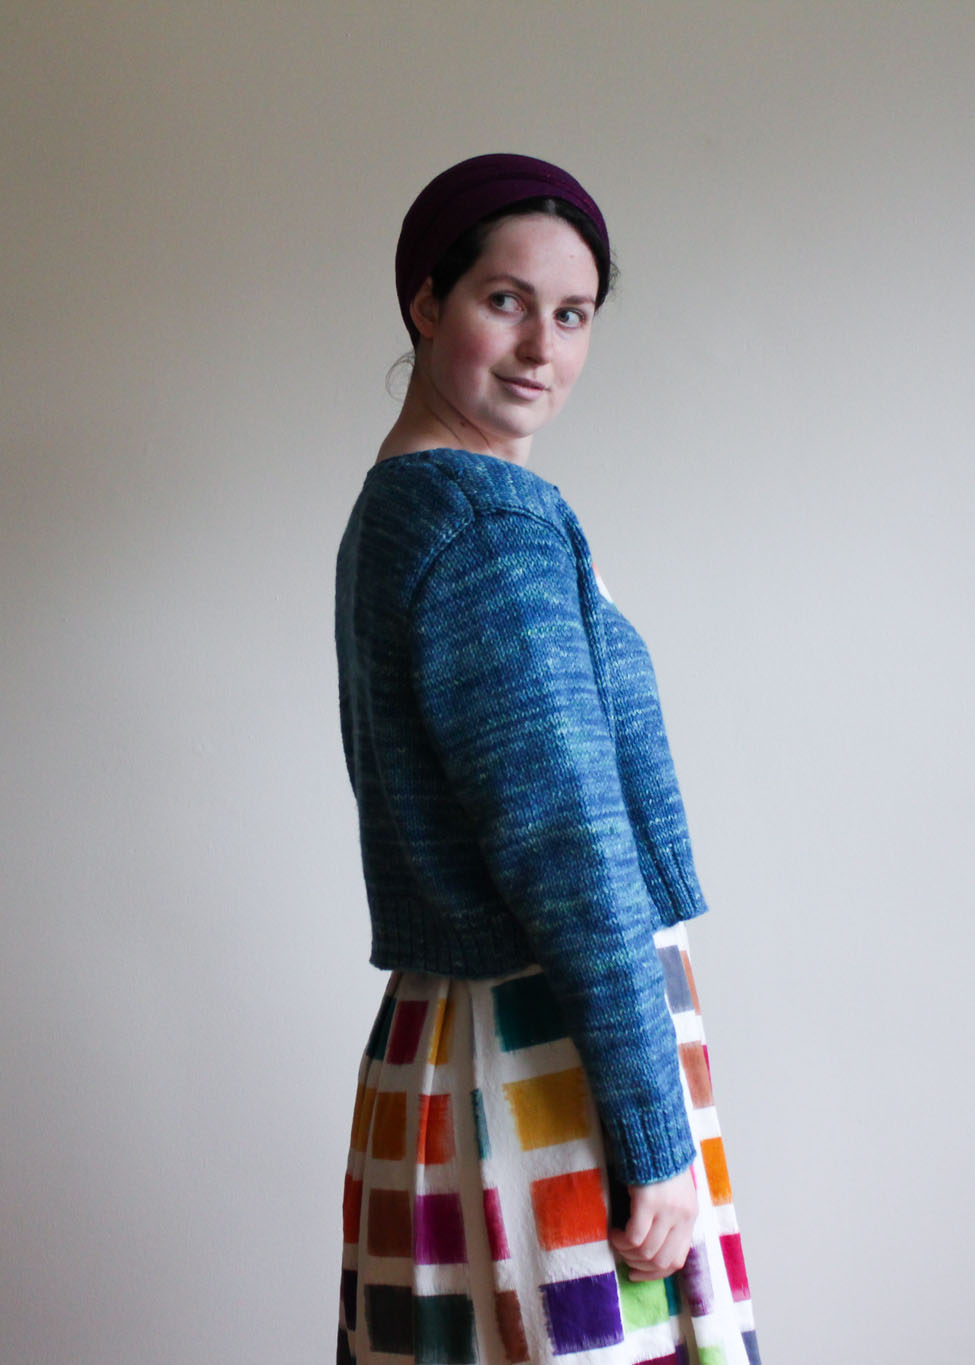
More time passed, and lo and behold, a global pandemic began, and yarn companies and knitwear designers started generously giving away their knitting patterns for free, as a form of paying it forward during a difficult time. I came upon the Sassy Cardigan from Peace Fleece, which seemed to use a yarn very similar in weight and texture to my hand-dyed yarn. I downloaded the pattern and decided it would be good for when I did eventually get around to knitting up that neglected yarn.
As social isolation continued, though, I found myself longing to cast on something weighty and cozy, and I couldn’t resist getting started on my cardigan. Knitting it was a new and different experience – indigo tends to rub off (as I mentioned earlier, the dye sits on the surface of the fibre) and left my fingers blue after every knitting session. Since the yarn was so “sheepy”, every few minutes I had to stop and pick out bits of twigs and grass (“vegetable matter” is the technical term) from the strands (this was a bit annoying to do but I loved that it reminded me how little processing it had gone through). I loved watching the colours of the stitches change as I went through different variegations in the yarn. And I loved feeling the itchy, woolly fabric turn soft and smooth after the knitted fabric was washed.
I’ll admit, it’s not my typical garment. I’m not sure how much that shade of indigo-blue-with-green-speckles in it goes with other things in my wardrobe. I find the sleeves a bit bulky. And I don’t typically wear cardigans. Or things with buttons. It’s thinking of the journey of the fibre that makes this sweater special – from Miney and the boys, to being twisted into yarn, to arriving in my hands, to my hands dunking the yarn in dye, to my fingers knitting it into fabric, and finally to the pieces of the garment being sewn into something wearable. Like all the garments I have, it’s special because I know no one else will have anything like it, but it’s also special because it has a story that is linked beyond me and to the local farm and sheep that produced the materials.
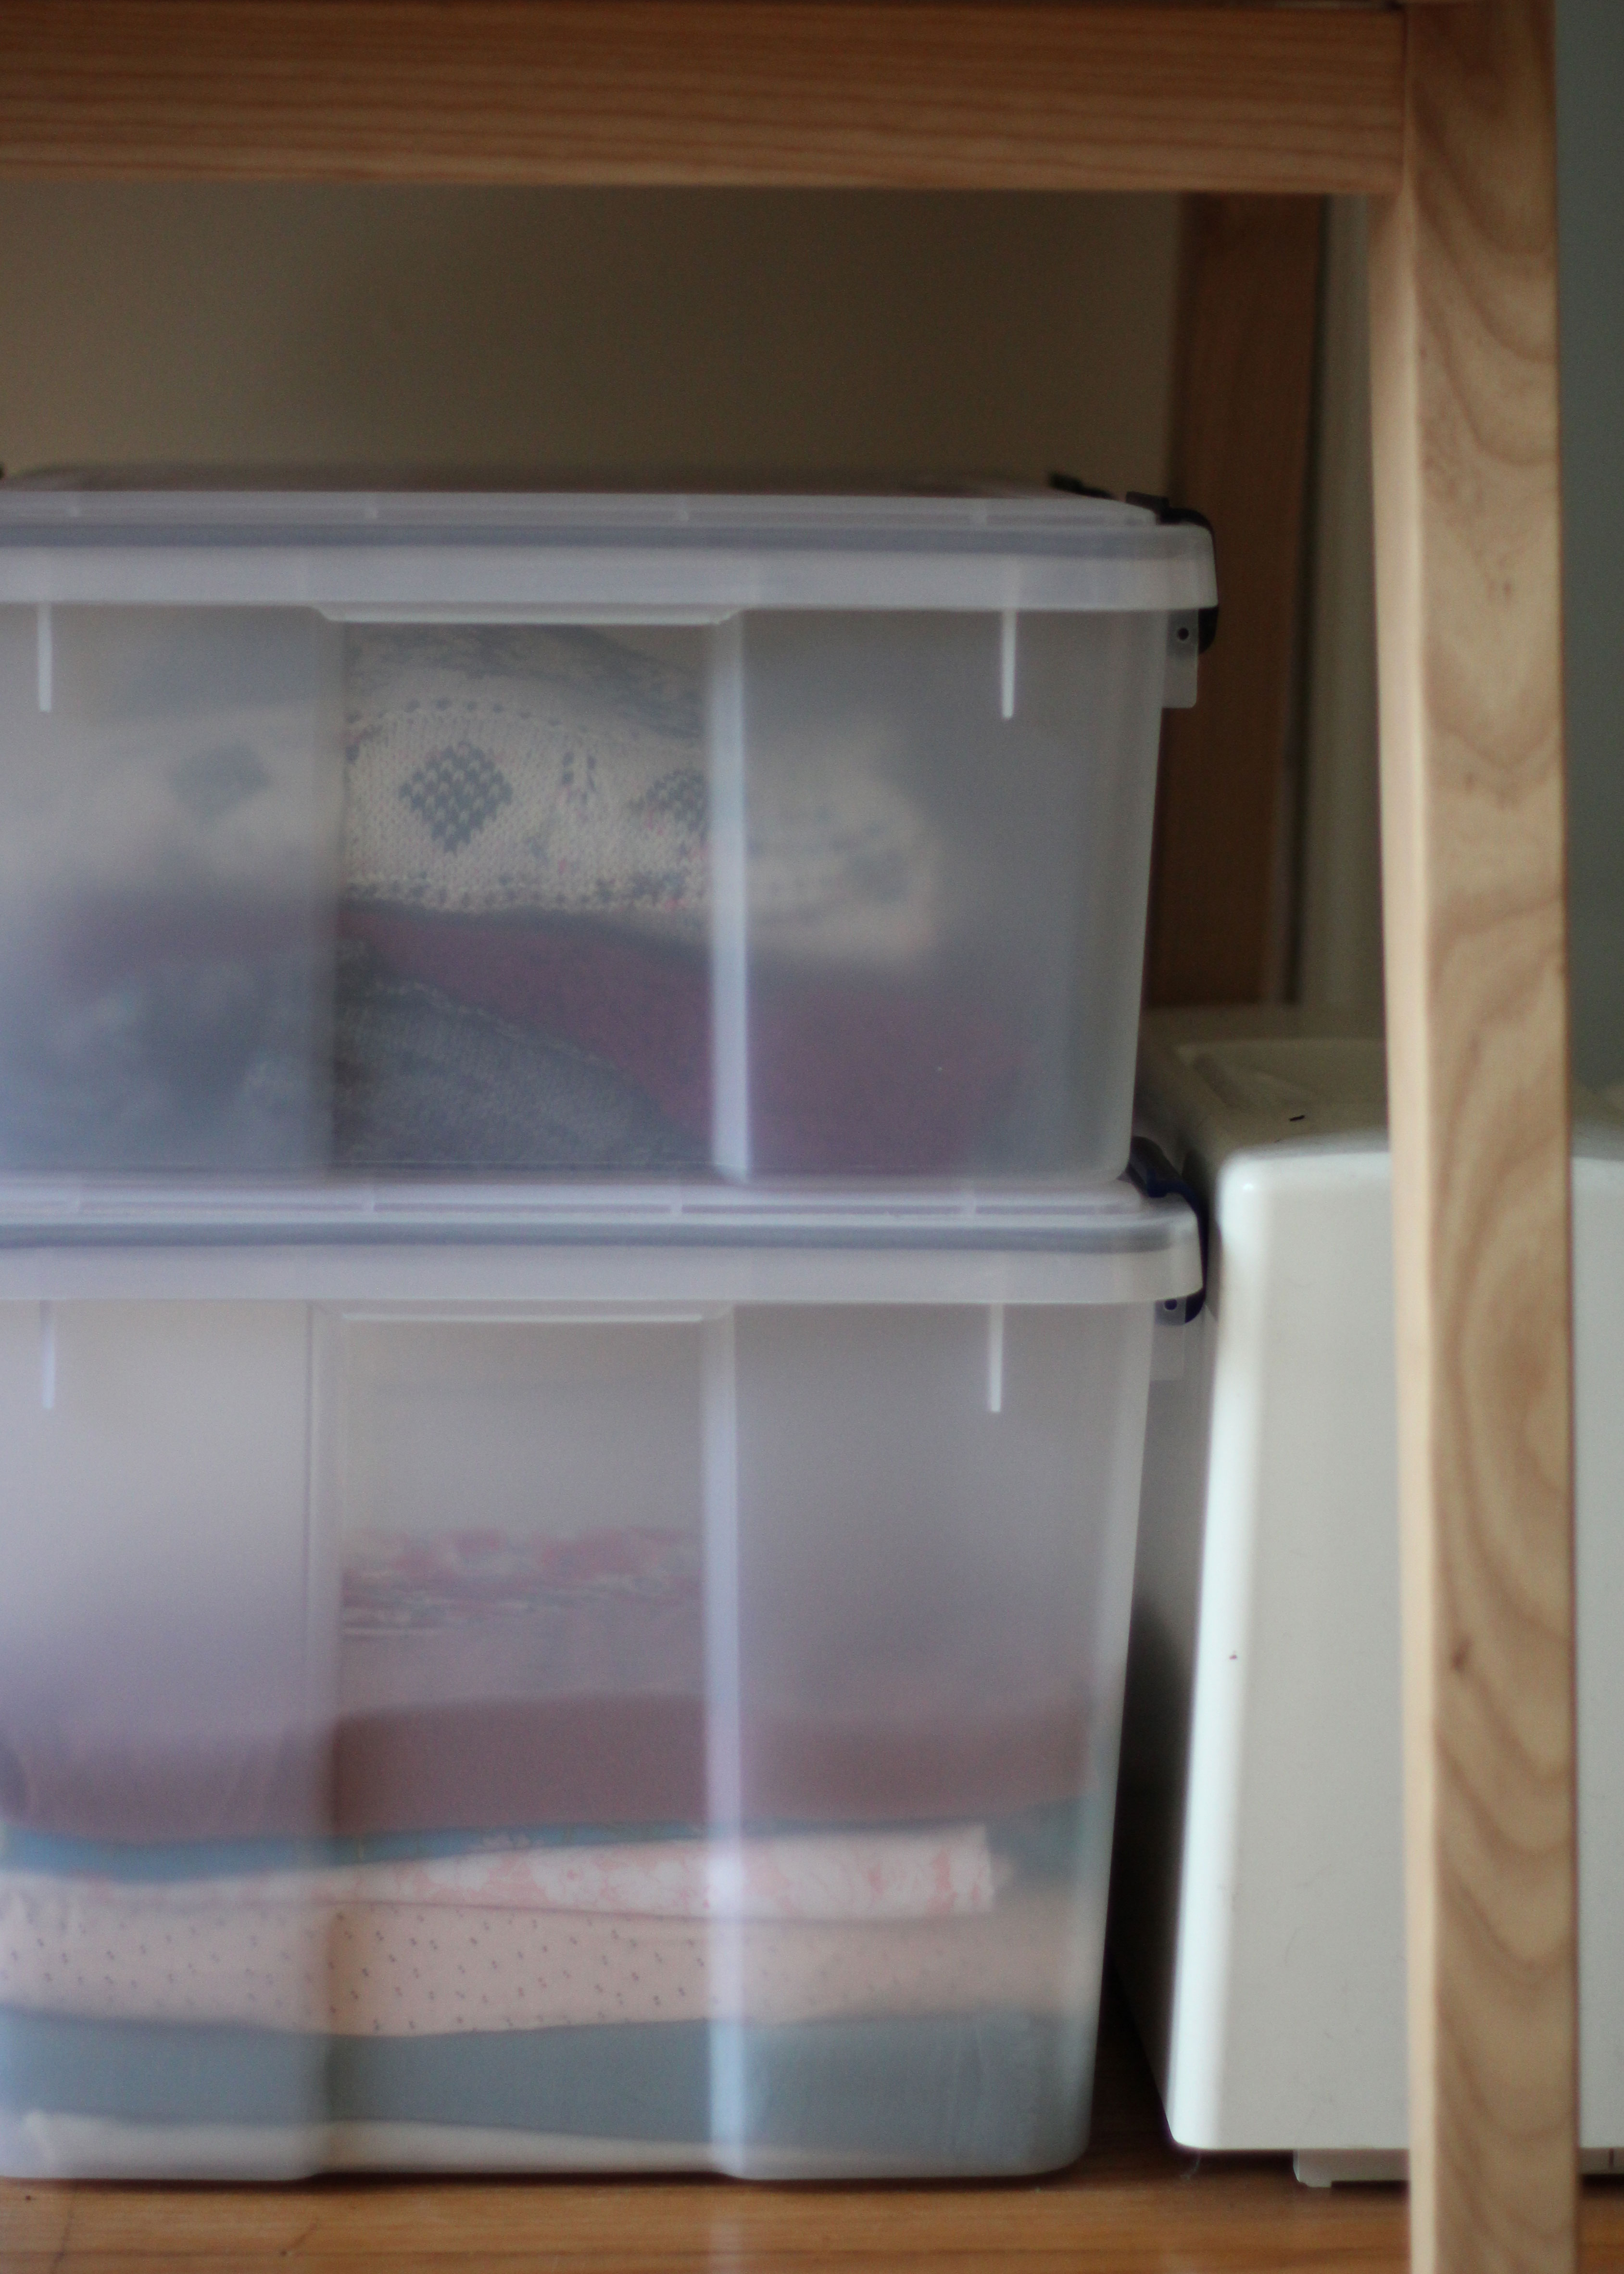
In August, I set a goal for myself that I would use up all the fabric in my stash before buying anything new. This wasn’t too crazy a goal – at the time, I only had about 10 pieces of “usable” fabric in the large translucent watertight bin under my desk. By “usable”, I mean fabrics I actually intend to cut up and use for projects. There are some vintage fabrics I have that I bought because I found their prints to be unique enough that I wanted to own and hold onto them, but aren’t practical for my wardrobe. Currently, I have 3 of these. Not excessive, in my opinion. I consider these collectors’ items.
The aforementioned watertight bin – the top one houses hand-knit sweaters, the bottom my washed and ready-to-go fabrics
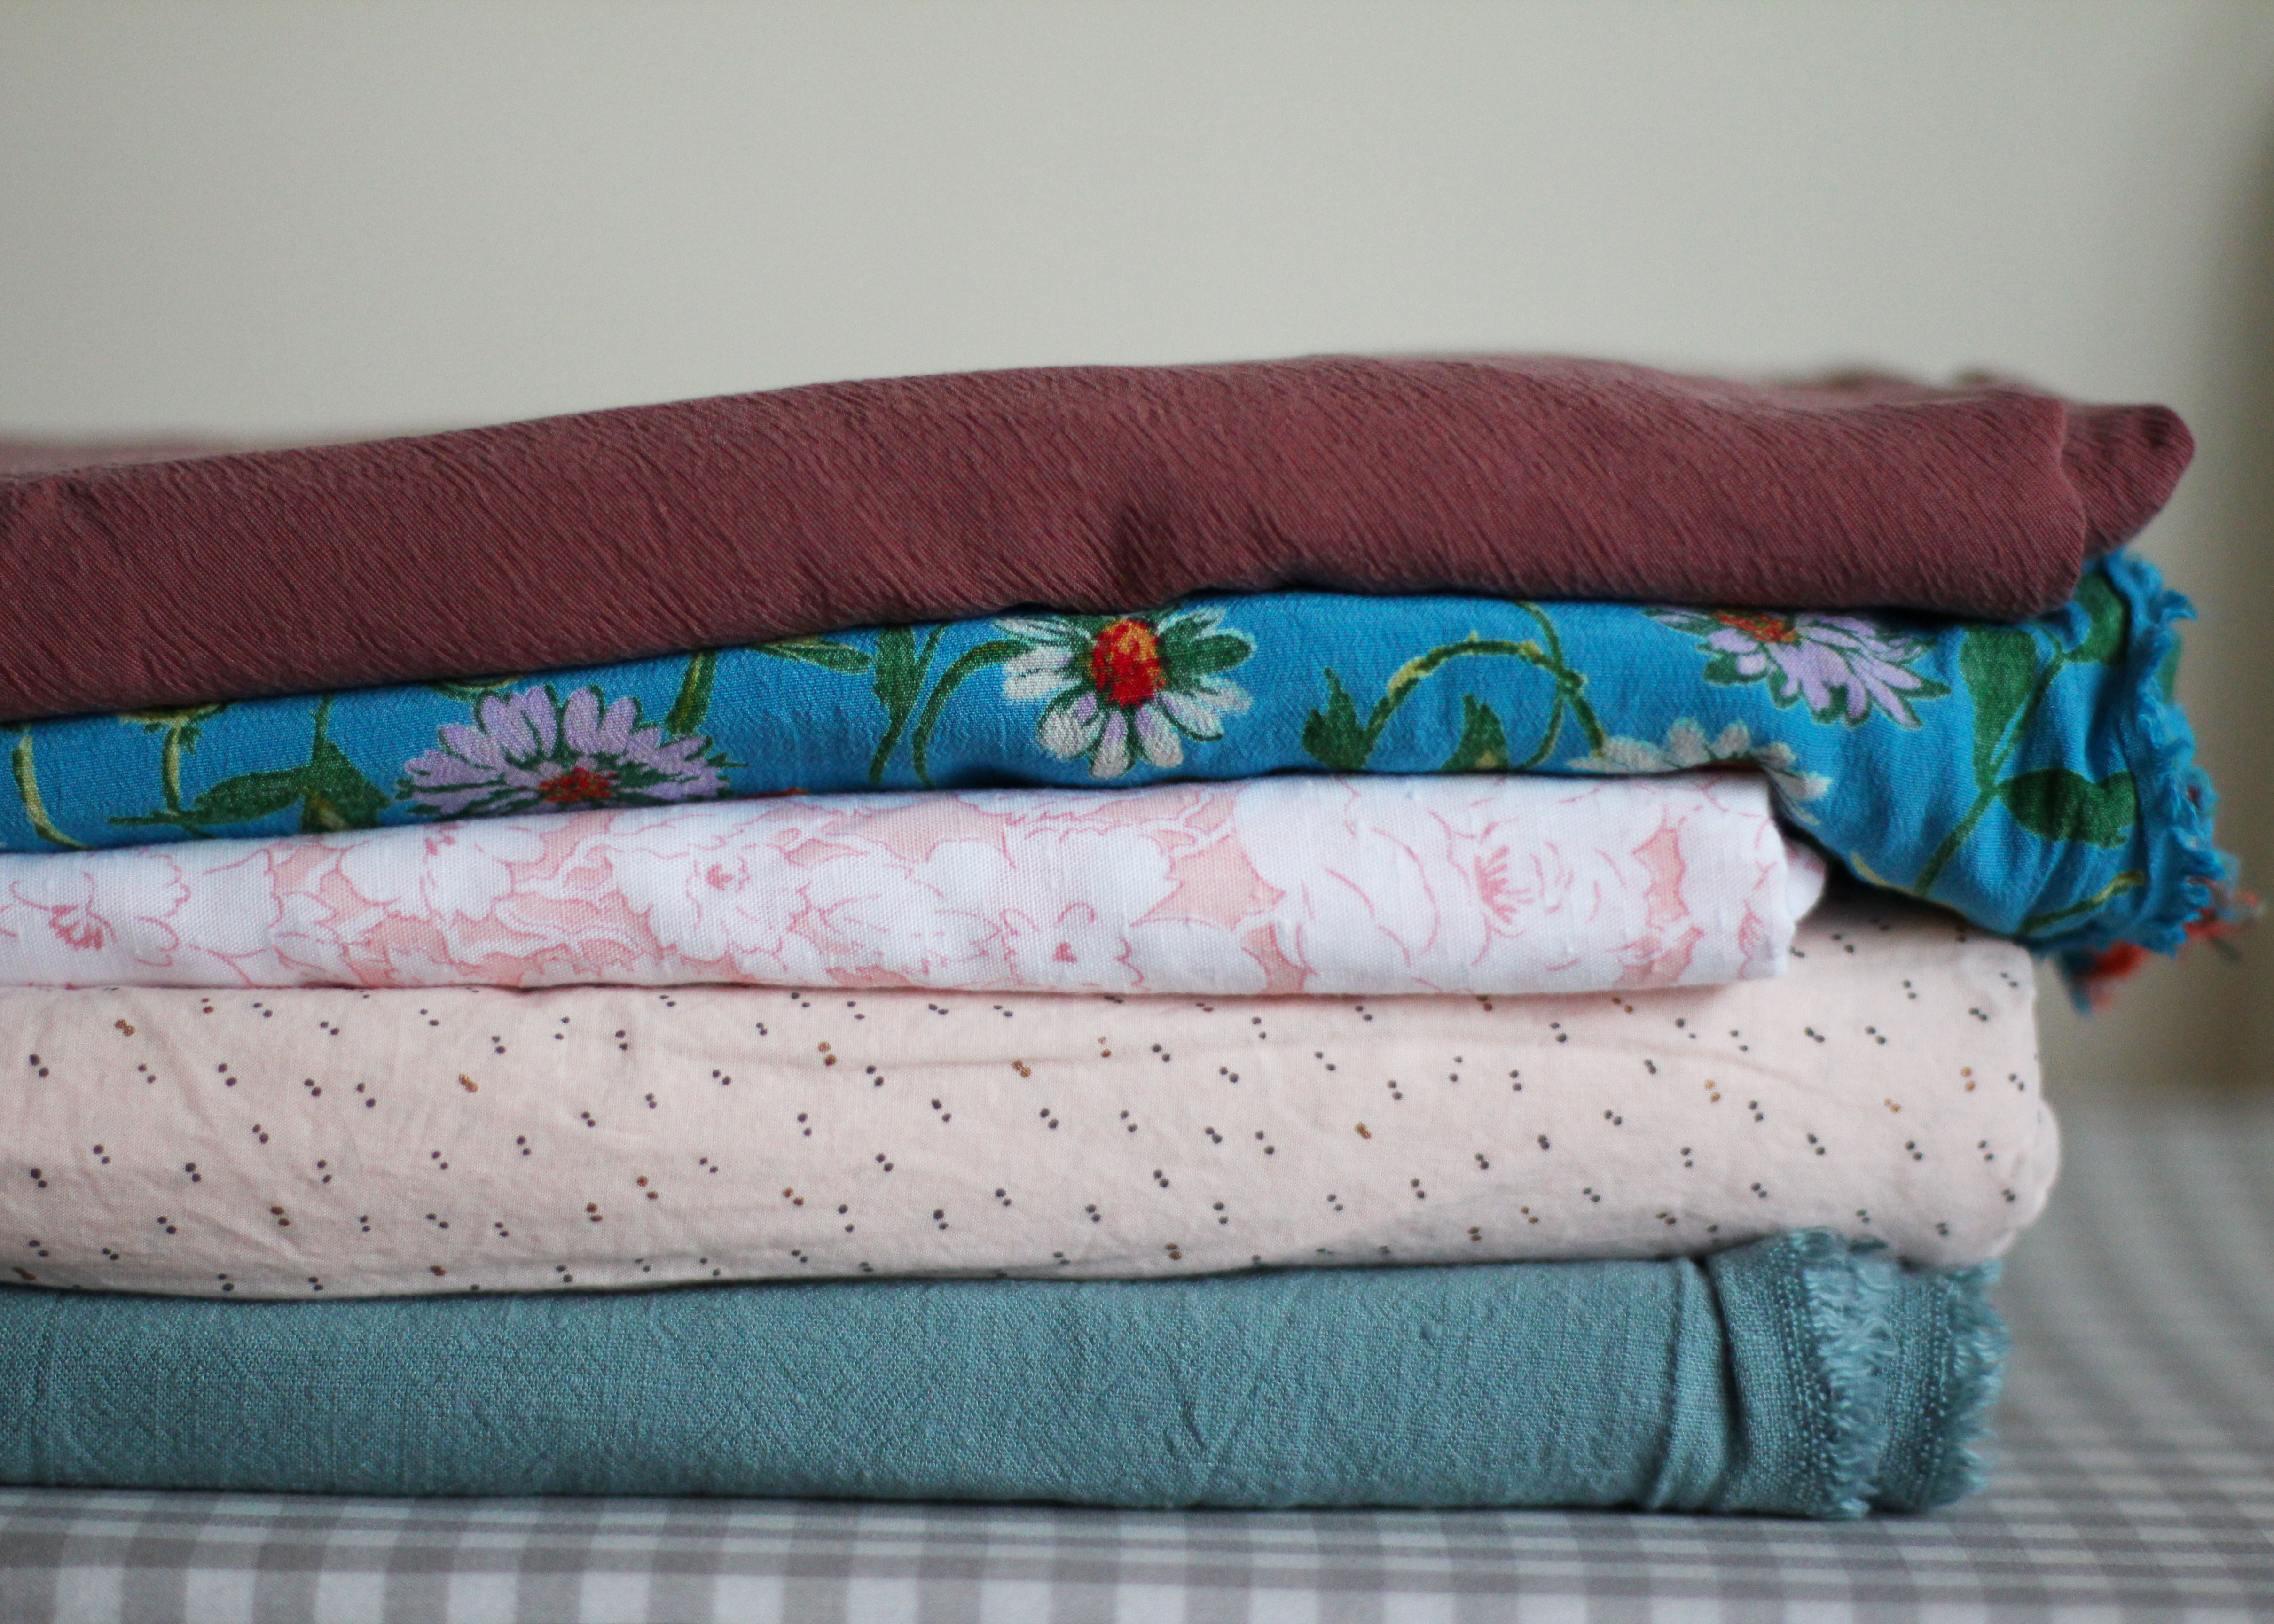
Since it was the end of August, I also had 4 pieces of fabric I had aimed to sew up for the summer months, that I just couldn’t get in by September. These I also didn’t consider currently “usable”, because I wouldn’t want to sew them over the winter months.
Fabrics for spring-and-summer-time sewing – with the exception of the top one – the last washed and ready-to-sew piece of fabric that I plan to sew this season.
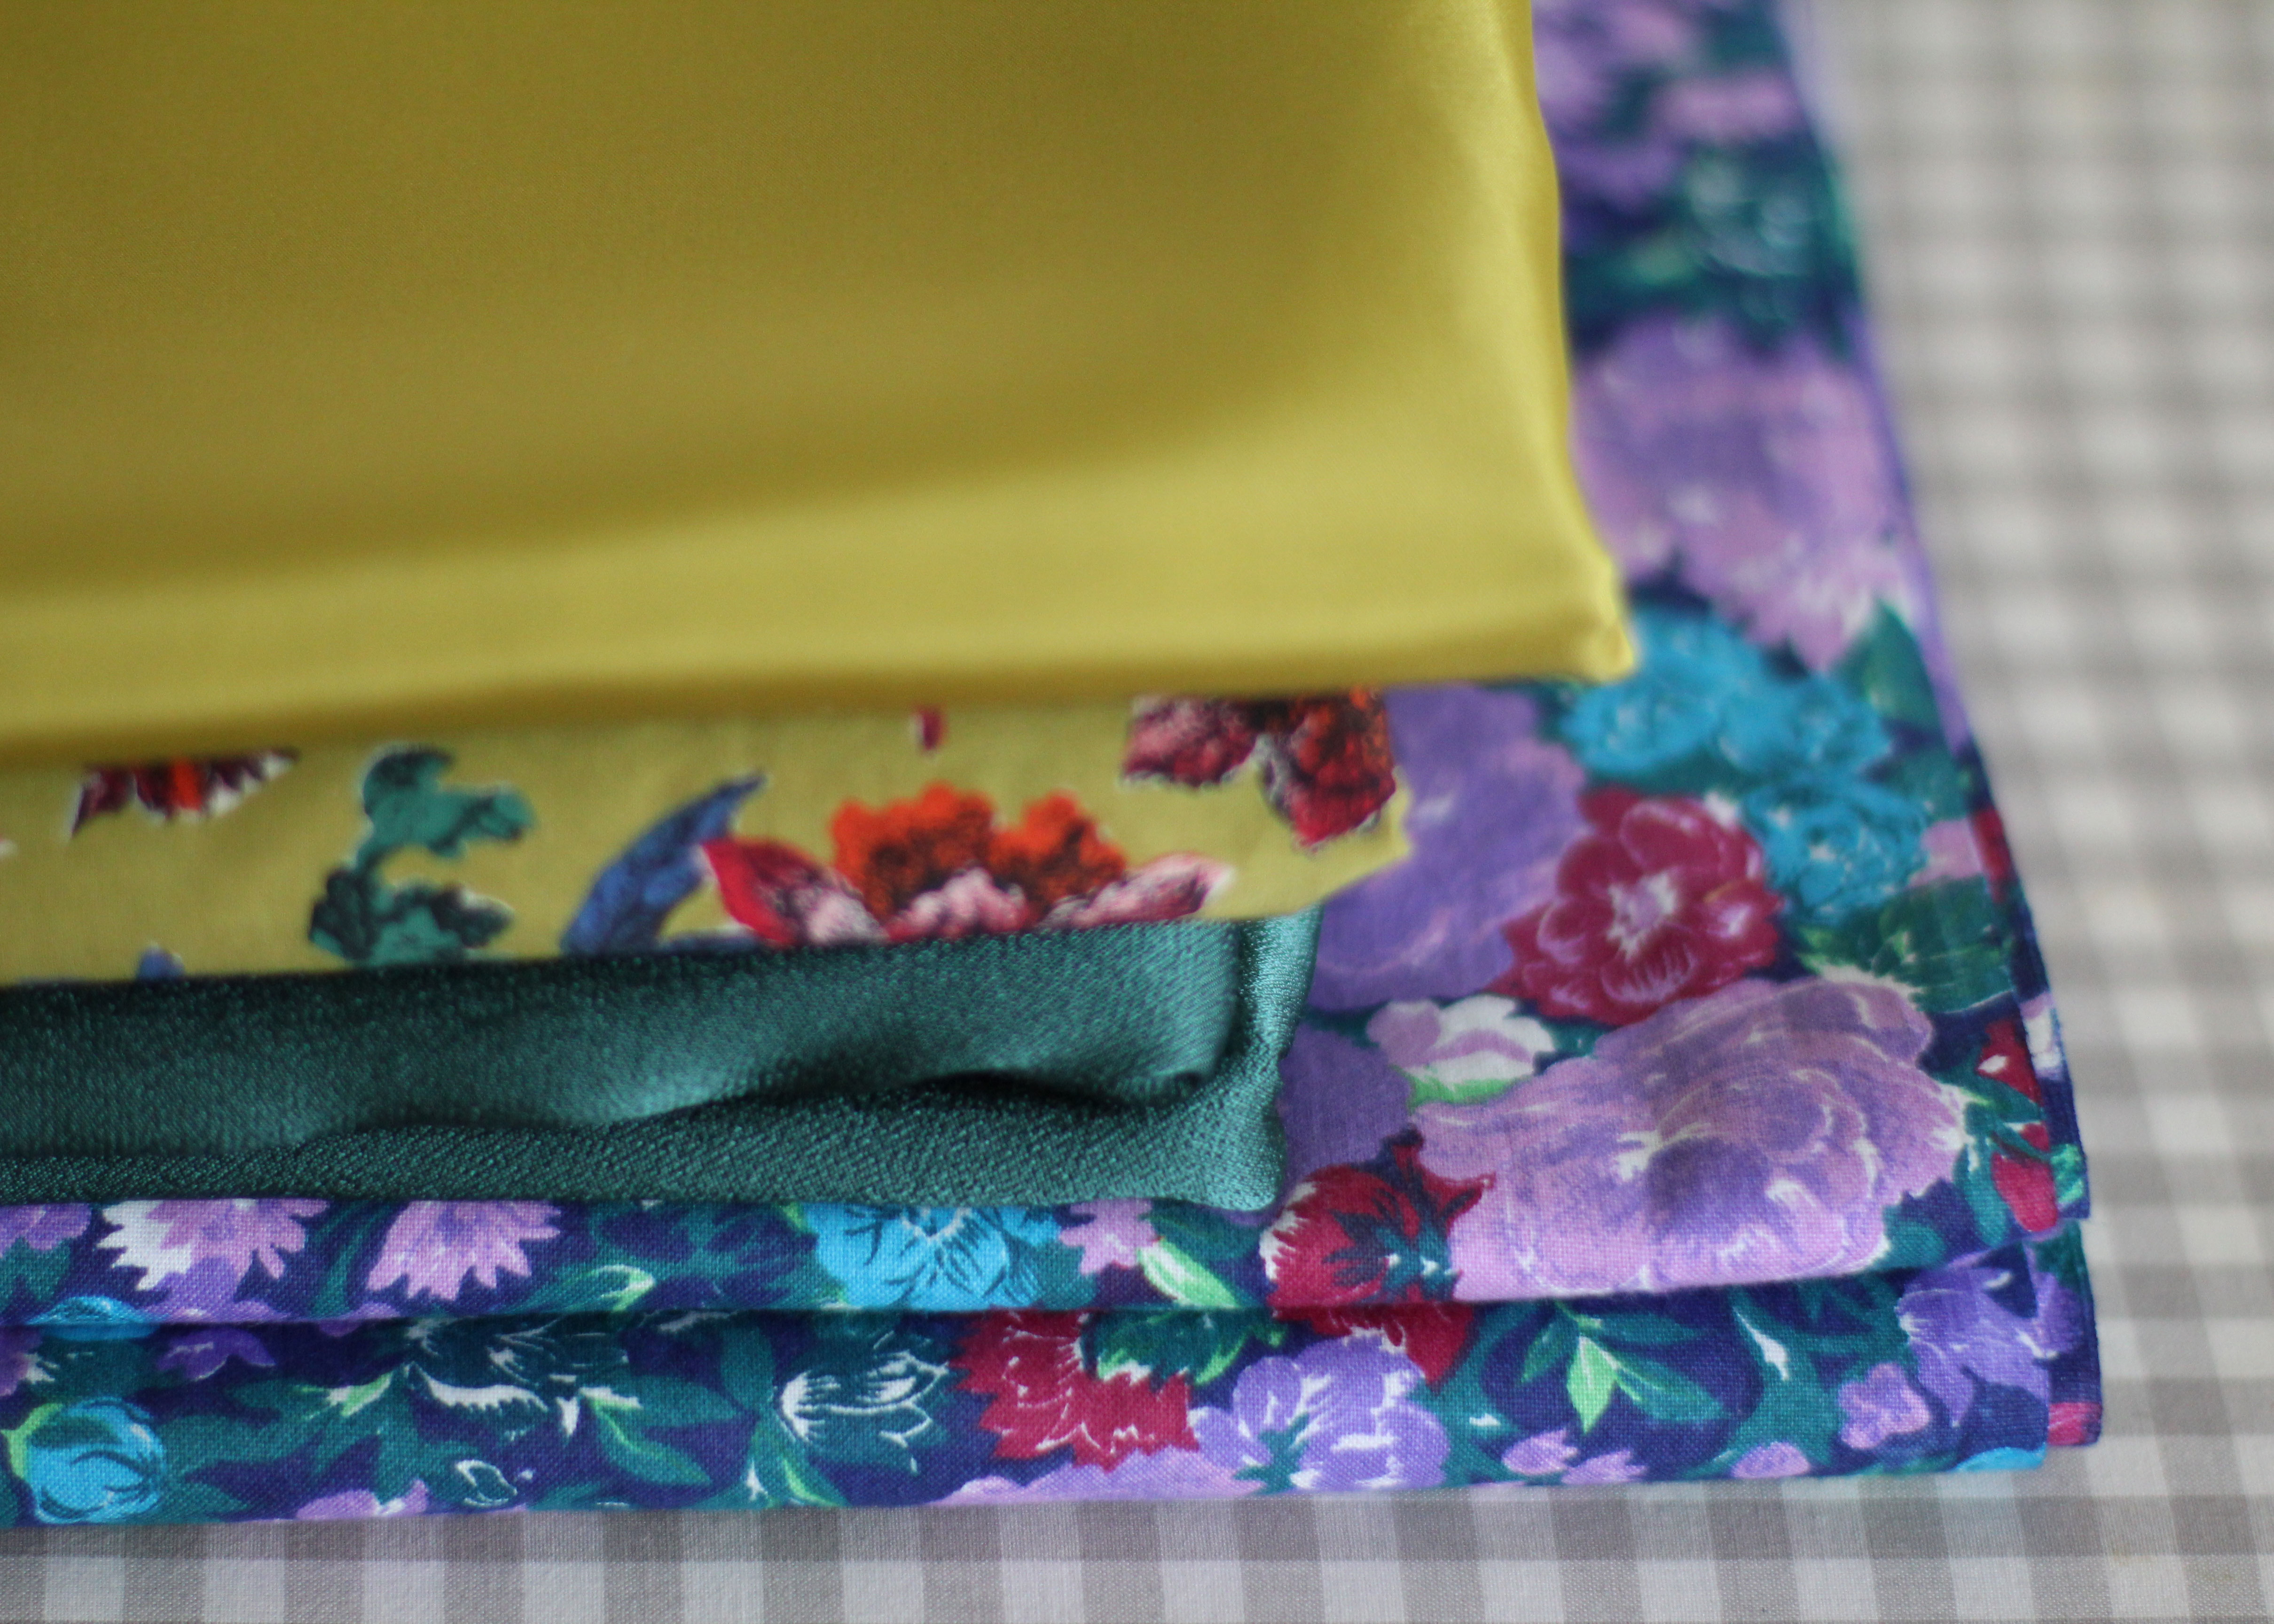
So for two months, I didn’t buy any new fabric. Honestly, I didn’t. I had my eye on some fabrics, though, so I slowly built up wishlists on Club Tissus and Etsy, intending to make some big and excessive purchases when my fabric ban was over. Then in October, a very special vintage Liberty of London fabric went up for sale on Etsy, with the owner telling me they wouldn’t hold it for me for long. I decided to make an exception to my ban and ordered it. The same happened with another vintage fabric on Etsy. Then in November, Shop La Mercerie in the US had the perfect dark teal viscose crepe for sale – and with only 2.5 yards left in stock only days after it went up, I acted fast and bought that too.
My special exceptions fabrics (plus coordinating chartreuse lining) – yet to be washed and added to the bin.
I told myself that these were all exceptions – special fabrics that would be gone if I waited around till after I used up my stash to buy them. After all, I wasn’t buying fabrics that I could really get at any time. But then when Cyber Monday sales came along, I broke down and bought many of the fabrics on my Club Tissus wishlist.
My fabric ban had obviously been broken. But I had been realizing something – and slowly realizing it long before I broke down and made a big Cyber Monday purchase.
The goal of using my stash was destroying my creativity.
I am the kind of person who likes to clear things out and check boxes and cross things off lists. If I have a stack of library books that I finished but still have a week to return, I like to return them right away – get the books off my shelf and check off the box of getting them returned. I work that way with a lot of things, probably to a point where it’s a bit weird.
I realized that in using up my stash, each piece of fabric used was a box I could check off. And I literally do this – I organize my stash using Evernote, and every time I finished a project, I would go to my Evernote notebook and delete the note, feeling an immense feeling of very fleeting satisfaction.
I was no longer using my stash for the fun, joy, and creativity of it – but rather, the short satisfaction of ticking a box. Once you tick all the boxes, I told myself, you can buy all the fabric you want. All the fabric on that wishlist. You can even order something from Europe and pay the 30€ shipping. I would also get the satisfaction of writing a blog post about how I was probably the first person in history to use up her stash for real.
But all that came to a crashing halt when I made that Cyber Monday order. I had failed at my goal. At the same time, though, I realized I was finally allowing myself to consider my stash more carefully. I had been starting to rush to think of ways to use up my fabric, and was no longer taking the time to let it simmer, to let the creativity come forth and give me new ideas. When I broke my fabric ban, in just a few short days, I started thinking more slowly and creatively about what I wanted to make, because I no longer had my reward to rush to. I had bought these gorgeous vintage fabrics and was forcing myself to think of what to make with them so I could hurry up and use them and replace them with more fabric.
I am currently at a point where if I had not bought fabric over the past two months, I would actually be one fabric piece away from completing my goal. It’s fabric to make a skirt – it could potentially be finished in one day. My infamous Cyber Monday fabric hasn’t been shipped yet, so I can’t sew it. My special exceptions fabrics haven’t been washed yet, so I can’t sew those either. I realized that once I sew that one piece of fabric in my bin, I will have no garments to start sewing. I never truly considered what it would be like to get to the end and have nothing to do about it.
And what happened is that I slowed down. I started to think of ideas for the vintage fabrics that I hadn’t thought of before. I started thinking more about what I would truly enjoy wearing, not what would use up the fabric fastest. I also started to think more about selfless sewing – a baby quilt I had been meaning to start since August, baby clothes for my niece and nephews, Hannukah gifts for loved ones… All things I avoided because I felt they would slow me down in achieving my (selfish) goal. I feel less pressure to make all the things and to finish a certain number of projects in a week.
I also began to understand that, at least for myself, I don’t need to worry about stash guilt (honestly though I don’t think anyone should worry about stash guilt). I’ve seen so many people on Instagram who have closets full of fabric and share them with pride. Stashes that make you wonder how they’ll use it all before they grow old and die. Me? I have a stash I could count on one hand.
You would think my little tiny stash is a lovely, considered, minimalist stash. It isn’t considered, though, and it should be. I am beginning to be less impulsive in my fabric buying habits. I have had too many fabrics in my stash that I bought because I loved the fabric, and when I used them, I didn’t end up loving the garment. When I made my latest purchase, the one that broke my ban completely, I went through each fabric and told myself what pattern I would use it for and how I would style that garment. I asked myself what occasion I would wear that garment for and if it went with other clothes in my wardrobe. If I couldn’t answer all those questions, I deleted that fabric from my cart.
I’ve learned that for me, there’s nothing wrong with having a fabric stash if it has pieces I want to use. My previously impulsive buying habits, though, had been leaving me with a stash full of fabric I wasn’t excited about sewing. I do like the idea of keeping my stash small, so that I can keep tabs on what I have and allow ideas to simmer without feeling overwhelmed. Sketching those ideas out helps, too.
I always thought that having no stash meant no stash guilt, and that that’s what would make me happy. It turns out though, that just like with my wardrobe, I need a to have a curated stash. And if my whole wardrobe ultimately begins with my stash, then doesn’t my stash need to be just as intentional?
So I’d like to ask you, dear reader, do you feel stash guilt? Do you think of a garment first, and then buy the fabric, or vice versa? Do you purchase fabrics impulsively or with purpose? How do you fill your life and home with textiles you love? I truly believe there’s no shame in having a large stash or buying fabric impulsively – but ask yourself these questions, and ask yourself if you’re happiest building your stash this way or you wish you’d do it differently. After all, fabric is such a huge part of our sewing practice, and if your stash isn’t making you happy, it won’t make your sewing happy either!
I have recently been in a bit of a slump in terms of my pattern collection. I use the same few patterns over and over (the Christine Haynes Emery, the By Hand London Zeena) but had been holding off from buying any new indie patterns. I decided it was time to “invest” in some more modern patterns, and the True Bias Roscoe was one of them.
One of the reasons I hadn’t yet bought the Roscoe was because a) I had read some reviews in which sewists weren’t a fan of the large amount of ease/tent-like quality of the dress and b) instead of a zipper, the front neck has one of those tie-neck slit things that you see on dresses at the mall that are meant to hang open – which I didn’t like, and I didn’t think it would suit me tied closed. (Necklines with frills or dangly things just don’t do it for me).
I found two pattern hacks that convinced me I could make this dress work for me: Chloe Montrose’s, in which she put an elastic channel in at the waist, thus cinching the waist in in a very flattering way, and Carole Rankin’s. Carole had simply made the slit in the back instead of the front, making for a round neckline in the front. Both these hacks solved the issues I had with the pattern (and also convinced me how gorgeous the pattern can look).
On my version I moved the slit to the back of the neck, and made a button loop instead of having the long ties. I made this button loop by cutting a short piece of bias (about an inch wide), sewing it into tube, and turning it out and sewing it into the slit opening as instructed for the ties. I do think I could have made the loop a bit shorter as the opening gapes a bit – but I don’t mind so much since it’s in the back.
Another change I made in the neckline area was I lengthened the piece of bias binding that’s used to bind the neckline – probably by about 4 inches. This deepened the neckline, without my having to cut away from the actual neckline. I thought to do this because Carole’s version seemed to have quite a high neckline and I didn’t really want that look for this dress.
Then there was the waist band – I started by marking a line 1″ above the “lengthen/shorten” line on the pattern. I made a channel by cutting two long rectangles – 24″ and 26″ long – by 1″-plus-a-bit wide. I sewed these pieces together on both sides to create somewhat of a loop, and then pressed a scant 1/4″ in along each side. I pinned the strip/loop along the line I marked and topstitched along each edge all the way around the waist of the dress. Then I worked an 1/2″-wide elastic the length of my waist measurement all the way through (I seamripped one of the sides of the loop open to insert the elastic).
When I tried it on, it looked awful. Kind of 80s country chic but not in a cute way. It was very blousey. So I pulled out the elastic (I had to seam rip where the two ends were sewn together) and tried on the elastic over the dress. It looked much better when I brought the elastic up about 2 inches.
So I had to seam rip out the entire channel I had sewn in. I then used the little holes left from the stitching as a guideline, and pinned the channel about 2 inches above it (closer to my bust than my actual waist). I put the elastic back in, and the dress was much improved. When I measured it, the channel lands about 4 inches below the armscye. So I’ve taken note of that to use for marking next time.
Otherwise, I didn’t make changes to anything else. I do think in the future I’d like to lengthen the dress and eliminate the ruffle. I could also lengthen the sleeves to full-length, or put elastics in the cuffs. There are so many options for hacking this dress, that I think I will get a lot of bang for my buck. I now see why this pattern is so popular!
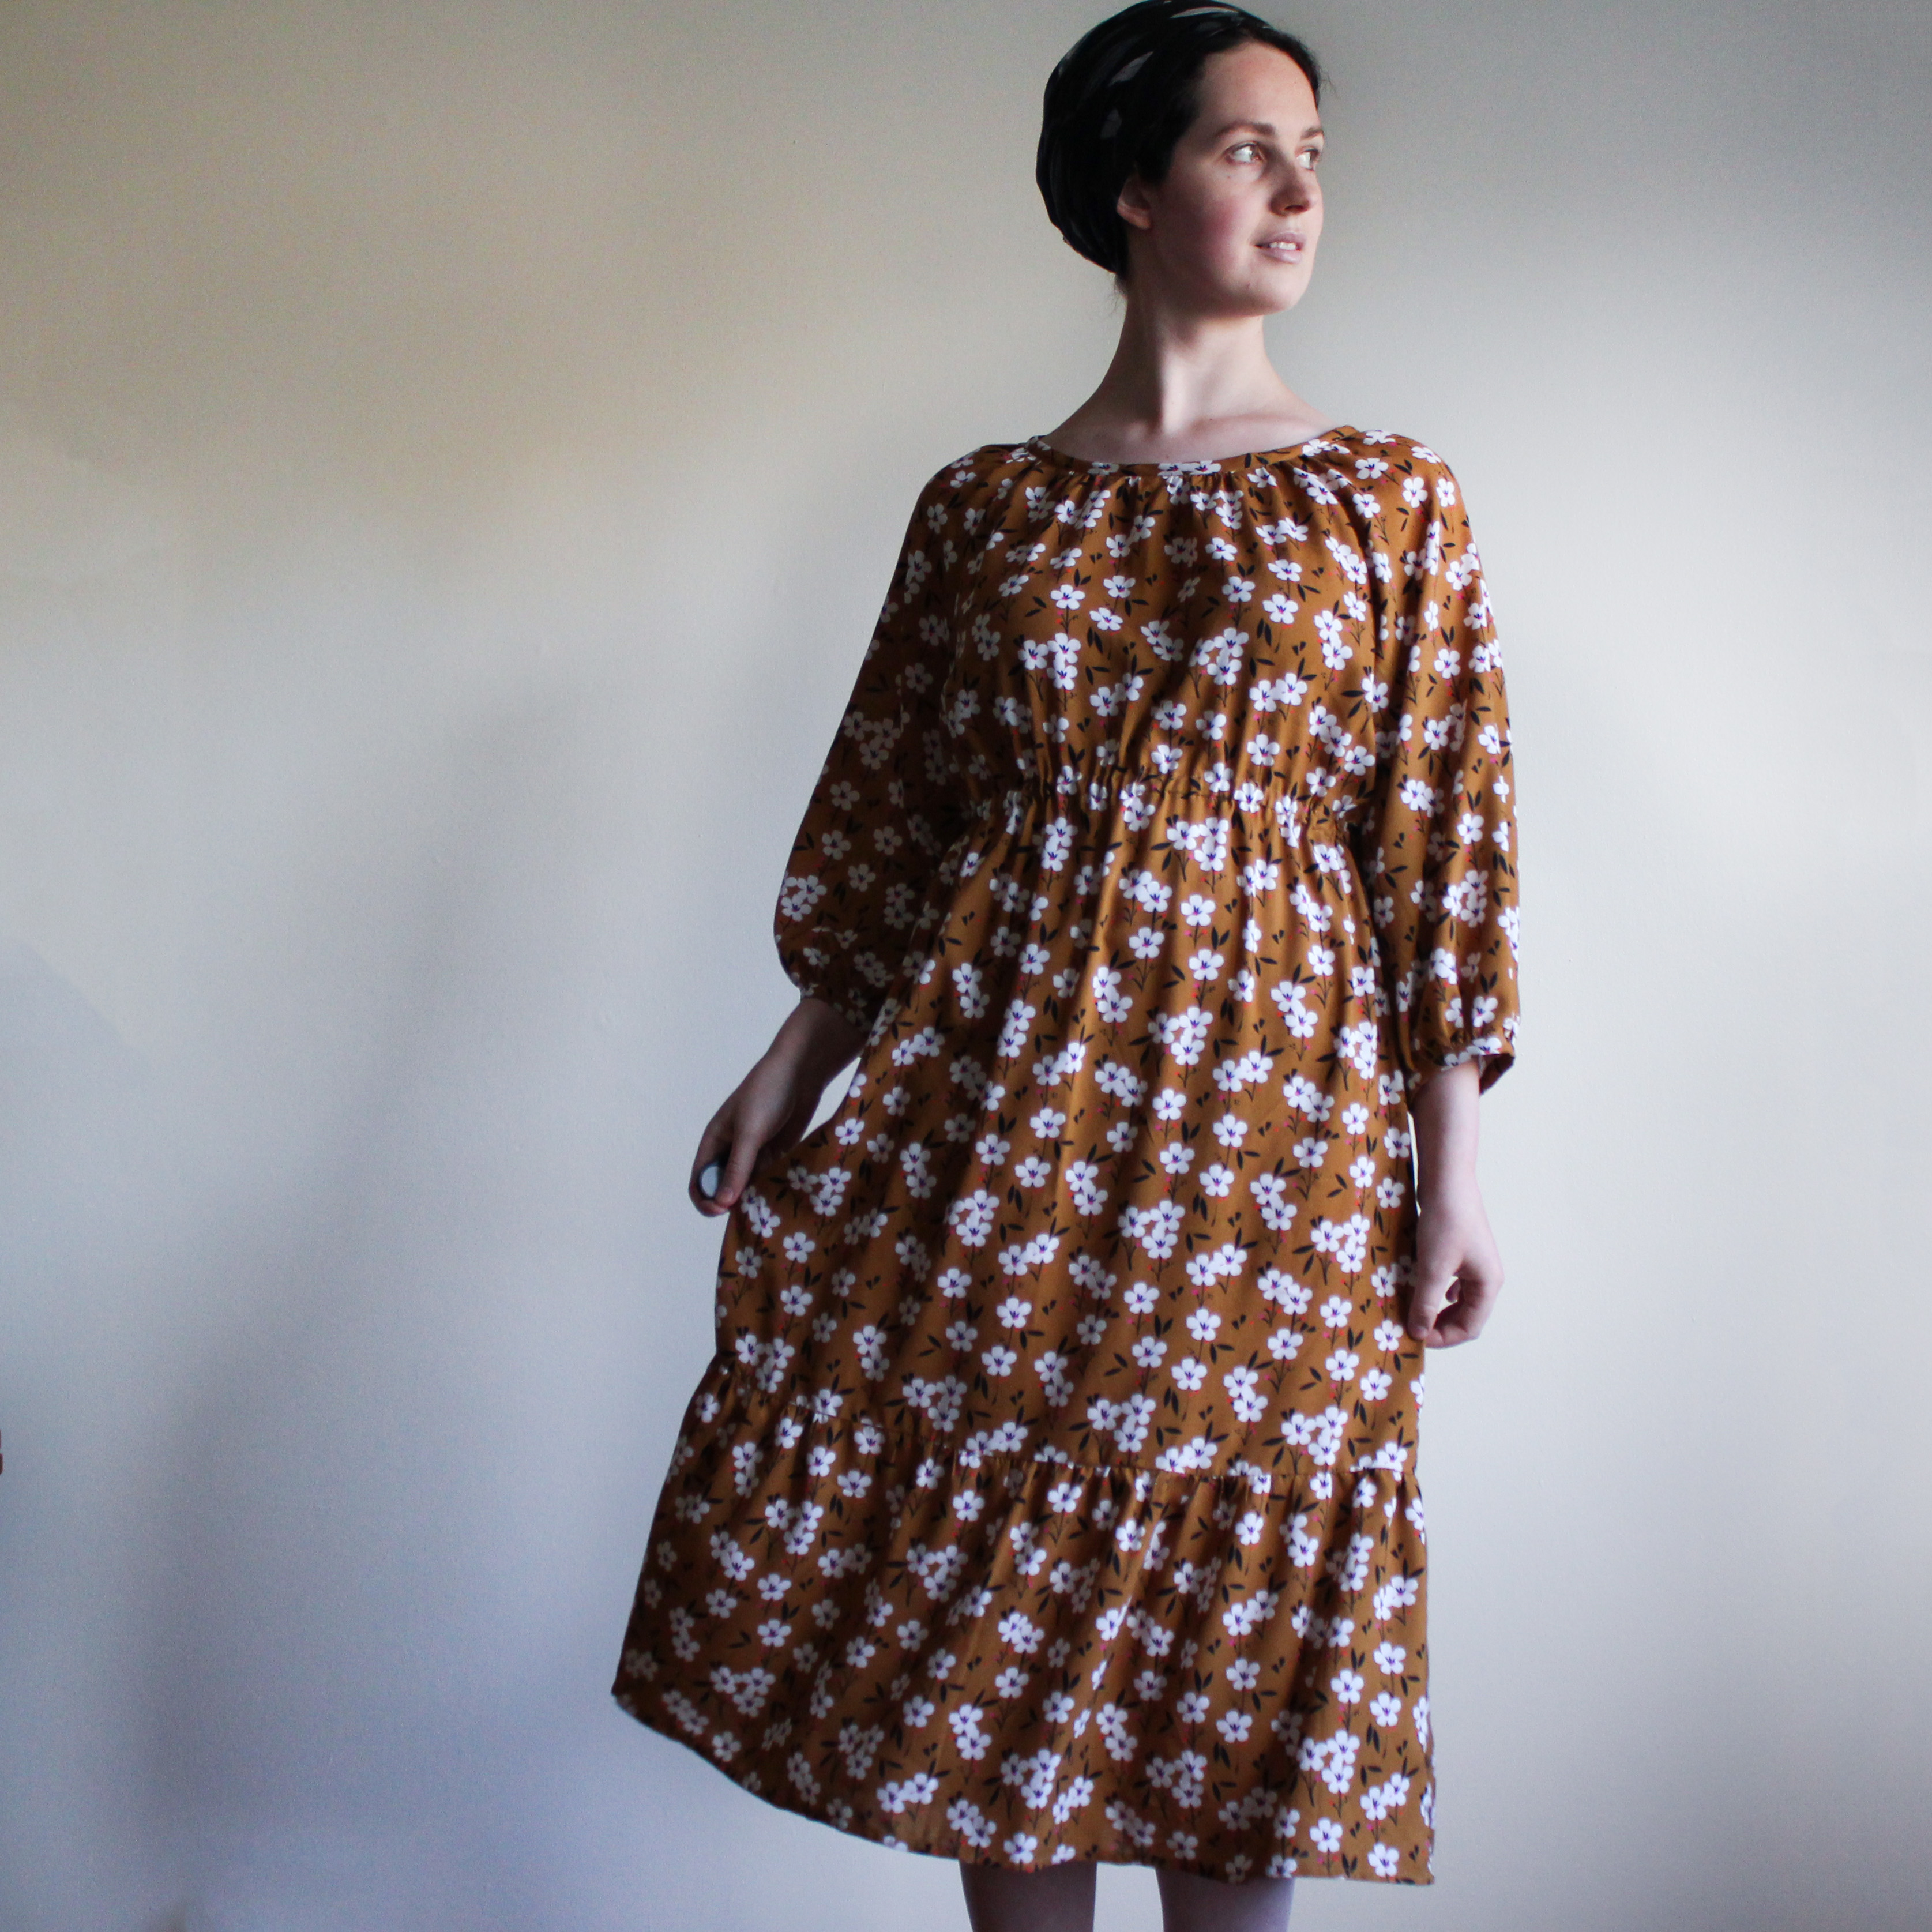
Every Fall I hit a bit of a sewing slump. I have to put my light summer projects aside and start making things for the cooler weather. Don’t get me wrong – I love dressing for Fall, but once we hit mid-September I’d much rather be knitting than sewing. While I’d love to fill my days with hours of knitting, I know it’s not possible, so I have to go on busying myself mostly with sewing.
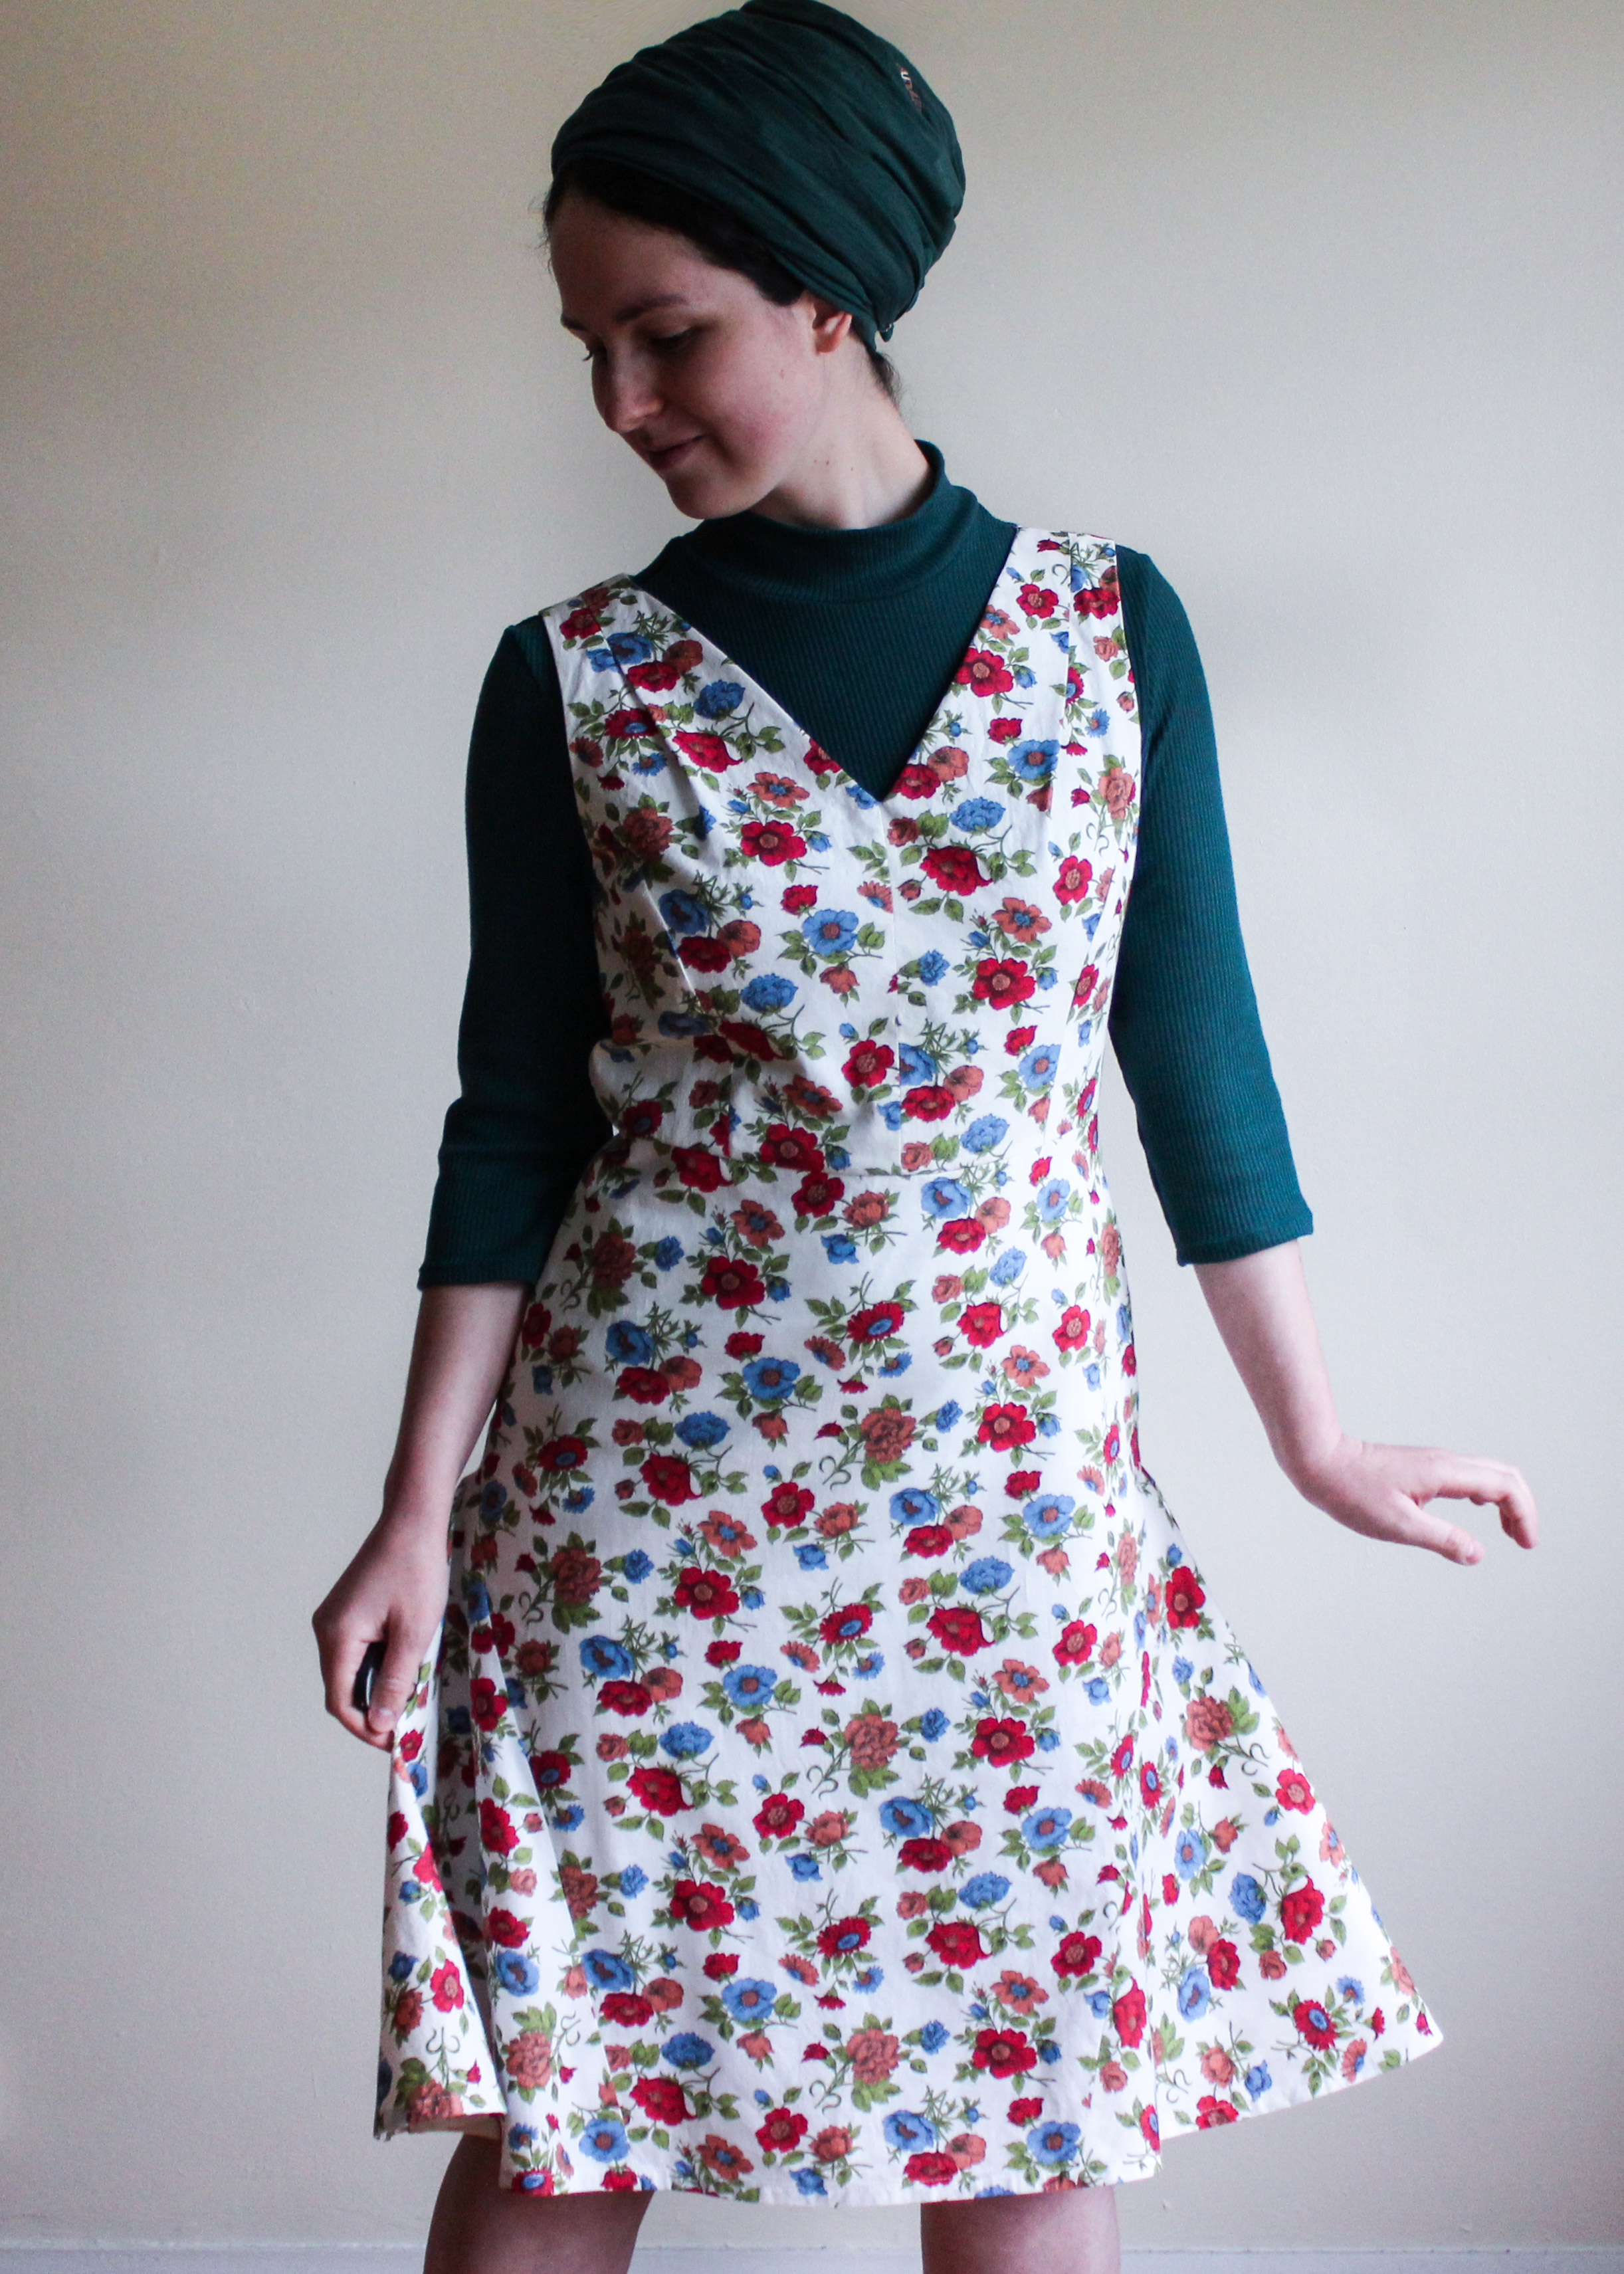
As you may or may not know, I’ve been quite into collecting and sewing with vintage fabrics as of late. I had a beautiful 1950s cotton in my stash that I got from an Instagram auction (@shopmakethislook, who auctions off amazing vintage garment fabric about once a week), but while it was light and more of a summer-weight cotton, the print really screamed fall to me. The background was white, though, and I don’t love white right near my face (with the exception of my wedding dress). I had a gut feeling it would work best as a layering piece, or, if I was lazy, a skirt – but not as a dress with sleeves.
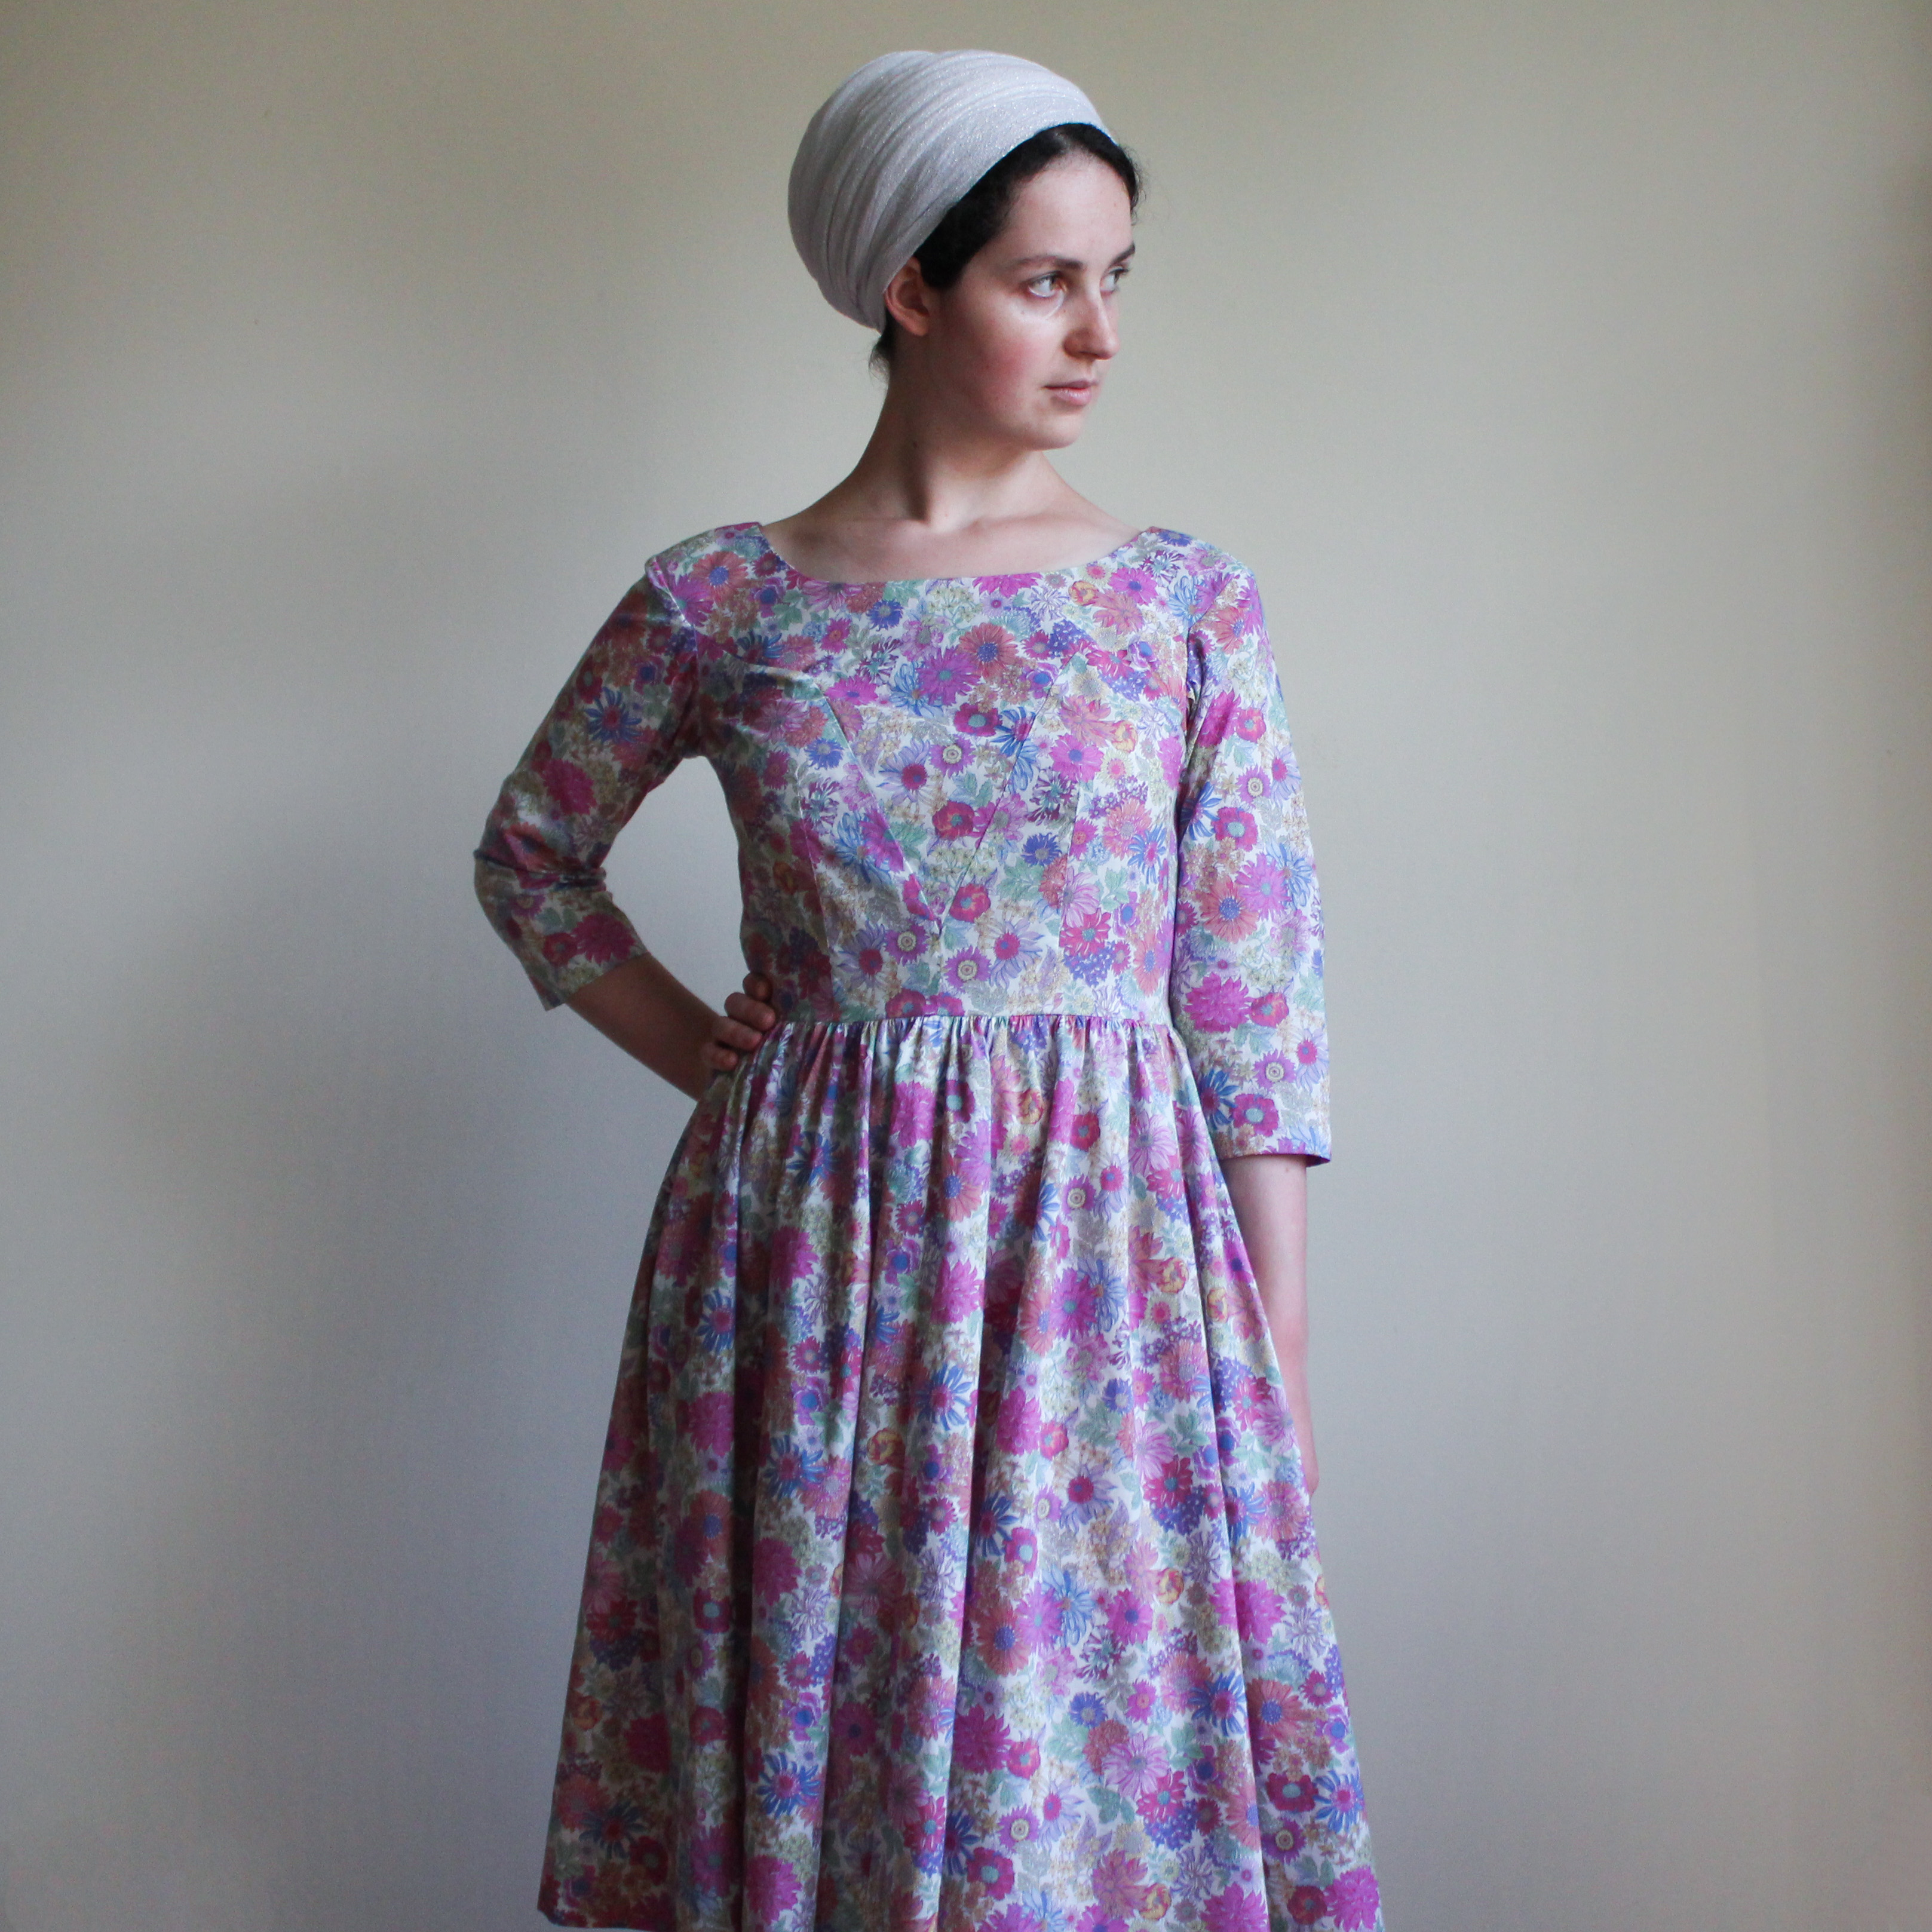
I’d been noticing that there have been a lot of people on Instagram making pinafores lately – many of them the more overalls-style ones, some of them like dresses (or as some people call them, “jumpers”). I really didn’t know if it was a look I could pull off. It was reminiscent of my school uniform in third grade, and I’ve been anti-layering dresses over long-sleeved shirts for a long time now (since I learned how to set-in sleeves) but I wanted to give the look a go. I spent a long time researching patterns, as I felt there were very few styles that would actually suit me. I wanted to go for the kinds of pinafore dresses I saw in vintage patterns from the 40s and 60s – the ones they showed sewn in plaid on the envelope and worn over a fitted turtleneck sweater.
I’ve been telling myself that I’ll try to work more with patterns I already have, and I actually started digging through my small collection of Burda magazines to see if there had been something I missed. I’ve heard of people staying away from them due to their scary pattern layouts that need to be traced. But I’d tried Japanese pattern books, which are pretty similar in terms of layout, and I figured I could handle it if I found the right pattern.
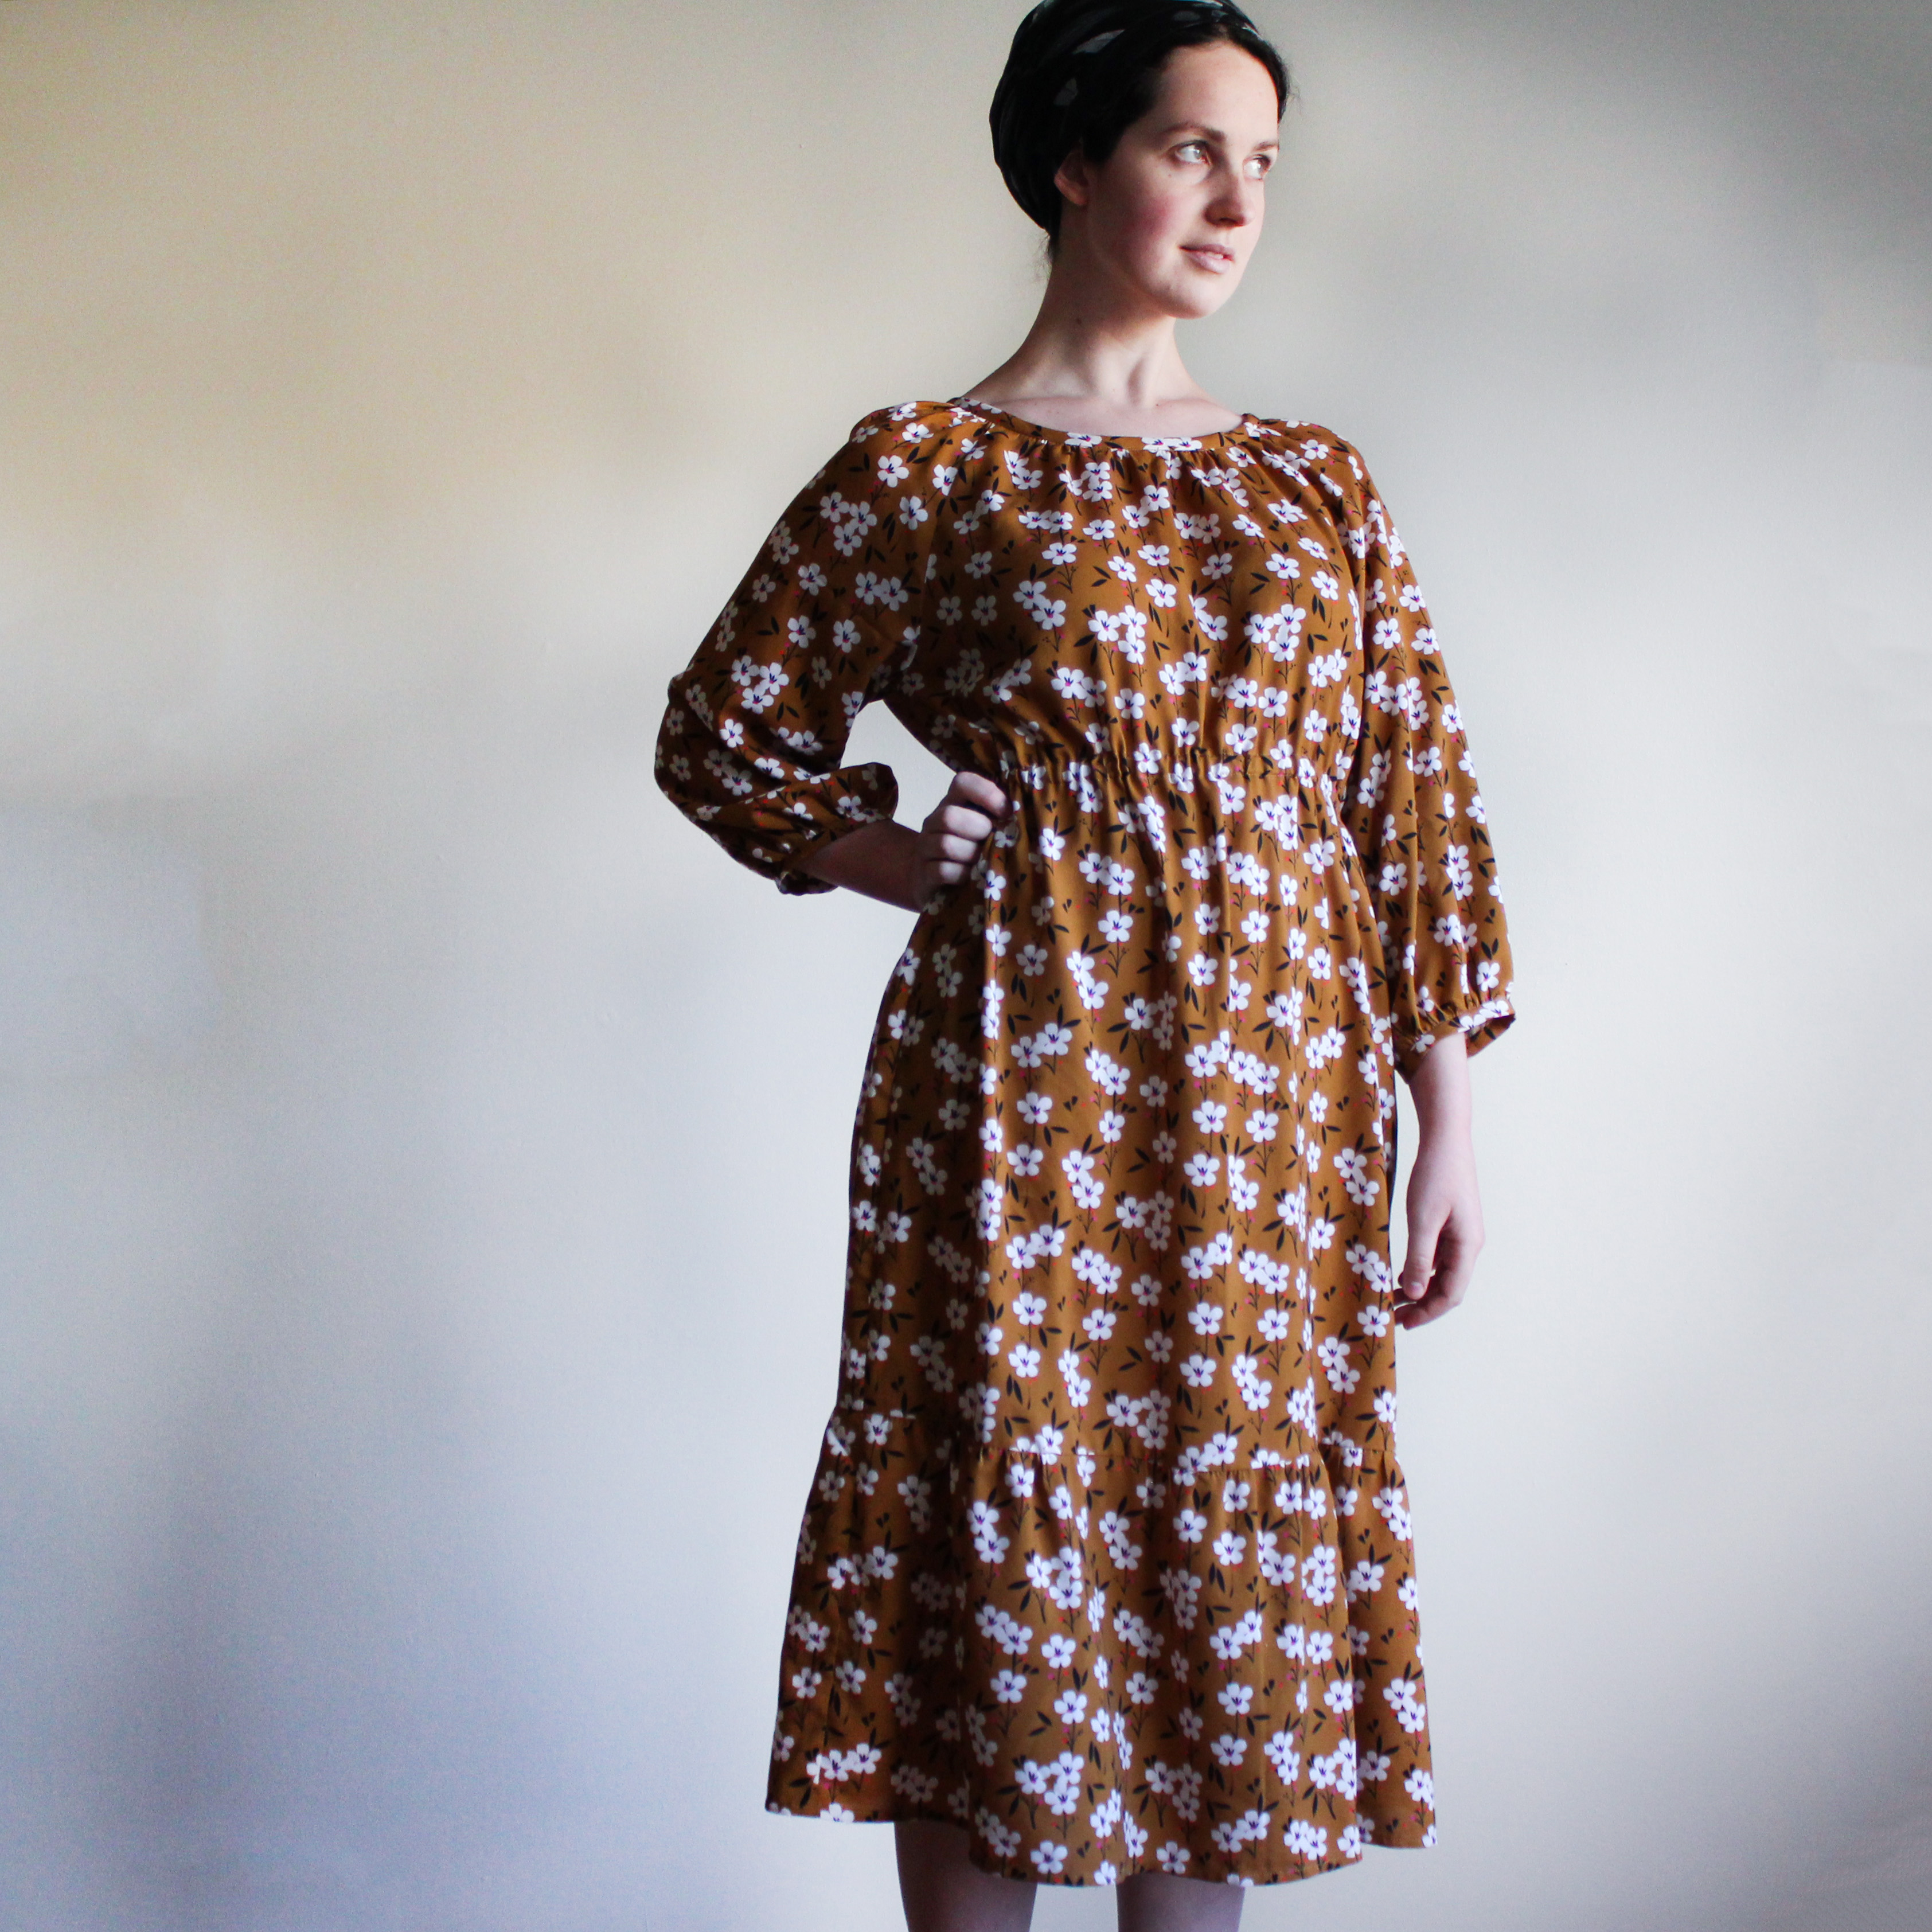
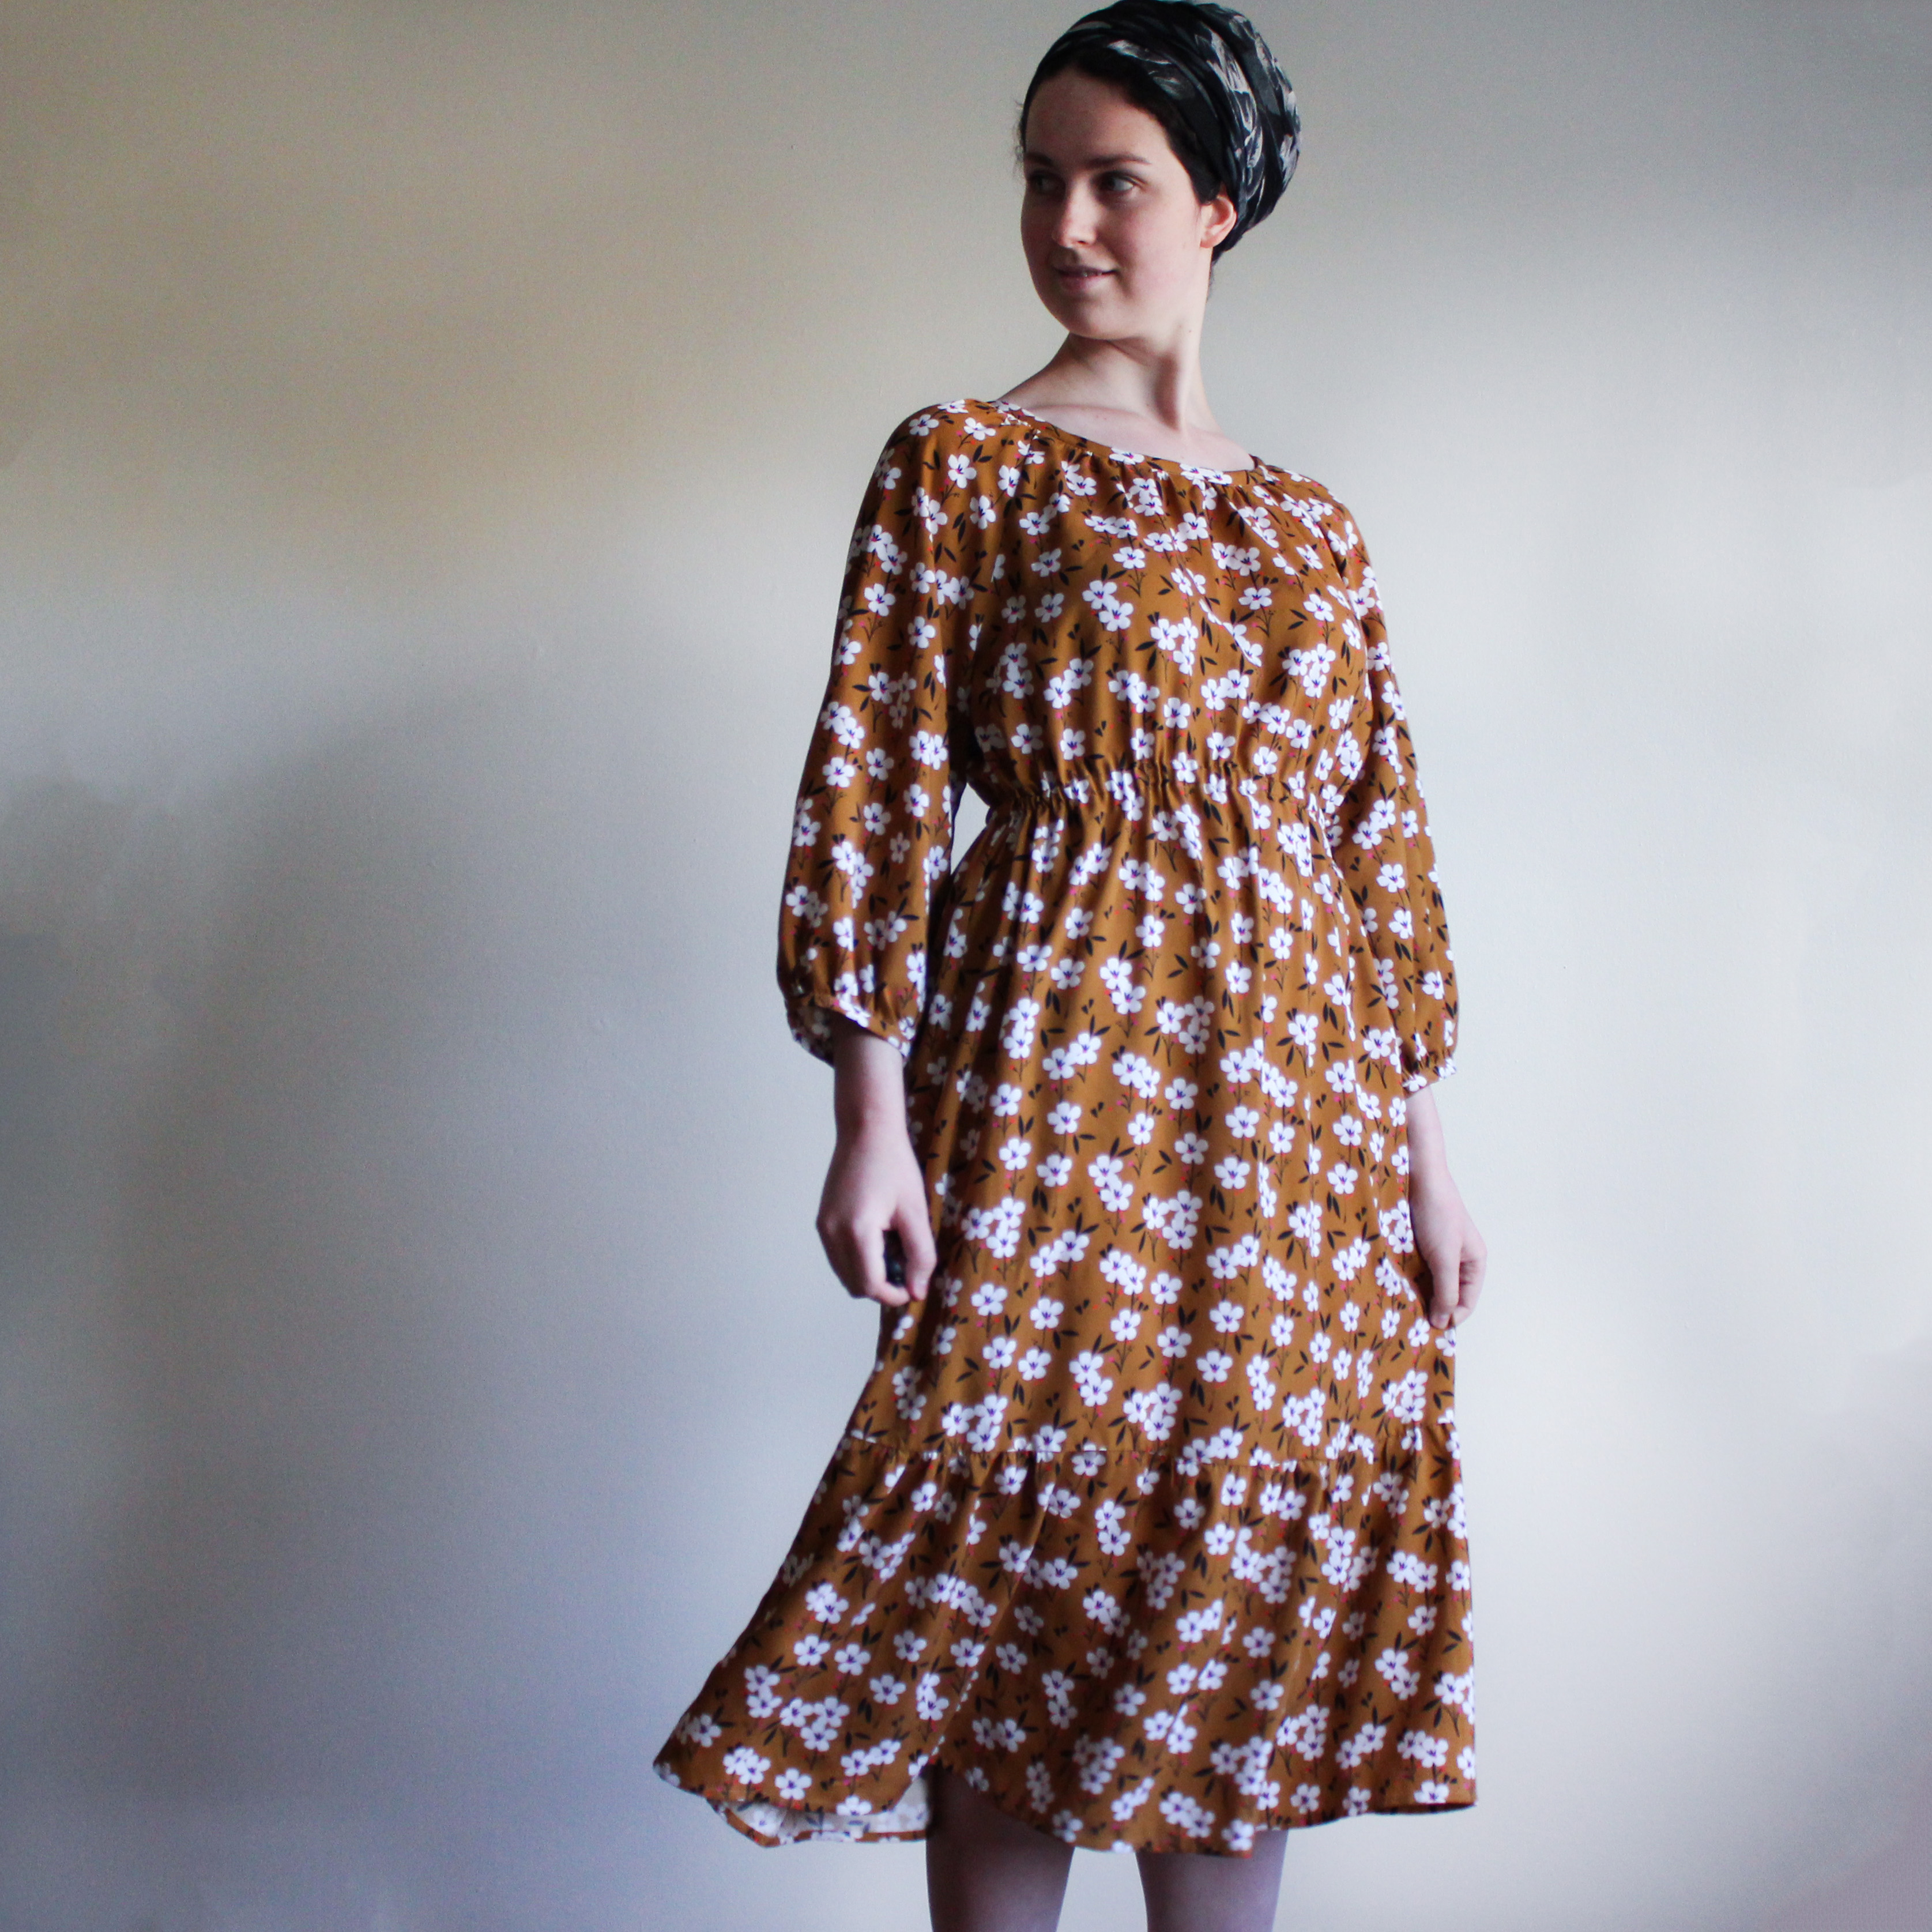
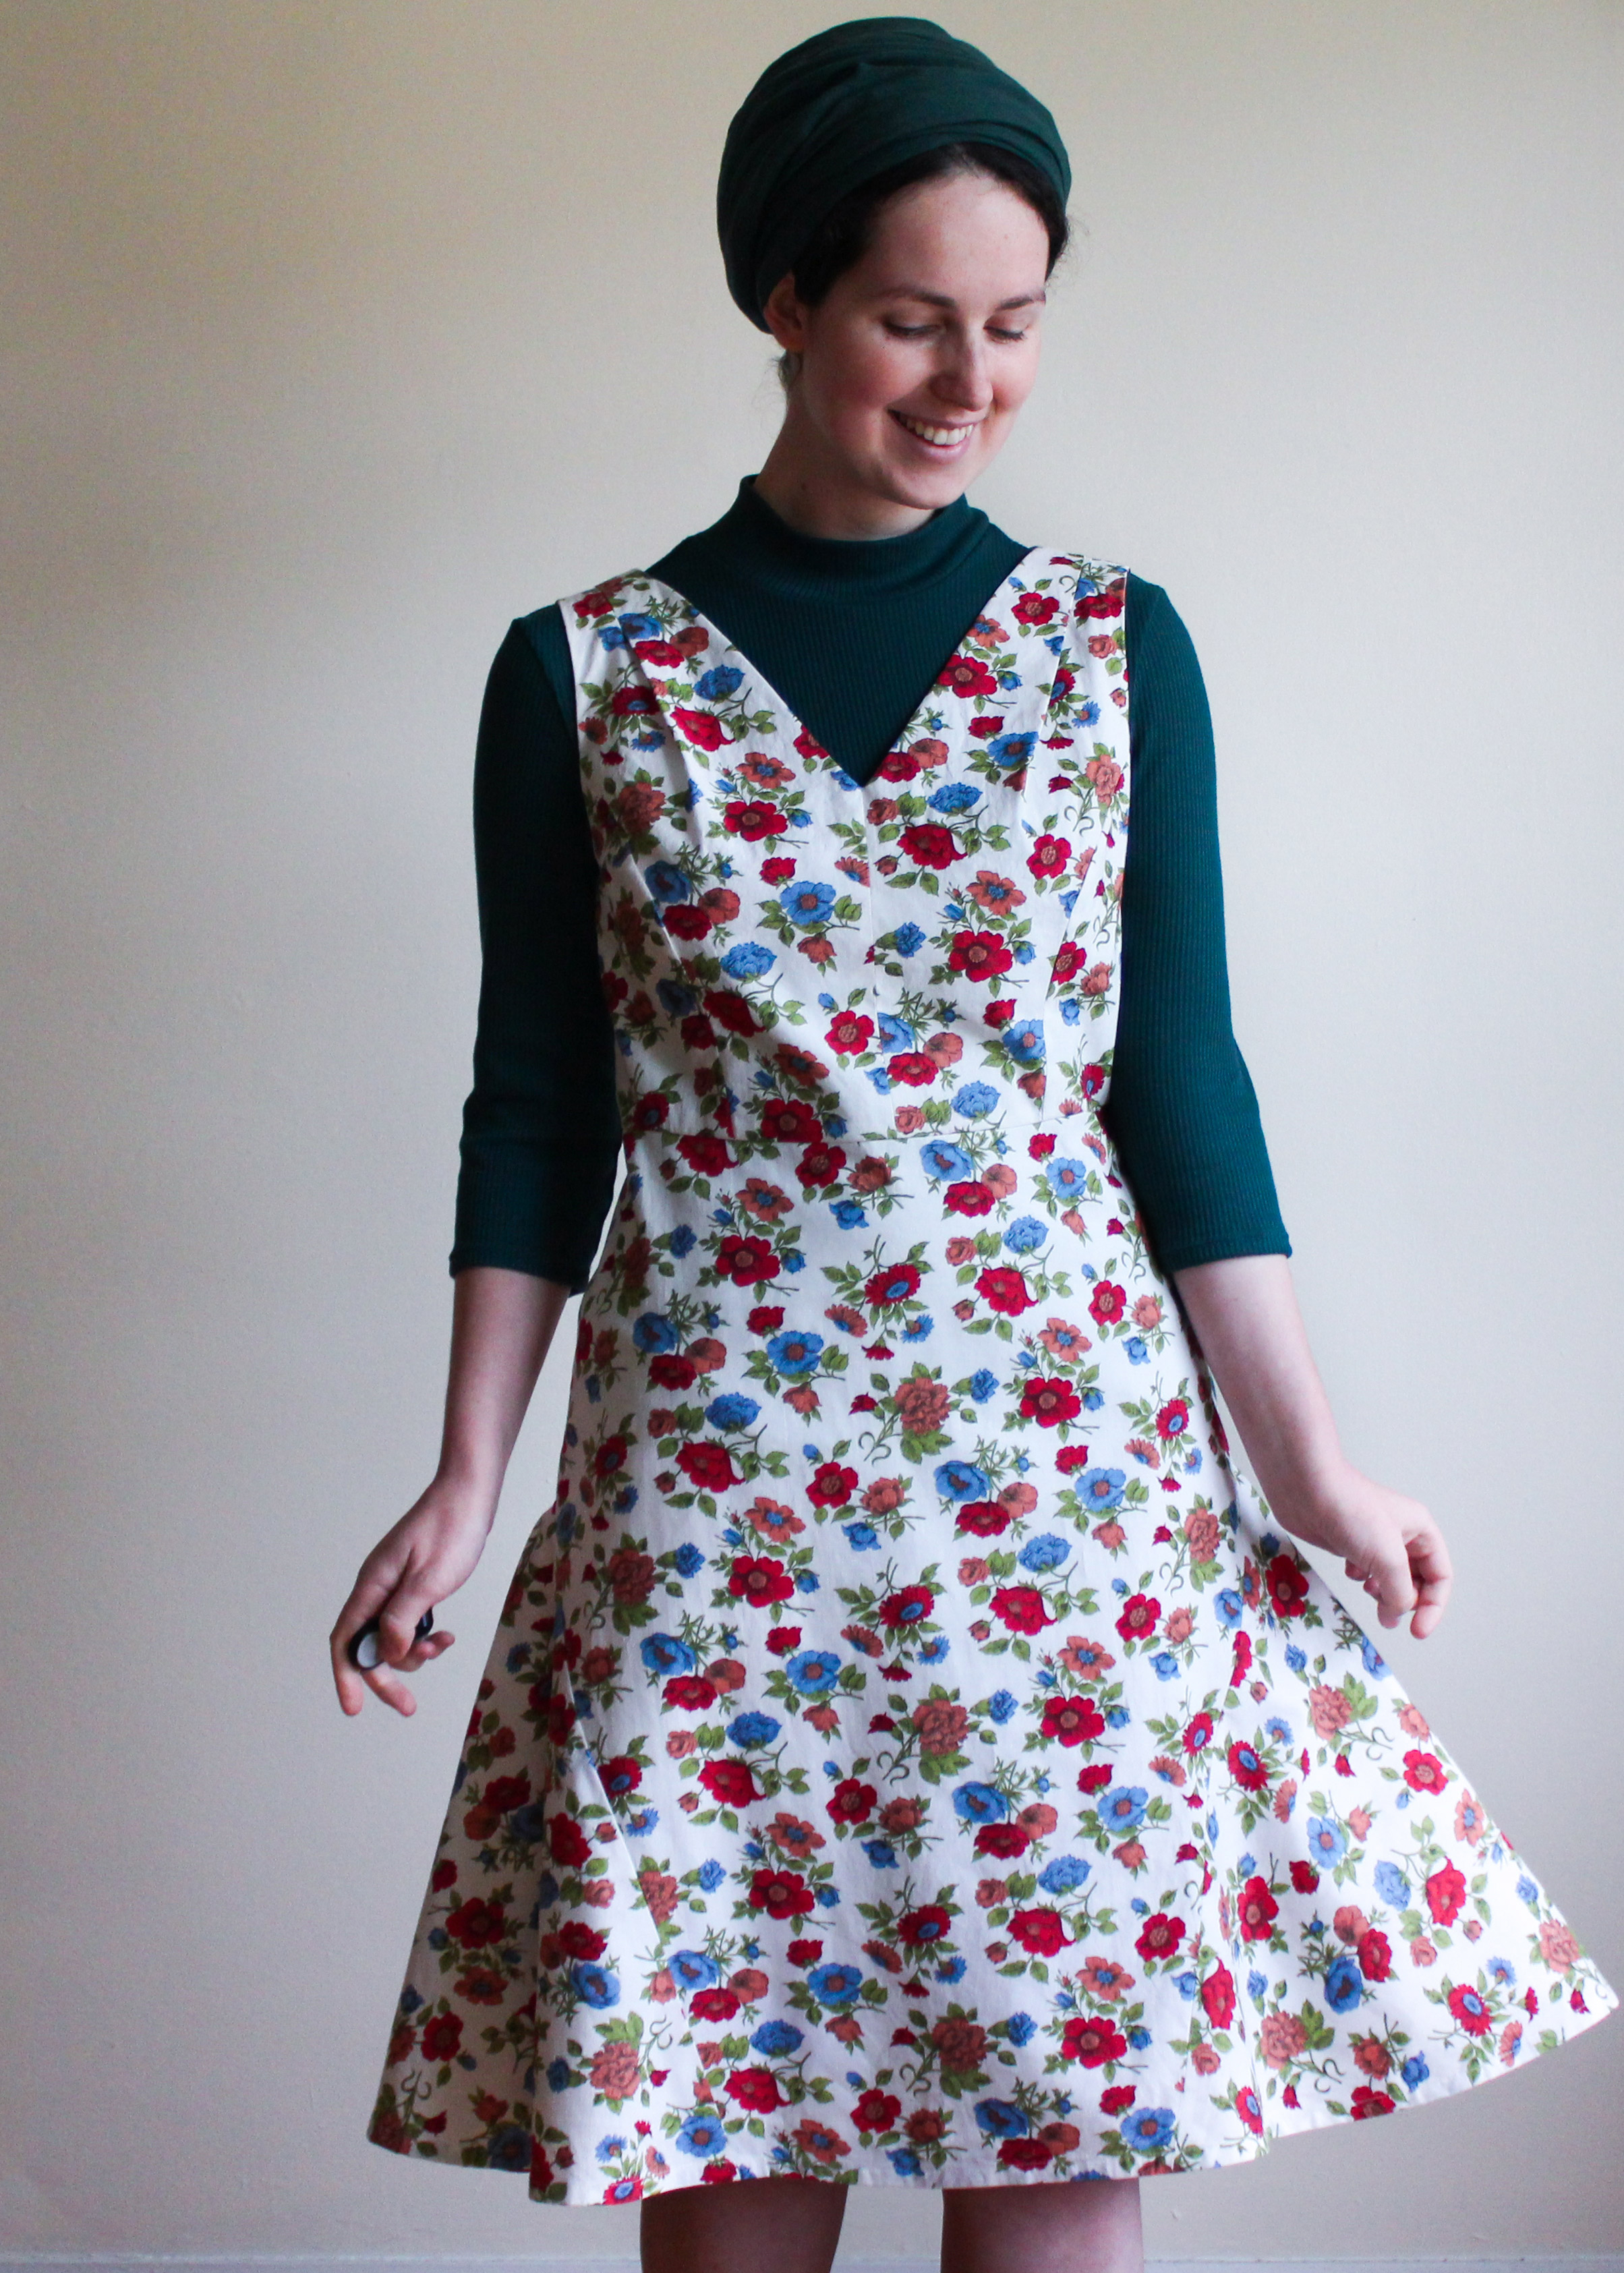
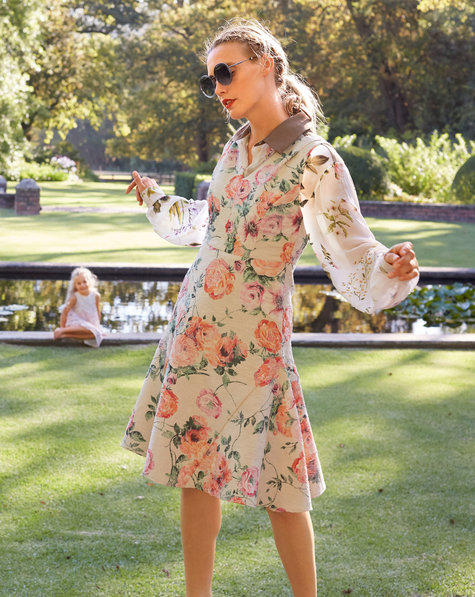
I came across this pattern, from the May 2017 issue, and I realized it could probably work perfectly. After all, they had already styled it layered over a top. It was something I had completely passed by the first several times I flipped through the magazine, because I always disregard sleeveless dresses.
Anyways, I was pretty pleased with myself for finding it. I got to tracing – which, I’ll admit, was a bit more of an endeavour than I had expected. The lines really do a lot of criss-crossing (as did my eyes…) and I had a lot of trouble reading the pattern pieces and missed a few grainlines and notches. Luckily, it was only 6 pieces (including a bodice lining piece) so I survived ok.
I made a muslin, and found that the pieces all needed to be made longer. Burda drafts for 5’4″ women, and I’m 5’9″, so I added 3/4″ to all the bodice pieces and 1 1/2″ to all the skirt pieces to get everything hitting the right places. Otherwise, I was really really impressed with the fit right off the bat. I did also have to add a bit to the back width due to my prominent shoulder blades.
I had been warned about instructions in Burda magazines – and for good reason. They were awful. I pretty much ignored them and used my own knowledge of constructing a dress. The godets in the skirt were very tricky to sew in but intuitive enough to figure out. I do wish the pattern came with more notches as I had trouble matching things up. The hemlines were kind of wonky but I hung the dress and evened them out, so you can’t tell they gave me so many issues!
I also fully lined the dress, so it’ll be easy to slide on over sweaters and tights. I used instructions from my copy of Gertie’s Ultimate Dress Book to figure out lining a sleeveless dress (which I found very satisfying to do).
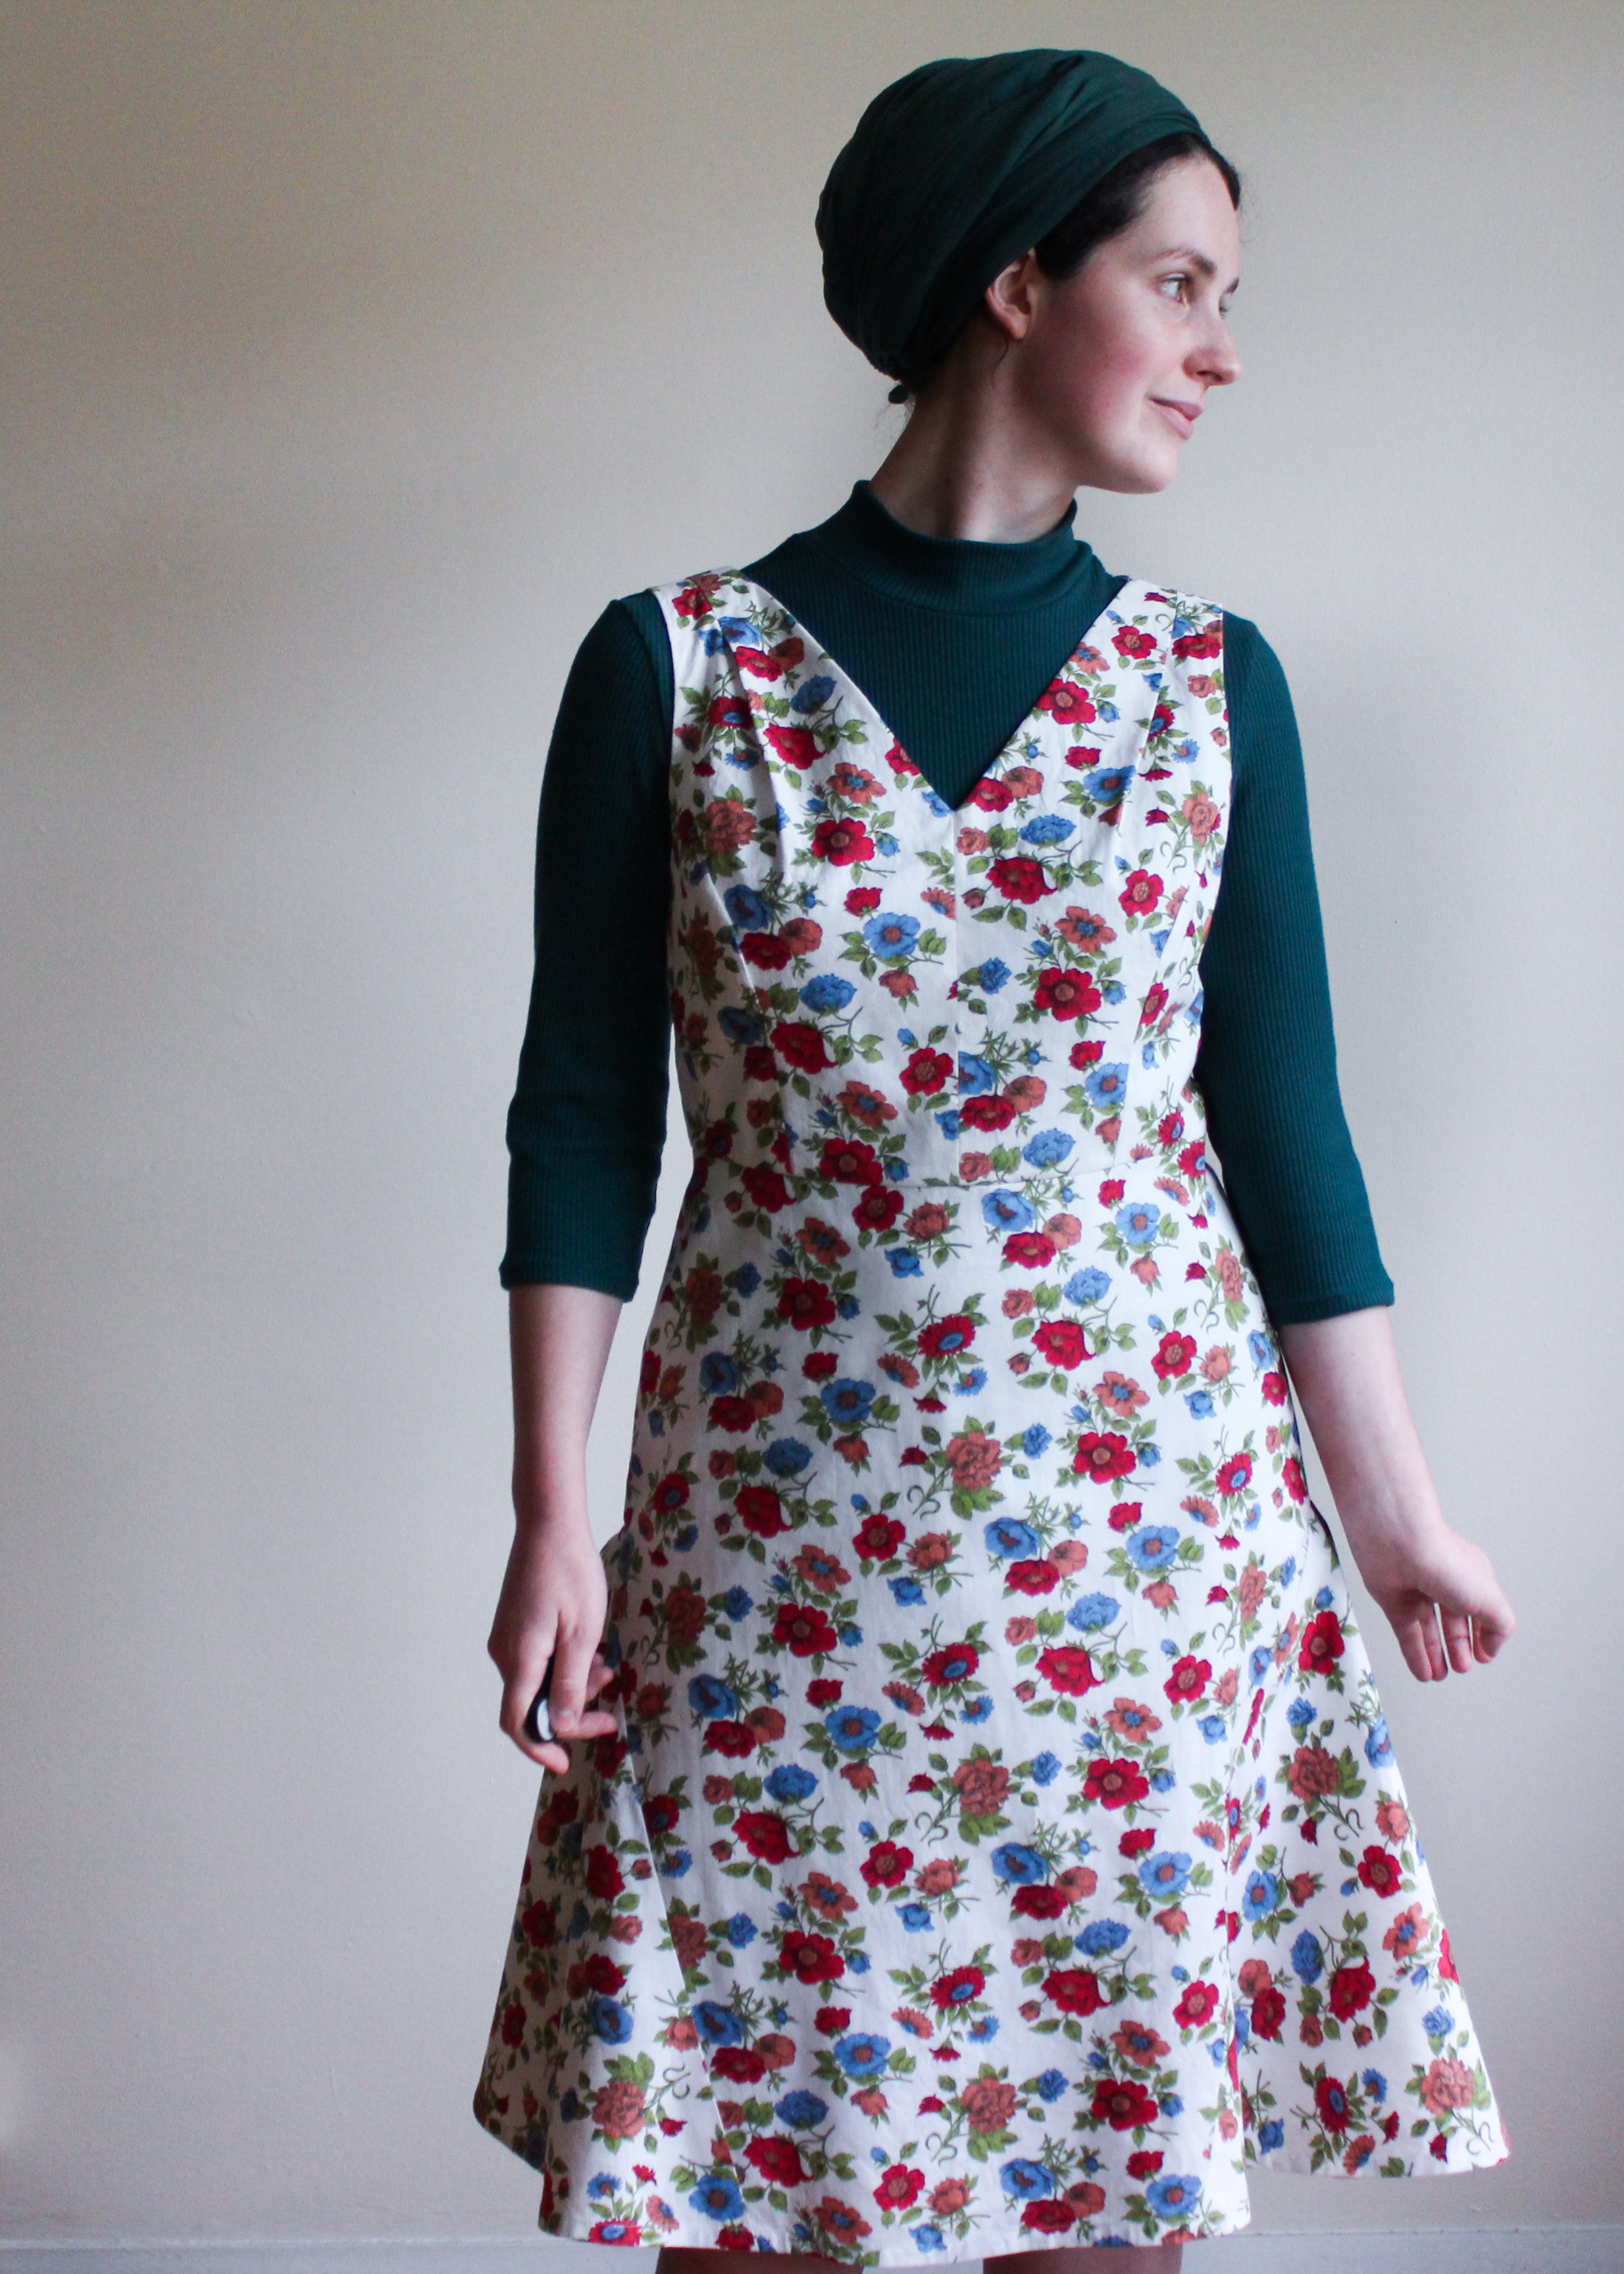
I really like all the little details in this dress – the princess seams, the v-neck and back, the pleats at the shoulder, and even those frustrating godets. It’s a different shape and style than what I see in the sewing scene typically, which I like! It definitely has me feeling that I should try Burda patterns again more in the future.
Finally, I sewed a tried-and-true Tilly and the Buttons Freya sweater to go underneath (after my plan to buy RTW turtlenecks completely backfired). I’m not sure how I feel about the forest green underneath, so I think I’ll have to make more sweaters to go with it.
I’m still not sure how I feel about pinafore dresses, but there is something nice about layering this time of year. While I hope it gets some wear, this pinafore experiment was enough to get me out of my slump and excited for more Fall sewing.
Last night was the Toronto Fancy Sewcial, an event for Toronto sewing folk to gather in their favourite frocks (or other handmade garments) and mingle while enjoying wine and cheese. I’ve heard of such events (often called “Frocktails”) happening in Melbourne, Seattle, London, and Ottawa, and was always jealous of those who got to attend.
So of course, when I heard about the one taking place in Toronto, I bought tickets as soon as they went on sale. Also, I knew I would just have to make a new dress for the occasion.
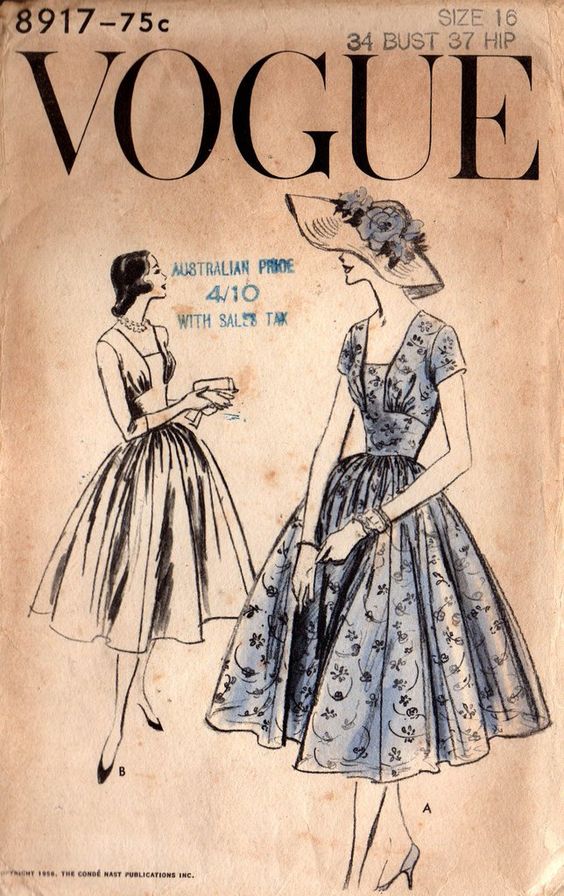
My original plan was to use a rare vintage Vogue pattern I had bought last year (for a pretty penny), with a beautiful Nani iro sateen print I had been eyeing for some years now. I began with making a muslin of the Vogue pattern, then another, then another, until I had reached about five iterations. I grew frustrated, but it was such a gorgeous pattern that I really wanted to stick with it. The main issue is that the bust part kept slouching down – I think it needed some boning channels, but vintage patterns tend to assume you know how to do things, and I think this step was simply omitted in the instructions. I had lost patience, so I packed the pattern away. I figured it would at least be a wonderful collectors’ item to have.
This is me trying not to look too sad about a pattern that didn’t work 😦
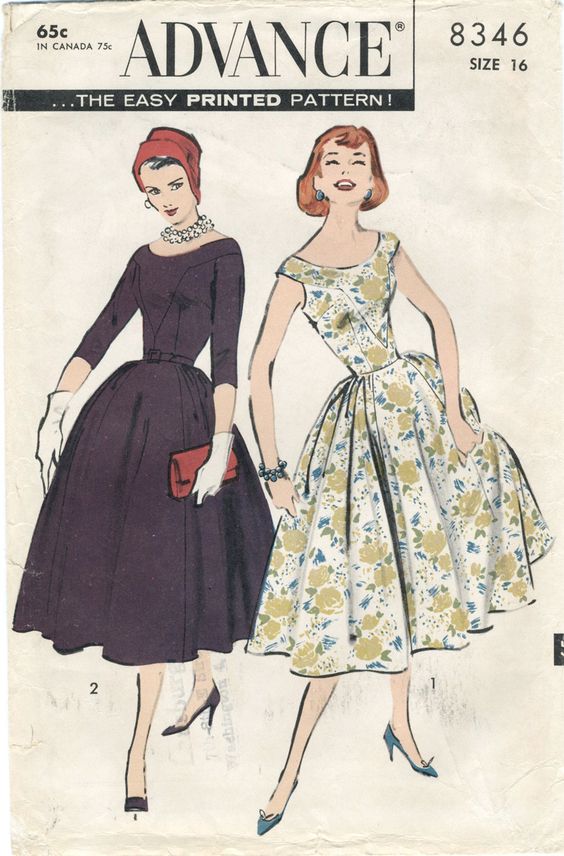
I then considered a vintage pattern I had made last year, but given up on due to too many fit issues. I had managed to scale it down to fit me in the bodice, but the sleeves were large, baggy, and twisted around my arm and under my armpit. Extremely unflattering. I had spent a lot of time adjusting that one, and since it had been a year, I was willing to come back to it with fresh eyes, knowing that the bodice was good to go.
That pattern is the Advance 8346.
I took out my sleeve block (which I know fits me as well as a sleeve is going to fit me), and compared it to the pattern piece. The pattern piece was huge in comparison! The reason I had been scared away from altering it, though, is because the sleeve cap is cut off and set into somewhat of a drop-shoulder (vintage patterns can be tricky to fit when the pattern pieces don’t match the standard ones you’re used to! At the same time this is what appeals to me about vintage patterns). Then I realized – the sleeve really wasn’t any different other than the top of the cap being cut off. I tried doing it with my sleeve block. It was much less baggy, but still twisted. I realized this pattern needed the adjustment all my patterns need.
A forward shoulder adjustment!
This is a really simple adjustment, and I did it to the shoulders on the yoke of the bodice. It worked! The sleeves were much less twisted. I was so pleased, and it was extremely satisfying to watch the adjustment work its magic. This is why sewing is so amazing! I also adjusted the pattern to have a zipper in the back rather than the side, since I have trouble getting dresses over my head otherwise.
So I used the beautiful floral Nani iro to make the Advance 8346 instead. I had 4 metres, and managed to fit all the pieces in even though the pattern called for about 6 yards. This involved cutting the pieces on one layer of fabric, and all the maneuvering took a full day. But in the end, I had a version of the Advance 8346 that I loved way more than my first attempt. And aside from a day of cutting, it didn’t take that long.
A much happier dress-modelling session
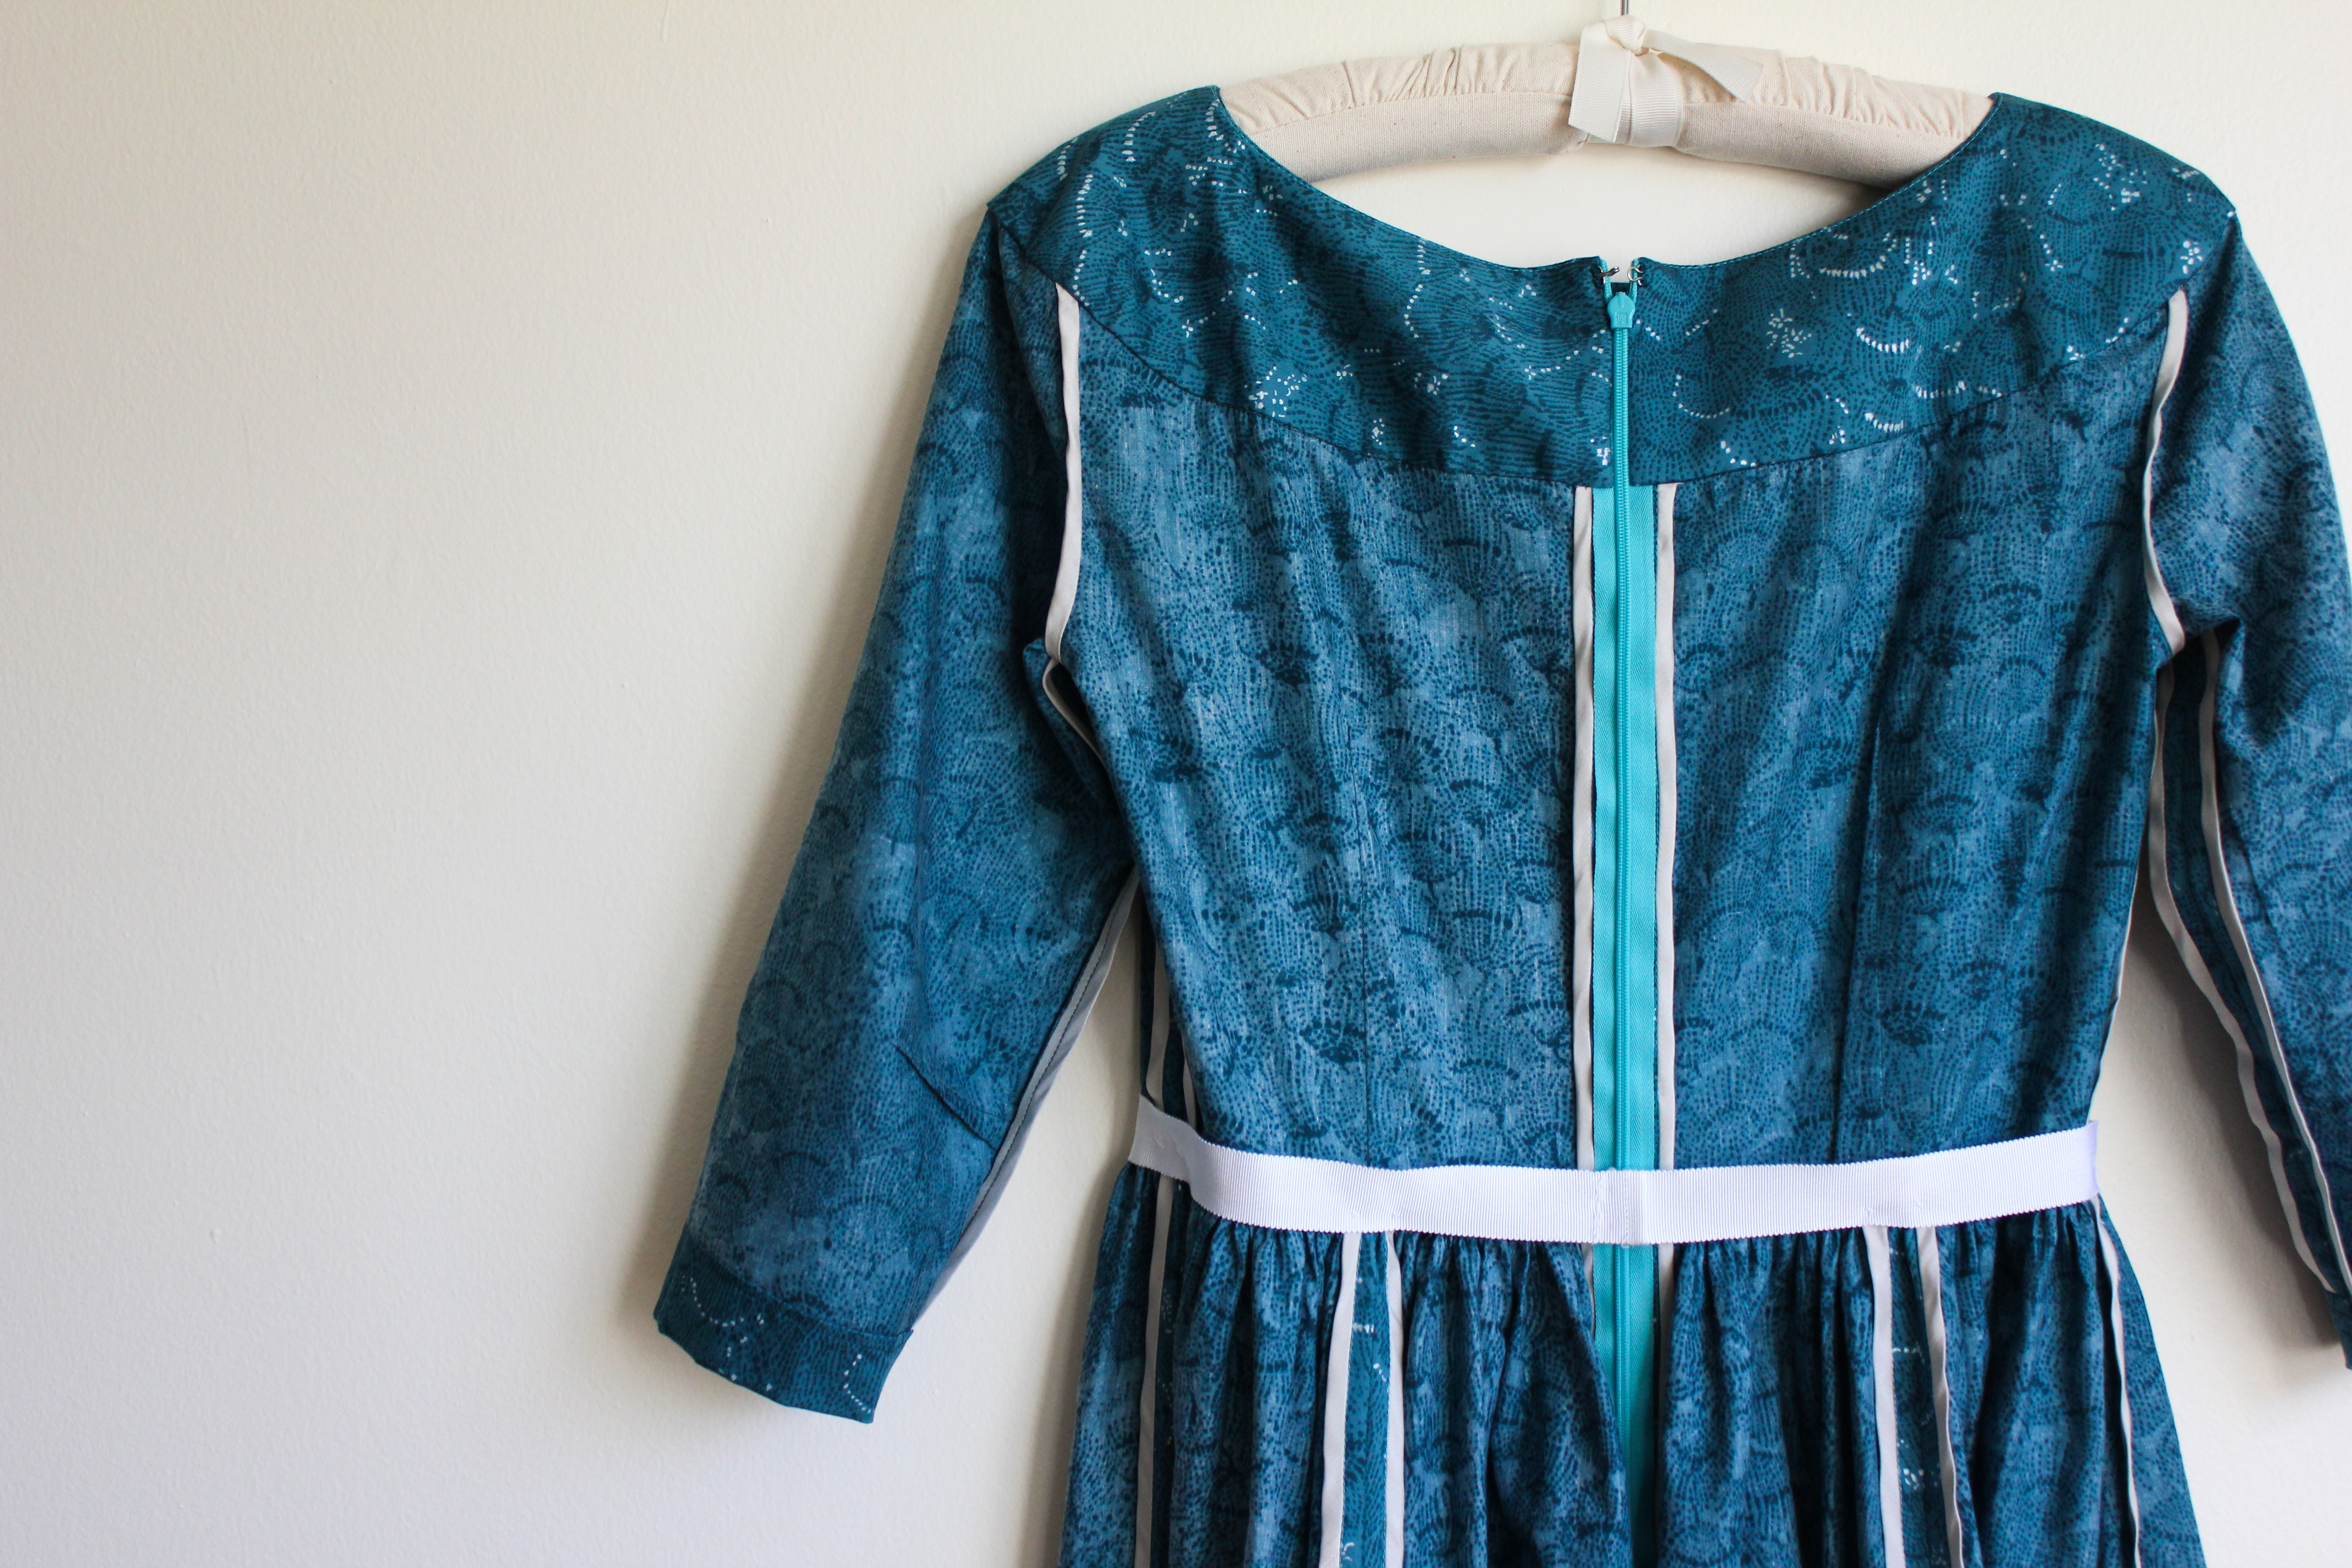
When I finished it though, I saw another Nani iro sateen at EweKnit, and I decided I needed to make another version in a teal version. This time I got 5.5 yards of fabric, and I had plenty for cutting out my dress. I had bought this AMAZING pre-cut silk bias tape, and I took the time to use it to finish all the seams using a Hong Kong bias finish. It took a while, I’ll admit, and it was kind of tedious. But it looked gorgeous in the end, and the neutral grey of the bias picks up the silver touches in the fabric so nicely.
Then I hand-stitched the entire gigantic skirt hem, and it was pretty on the outside and the inside. I also added a waist-stay, which helps support the skirt and keep the waistline snug around my waist.
I had given up on this pattern a year ago, but the envelope art was so beautiful and I was so disappointed it hadn’t worked out. I’m so glad I gave it another chance and came back to it, because it is now one of my favourite and most unique patterns. I wore it to the Fancy Sewcial and got lots of compliments, and everyone appreciated the beauty of the fancy yoke seams.
Hopefully, I can come back to my rare vintage Vogue in the future and make it work just as well!
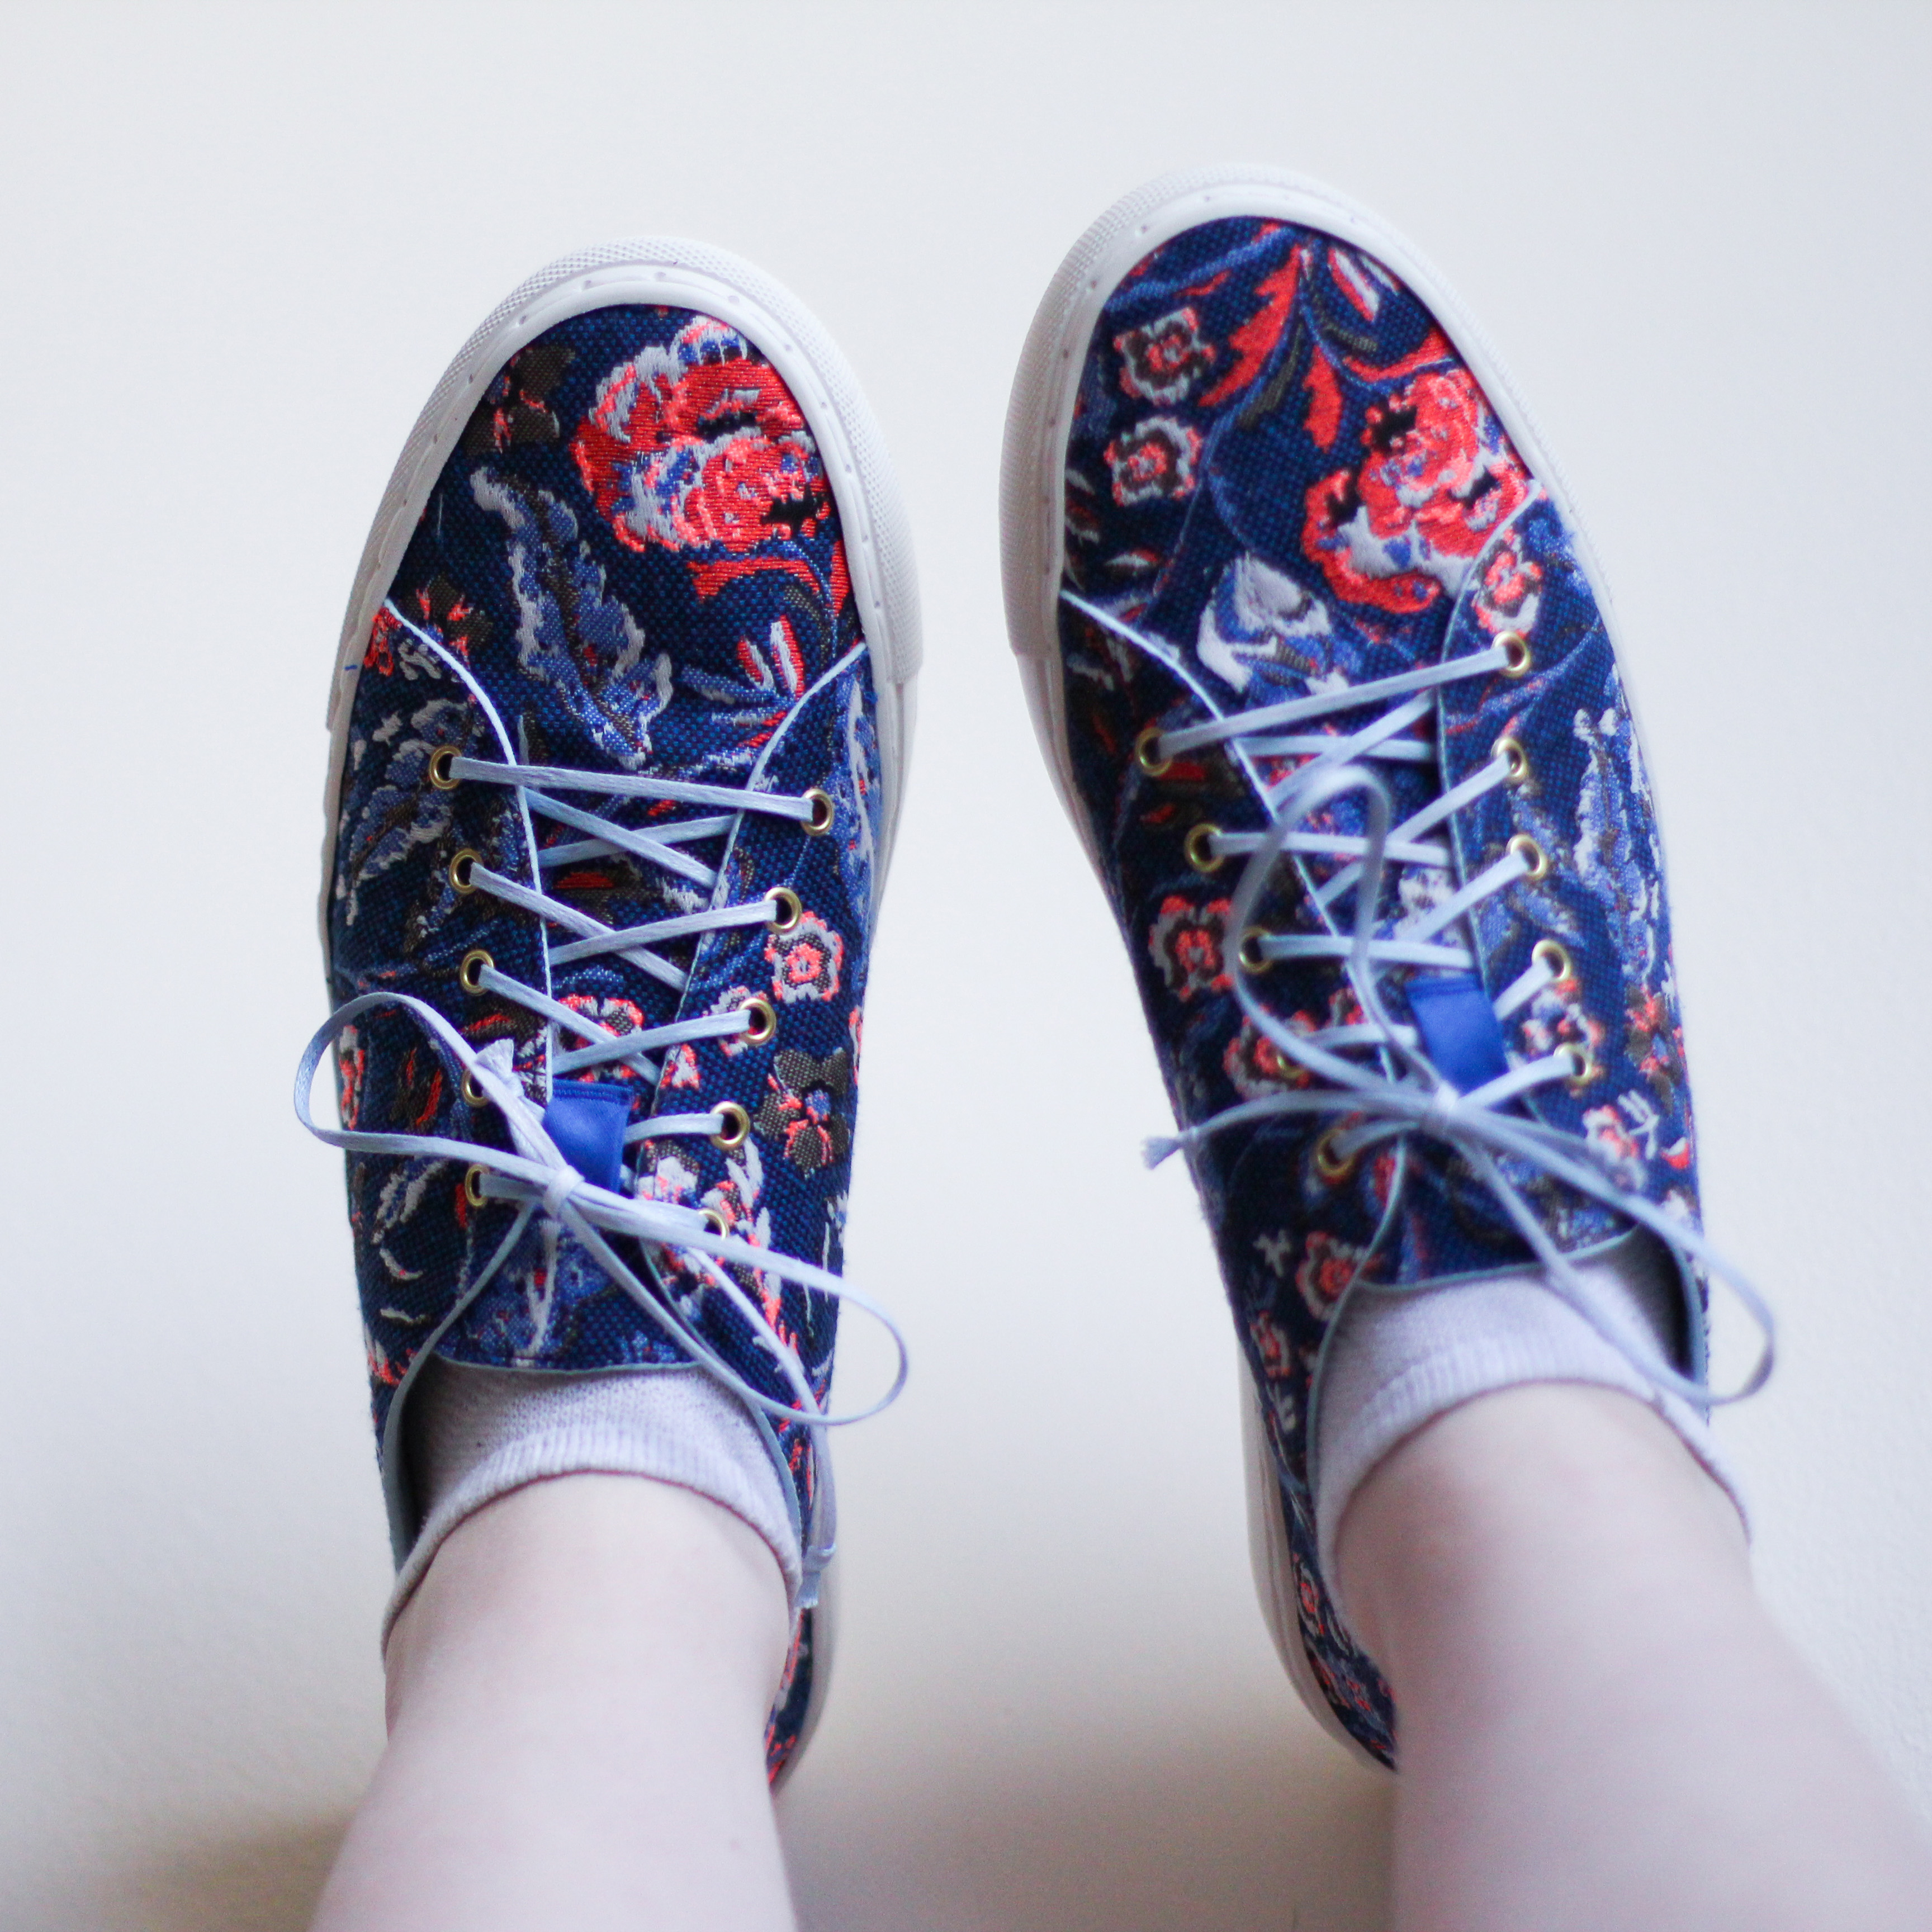
If you can recall, I tried my hand at making sneakers using SneakerKit last summer, but I made the (beautiful) mistake of attempting to cross-stitch leather. I also wasn’t totally pleased with the quality of the kit. Since then, though, the sneaker-making bug came back, and SneakerKit changed the insoles that were giving us trouble. SneakerKit is based in the Netherlands, and since international shipping is pricey, I thought our trip to Amsterdam would be a great chance to get another pair.
I follow SneakerKit on Instagram, and for a long time I’ve been seeing them share sneakers using fabric and a product called Decovil. Considering how much I love fabric, the idea of using fabric to make shoes really excited me. I had never heard of this Decovil stuff before (though I assumed it was a sturdy fusible interfacing – which it is), so I looked for it in Amsterdam and found it quite easily. The idea to use Decovil with SneakerKit isn’t my own, and I figured out a lot of it from @tinesews on Instagram, who has a highlighted story (in German) showing how she did it.
And now, I’ll show you my way.
I did stay awake in bed for a few nights trying to think of the best way to do it. Tine lined her sneakers by using spray glue to glue the lining to the Decovil on the inside, and then finished the raw edges with bias binding. I didn’t have spray glue, so I wanted to find another way.
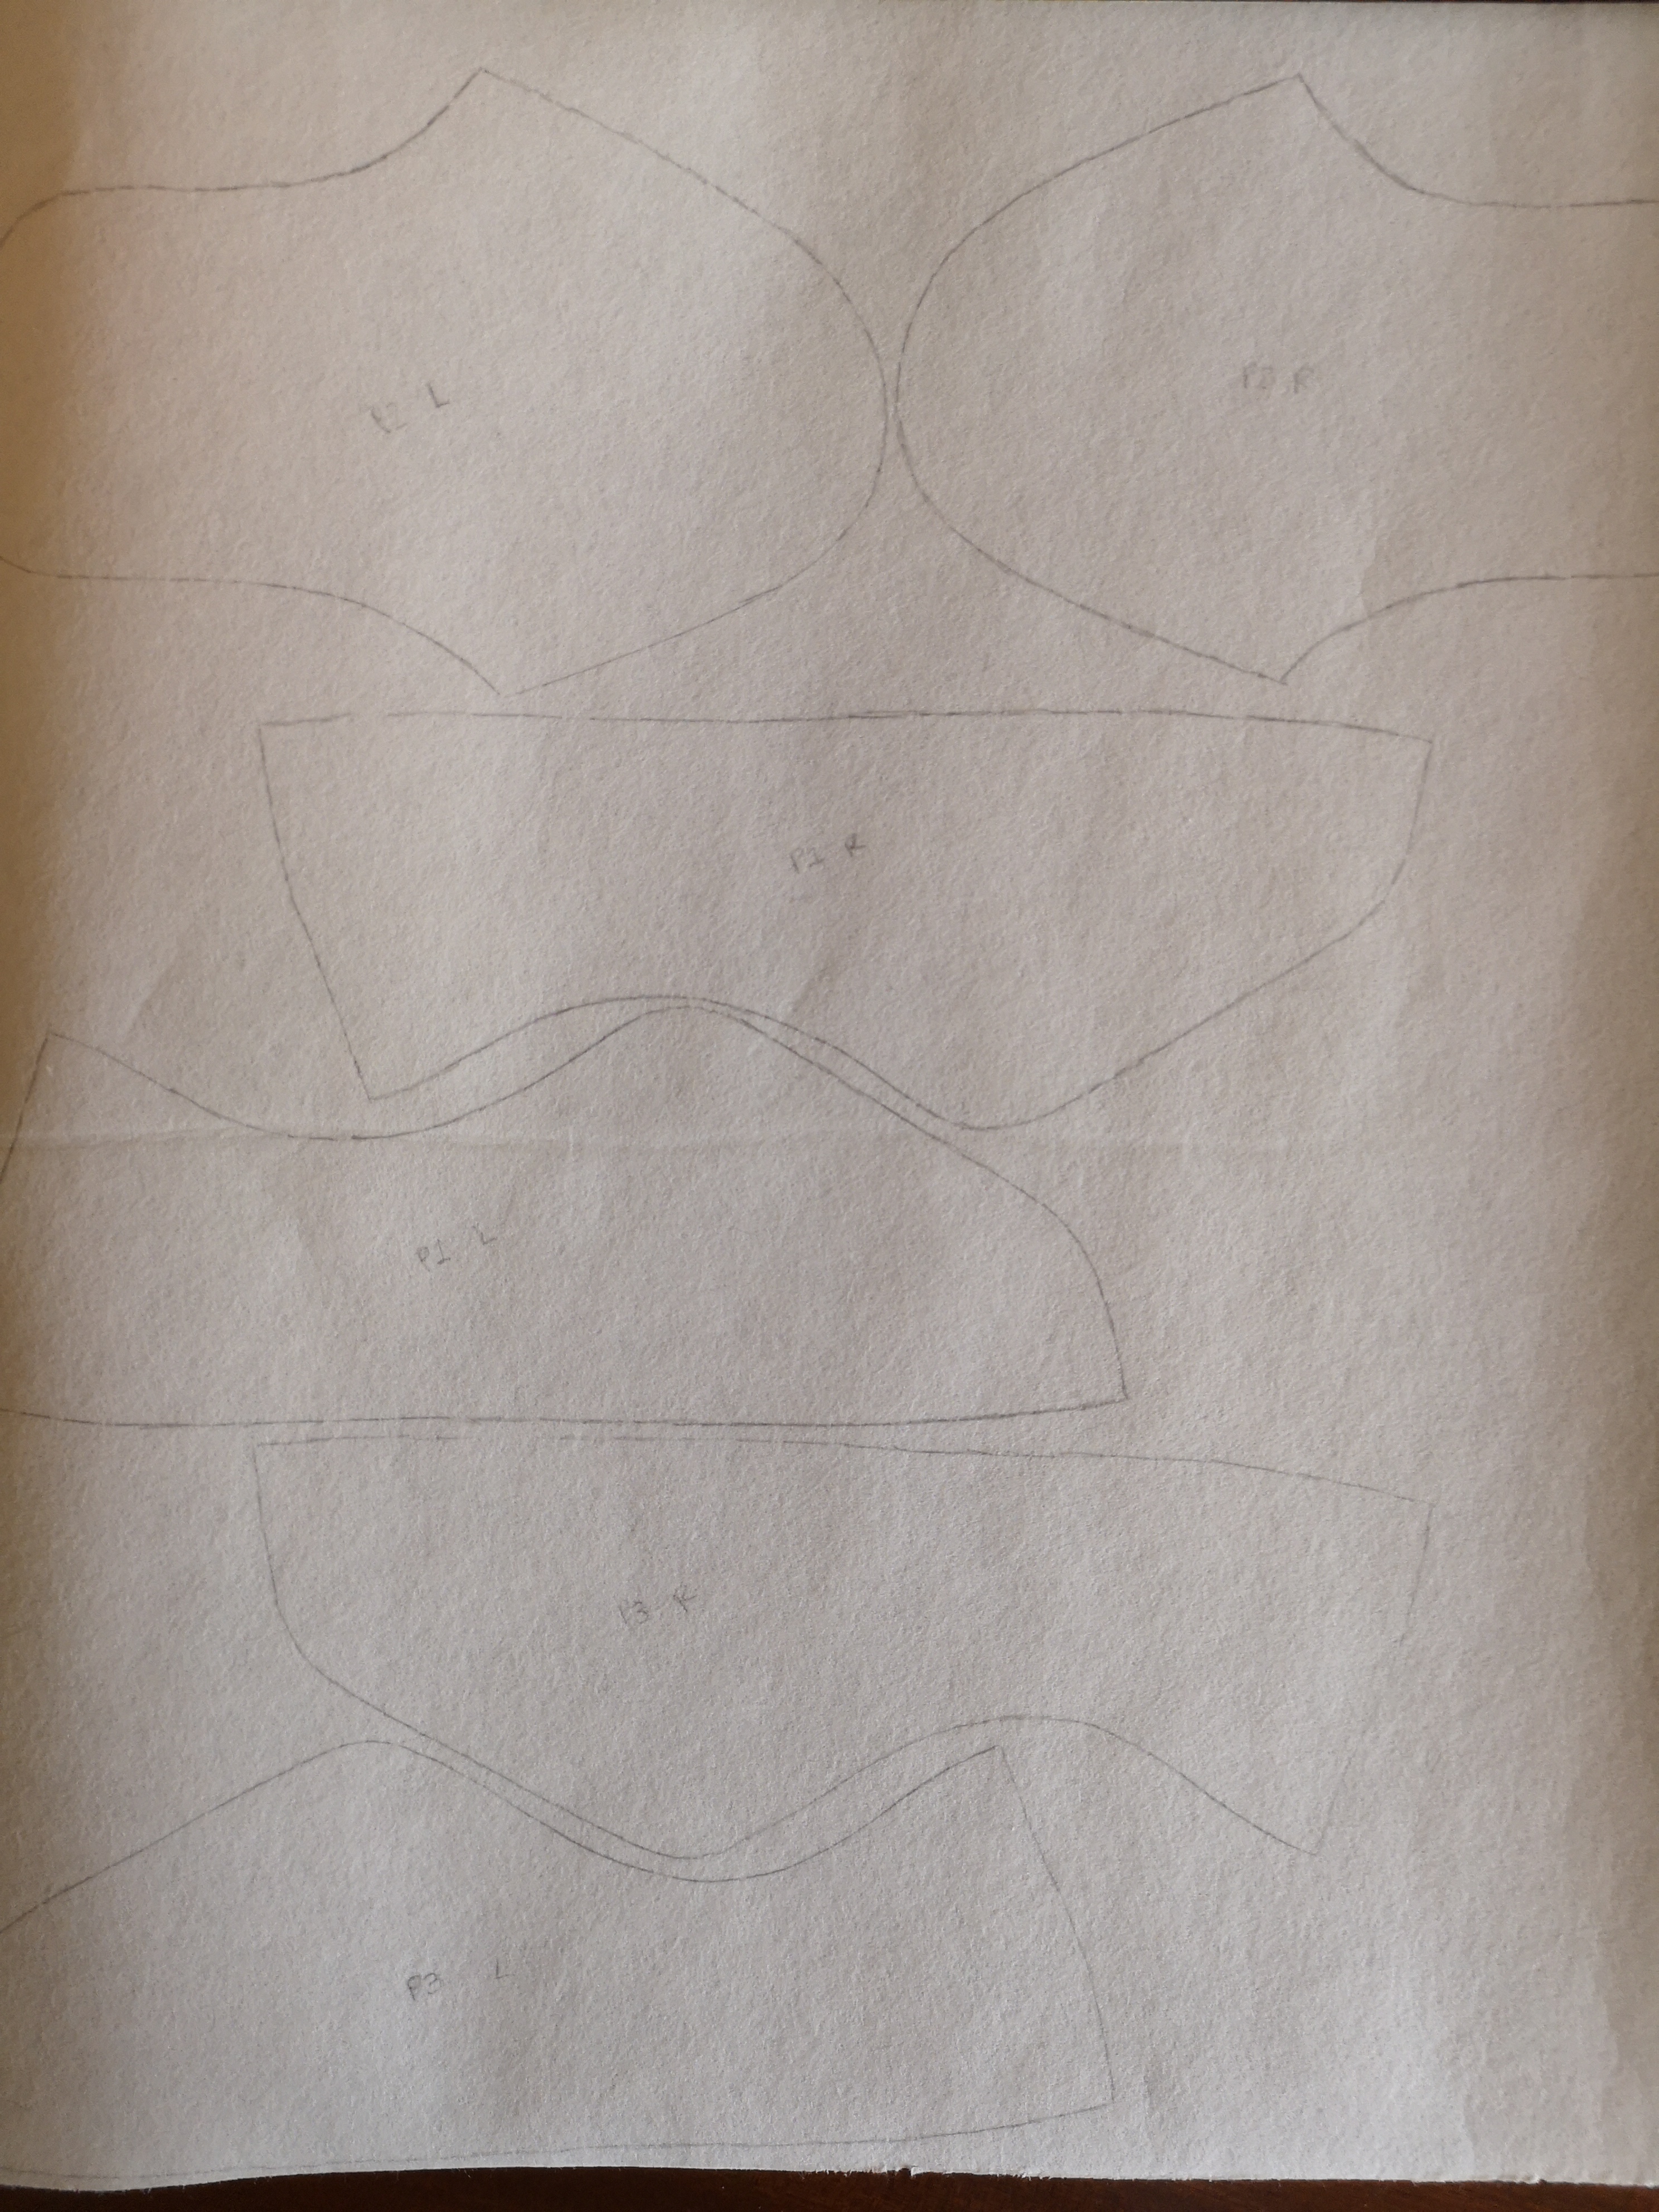
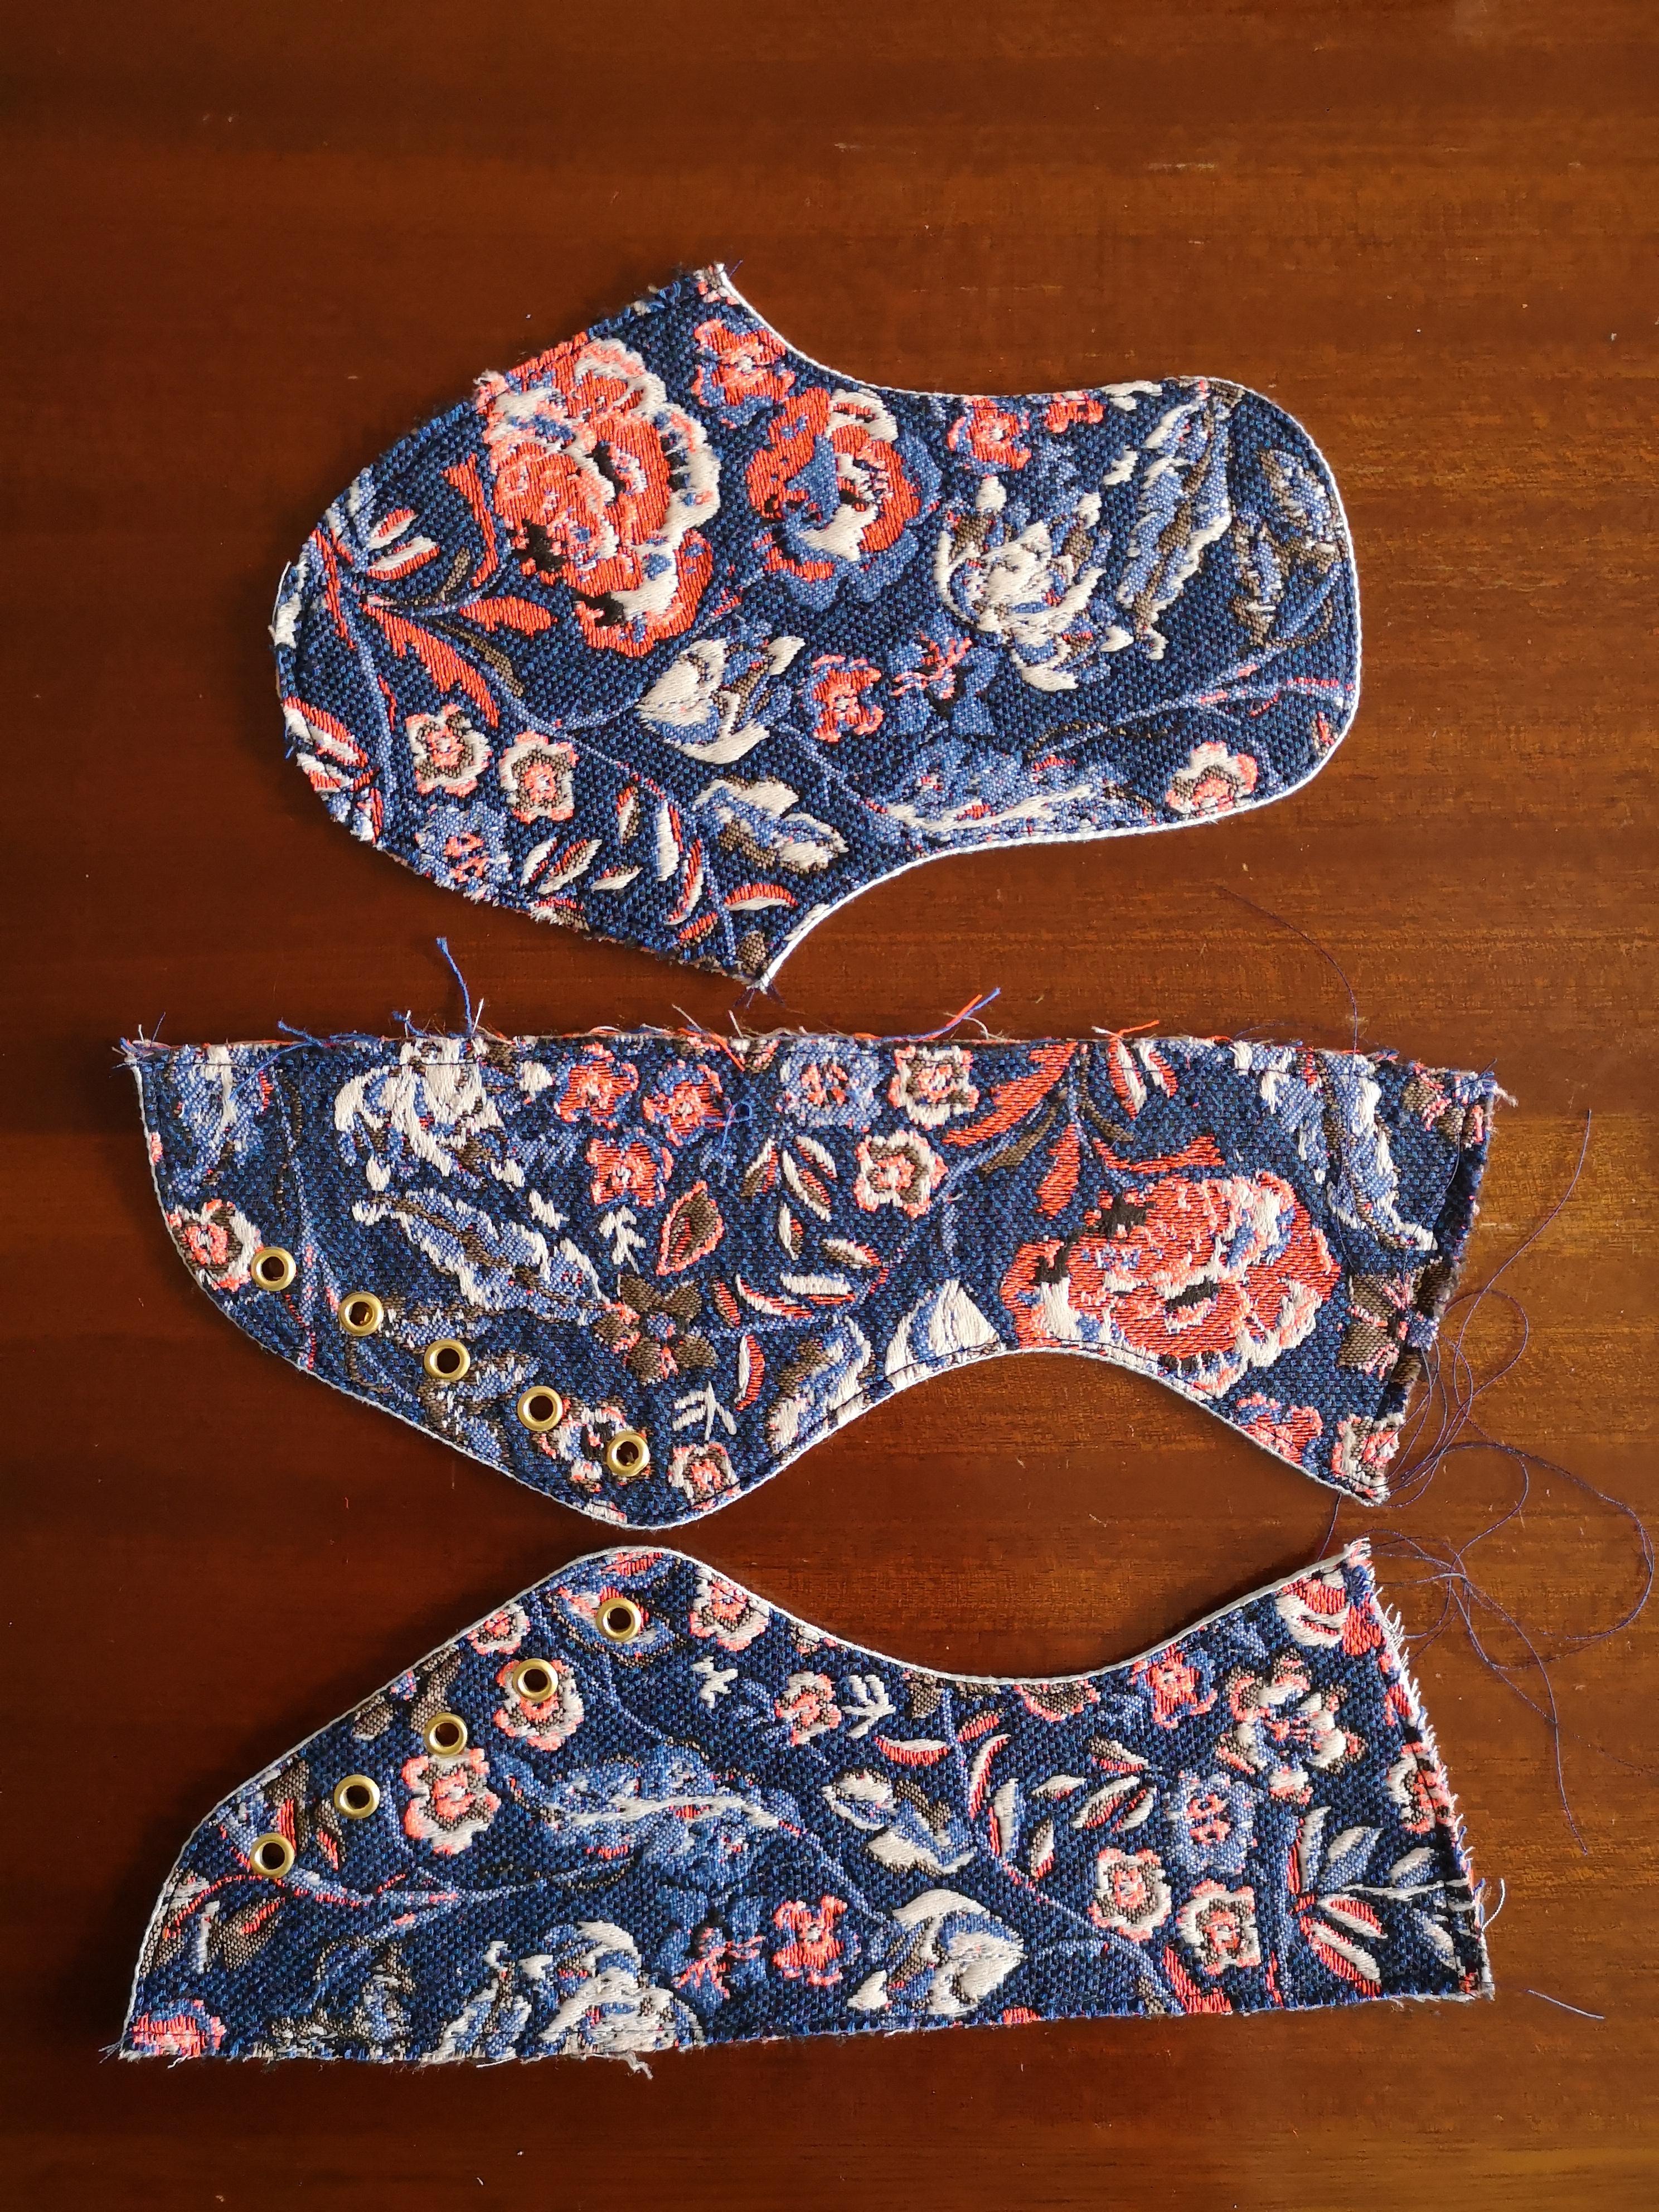
First, I used the template that comes with SneakerKit (downloadable from their website) and traced the pieces onto the non-adhesive side of the Decovil. Basically, I followed the same steps for cutting out leather that SneakerKit provides. I didn’t mark the punch holes.
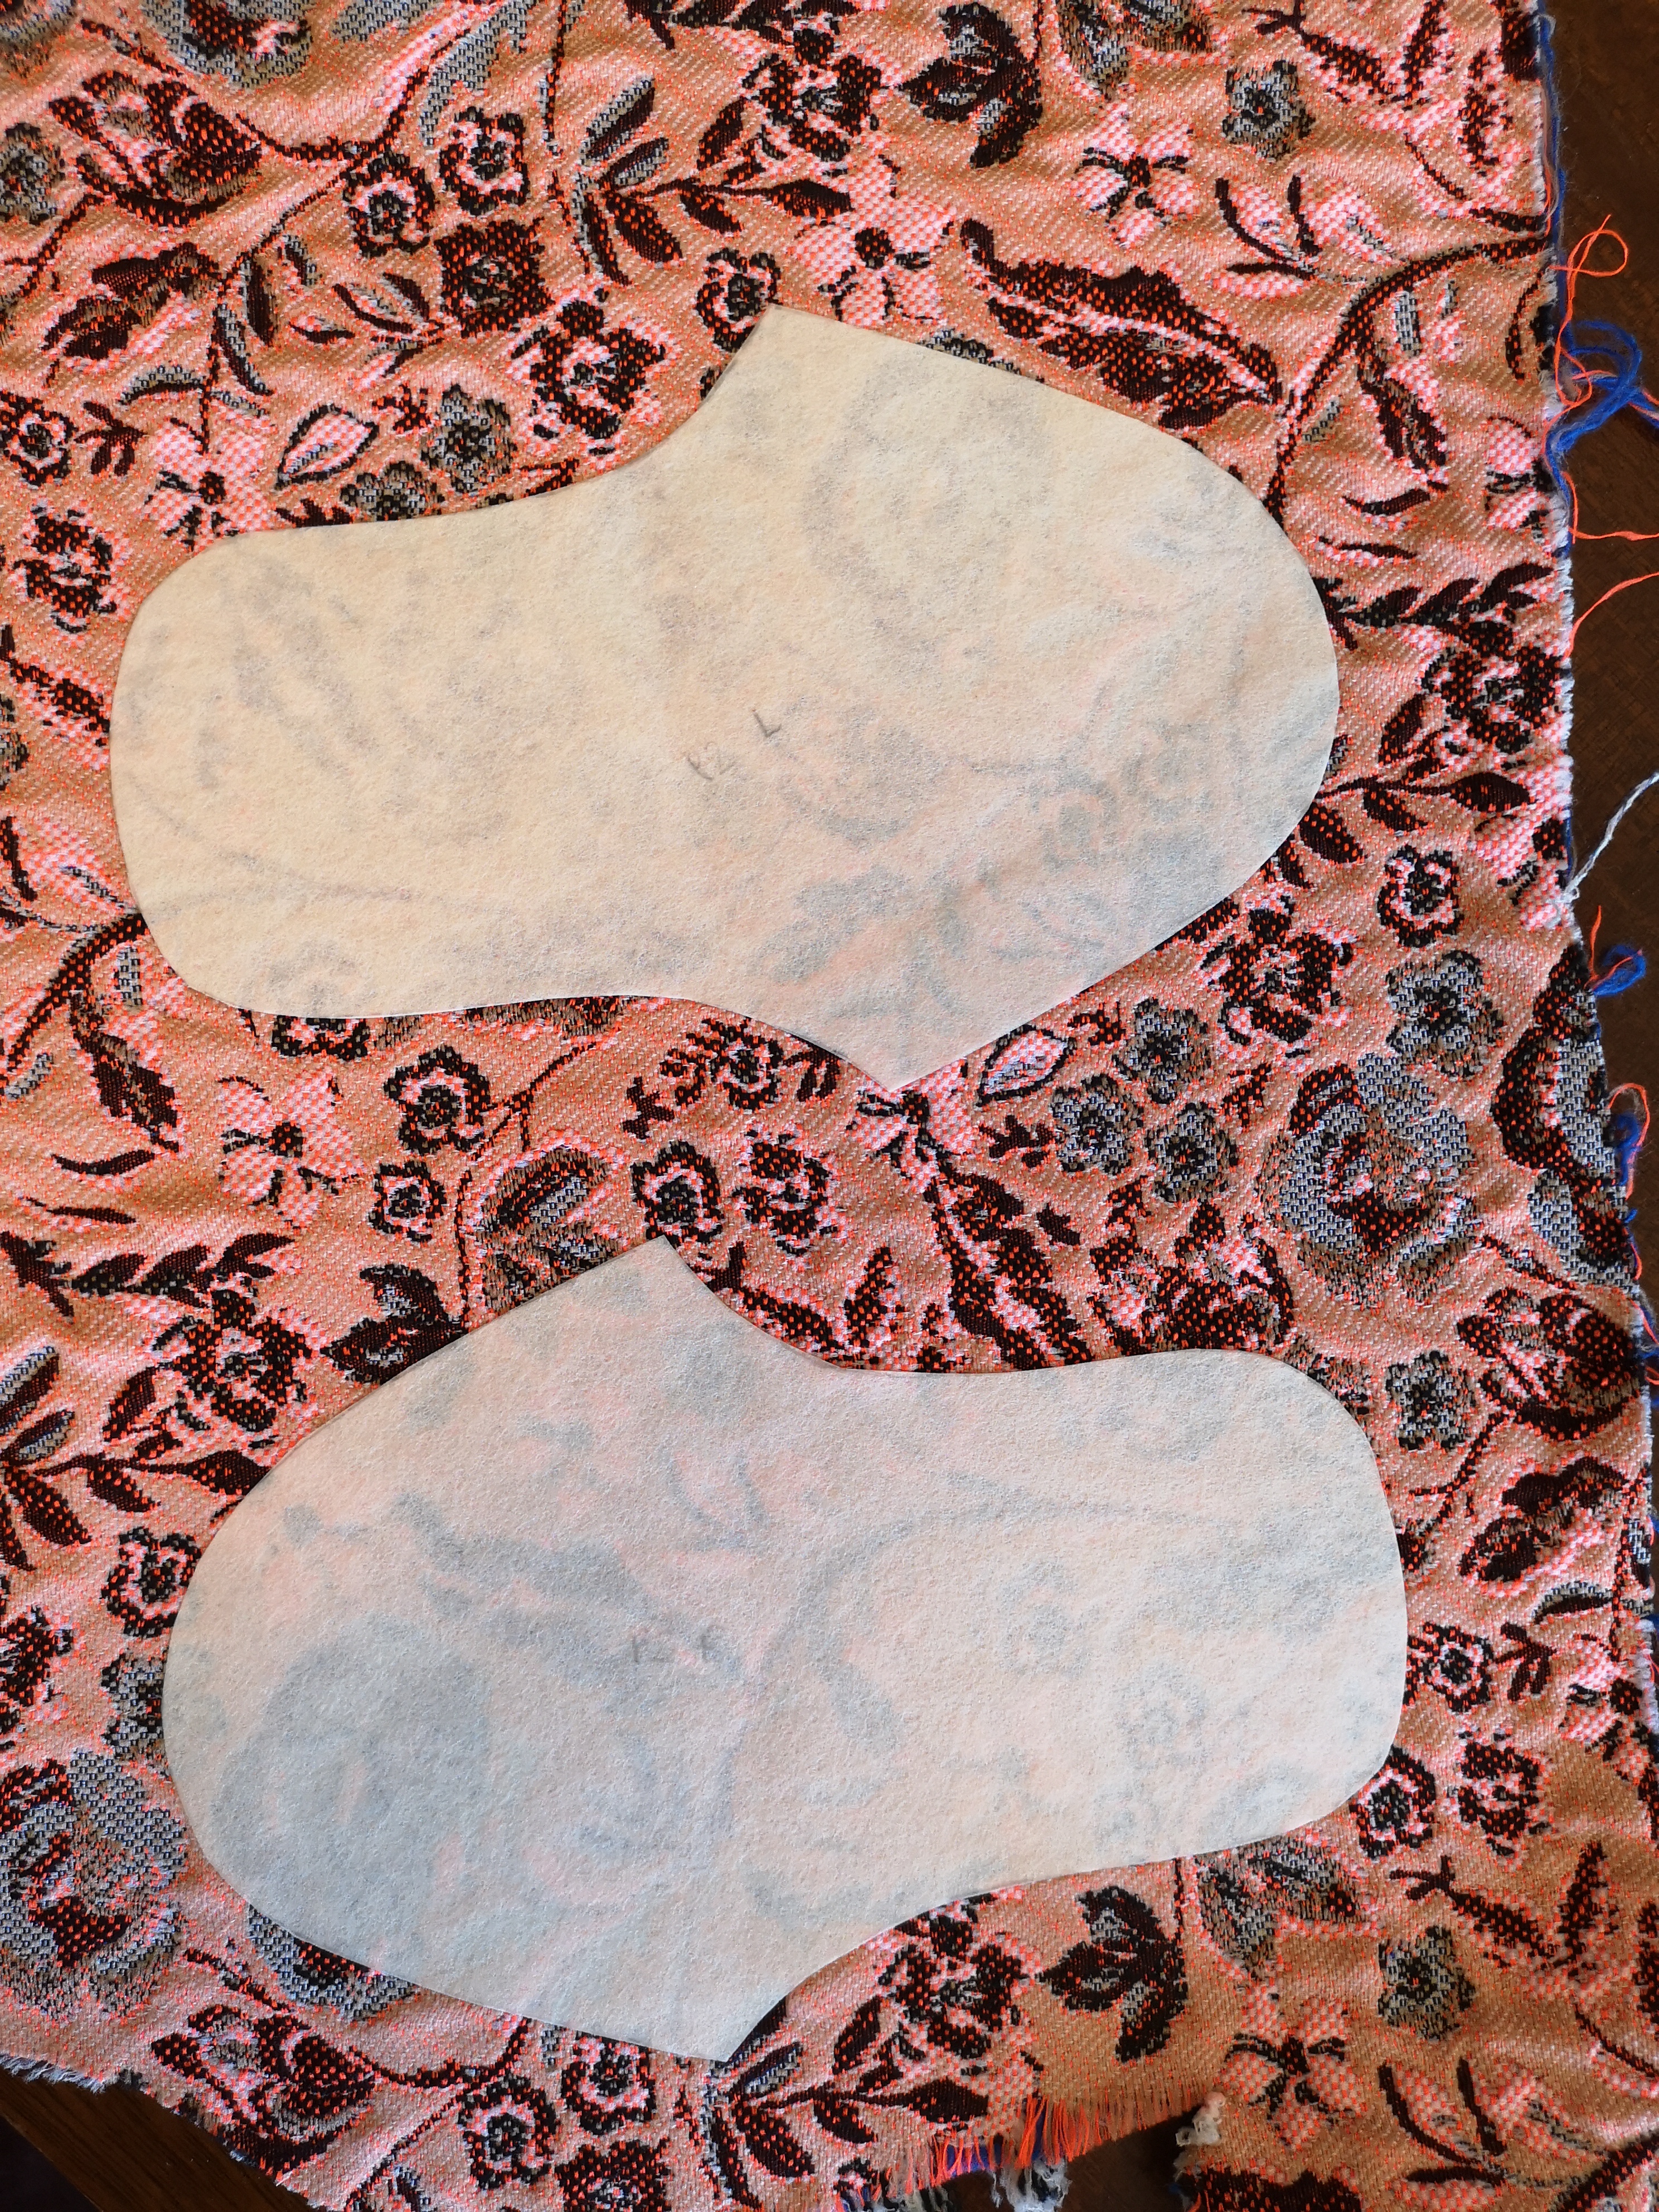
I cut out the pieces and ironed them to the wrong side of my main fabric, making sure to leave a good border all around each piece for seam allowances. I cut out the pieces, but eyeballed a 1/2″ seam allowance along the top edges of the sneaker sides, and around the long part of the centre piece that would be the tongue.
Then I placed these pieces on the lining fabric and cut out the lining using the interfaced main fabric as a template. I sewed the lining to the right side of the main fabric, stitching right along the edge of the Decovil.
I trimmed the seams and clipped the curves, and turned the lining fabric to the inside. I found the lining fabric got kind of tight and pull-y, but I managed to press it out enough that it wasn’t a problem.
Then I topstitched the edges, which also helped keep the lining from flipping out. I also stitched down the open raw edges of the pieces so the lining wouldn’t pull back up.
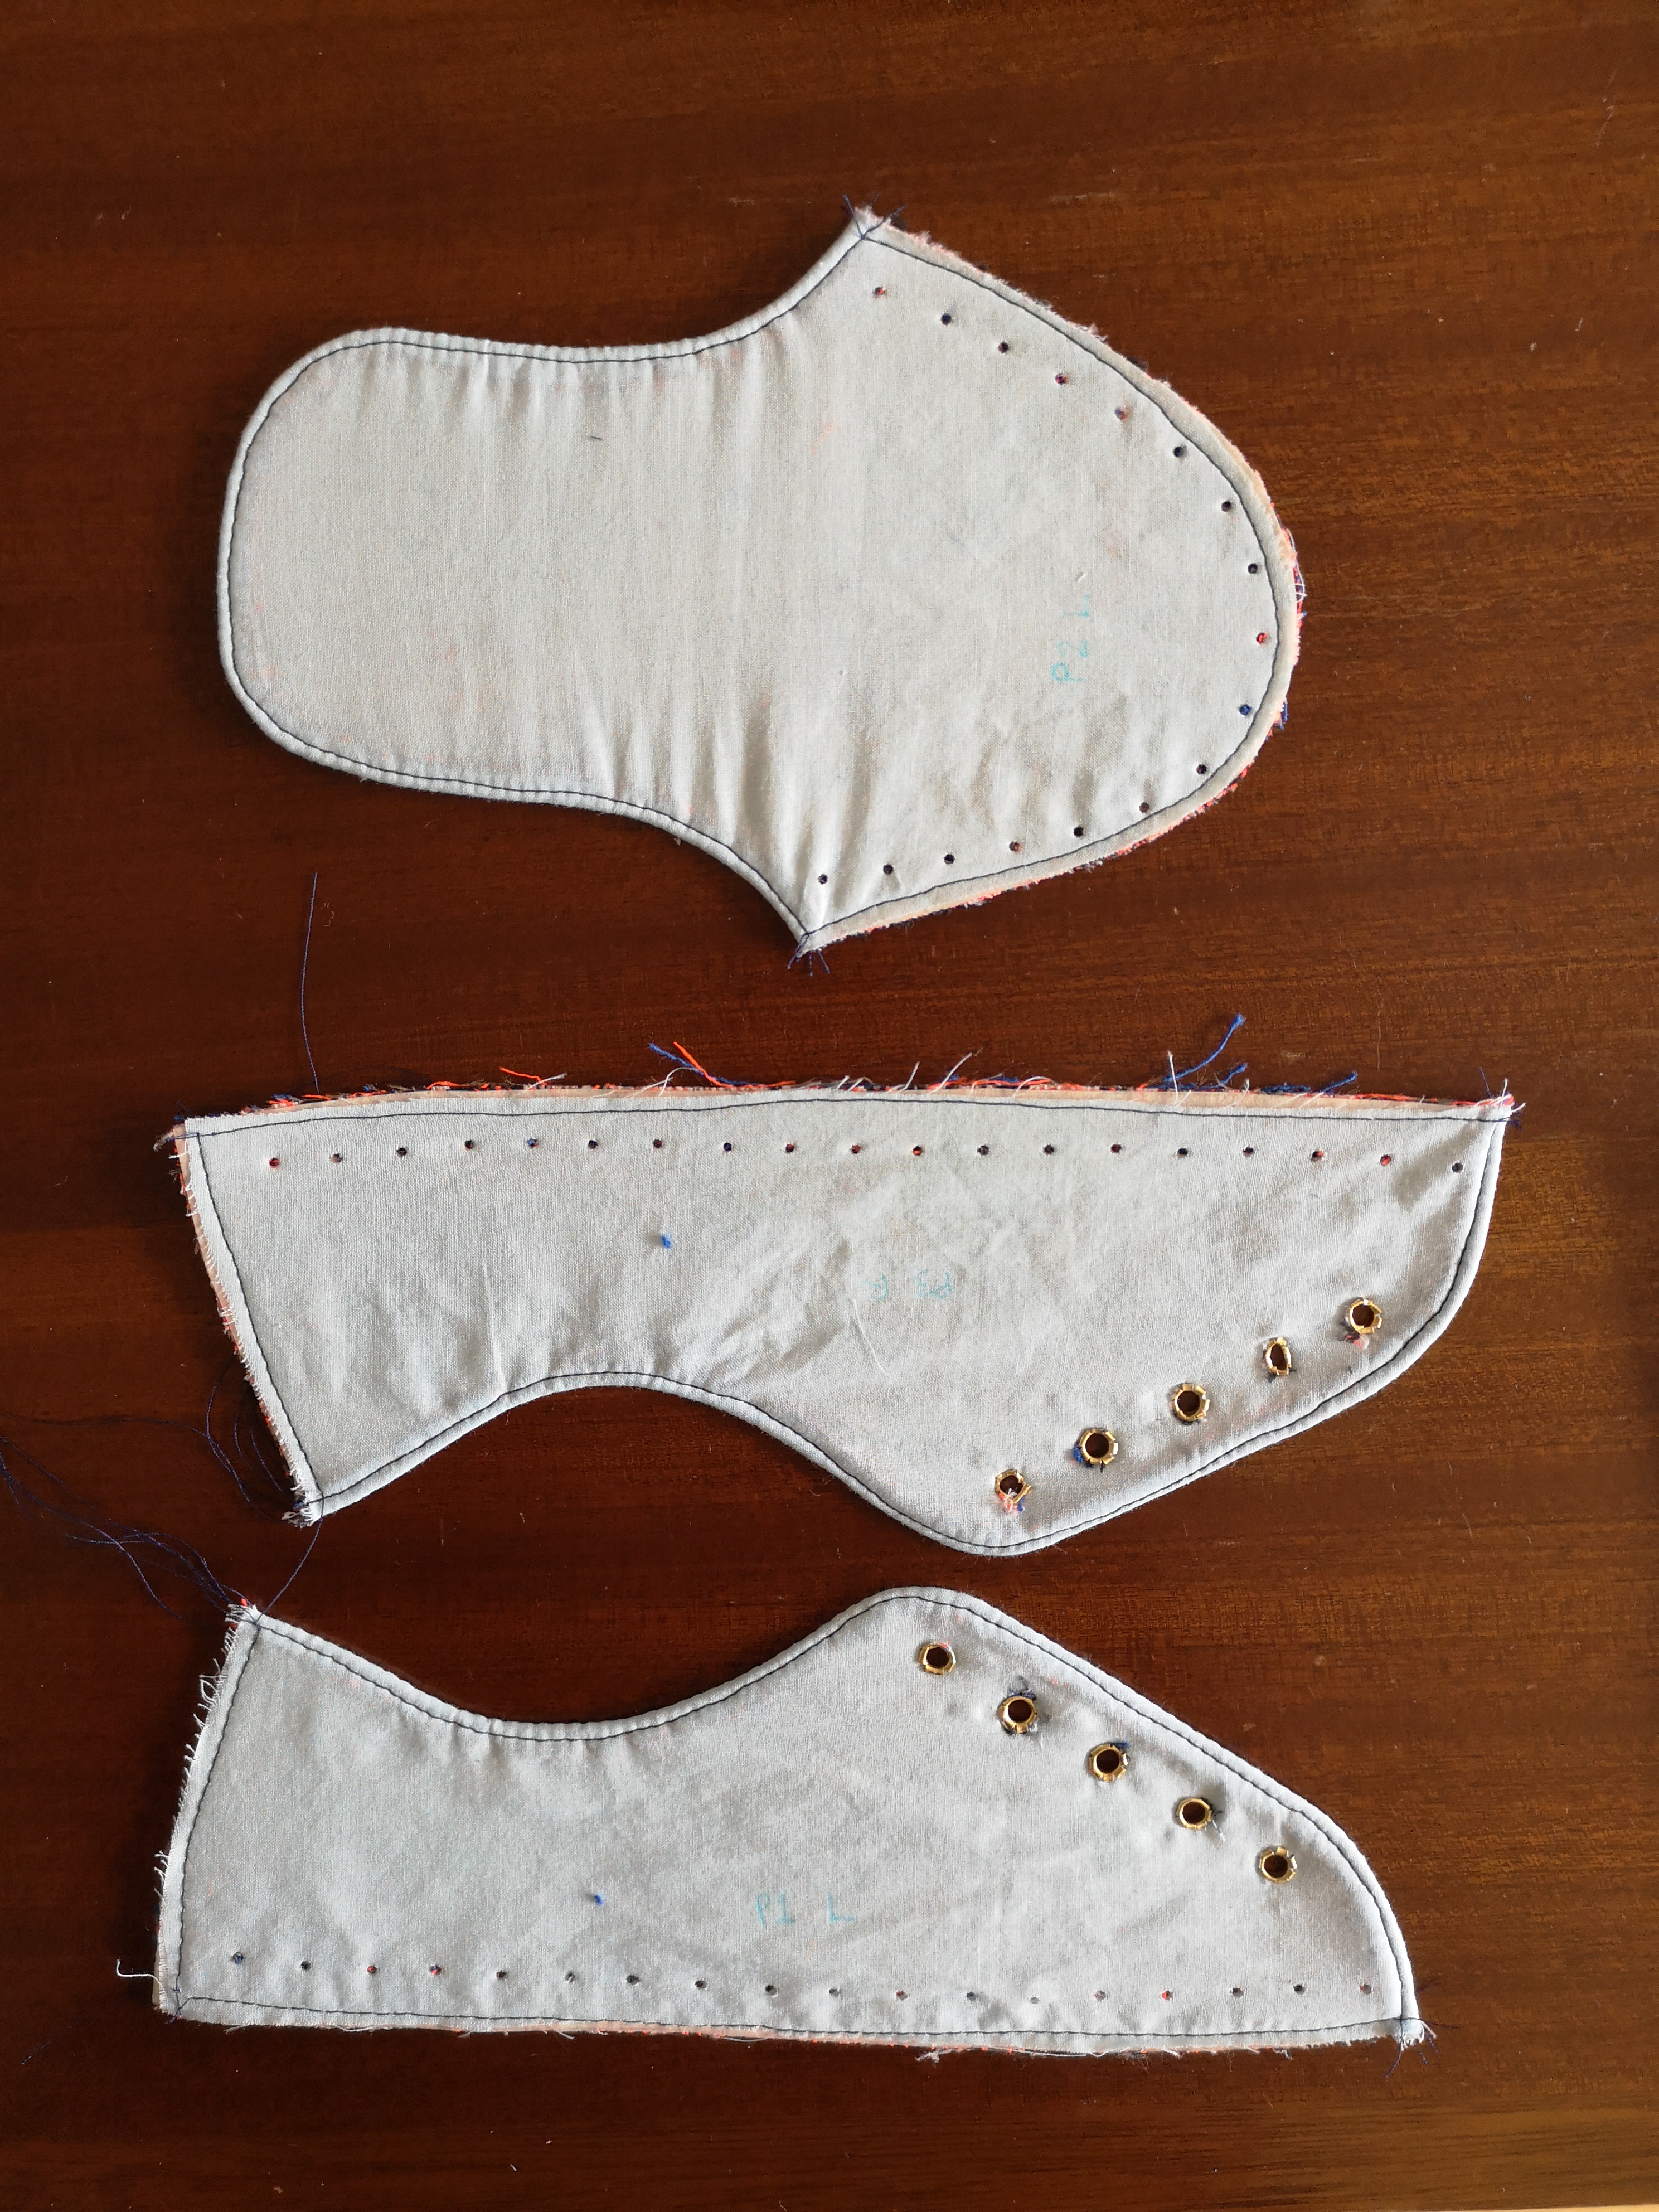
Once all the pieces were sewn, I marked them and prepared them according to the SneakerKit instructions, but I didn’t punch holes up the back of the shoe/ankle. This is because those holes are used to stitch the two side pieces together (P1 and P3) and I decided I would do this on the sewing machine.
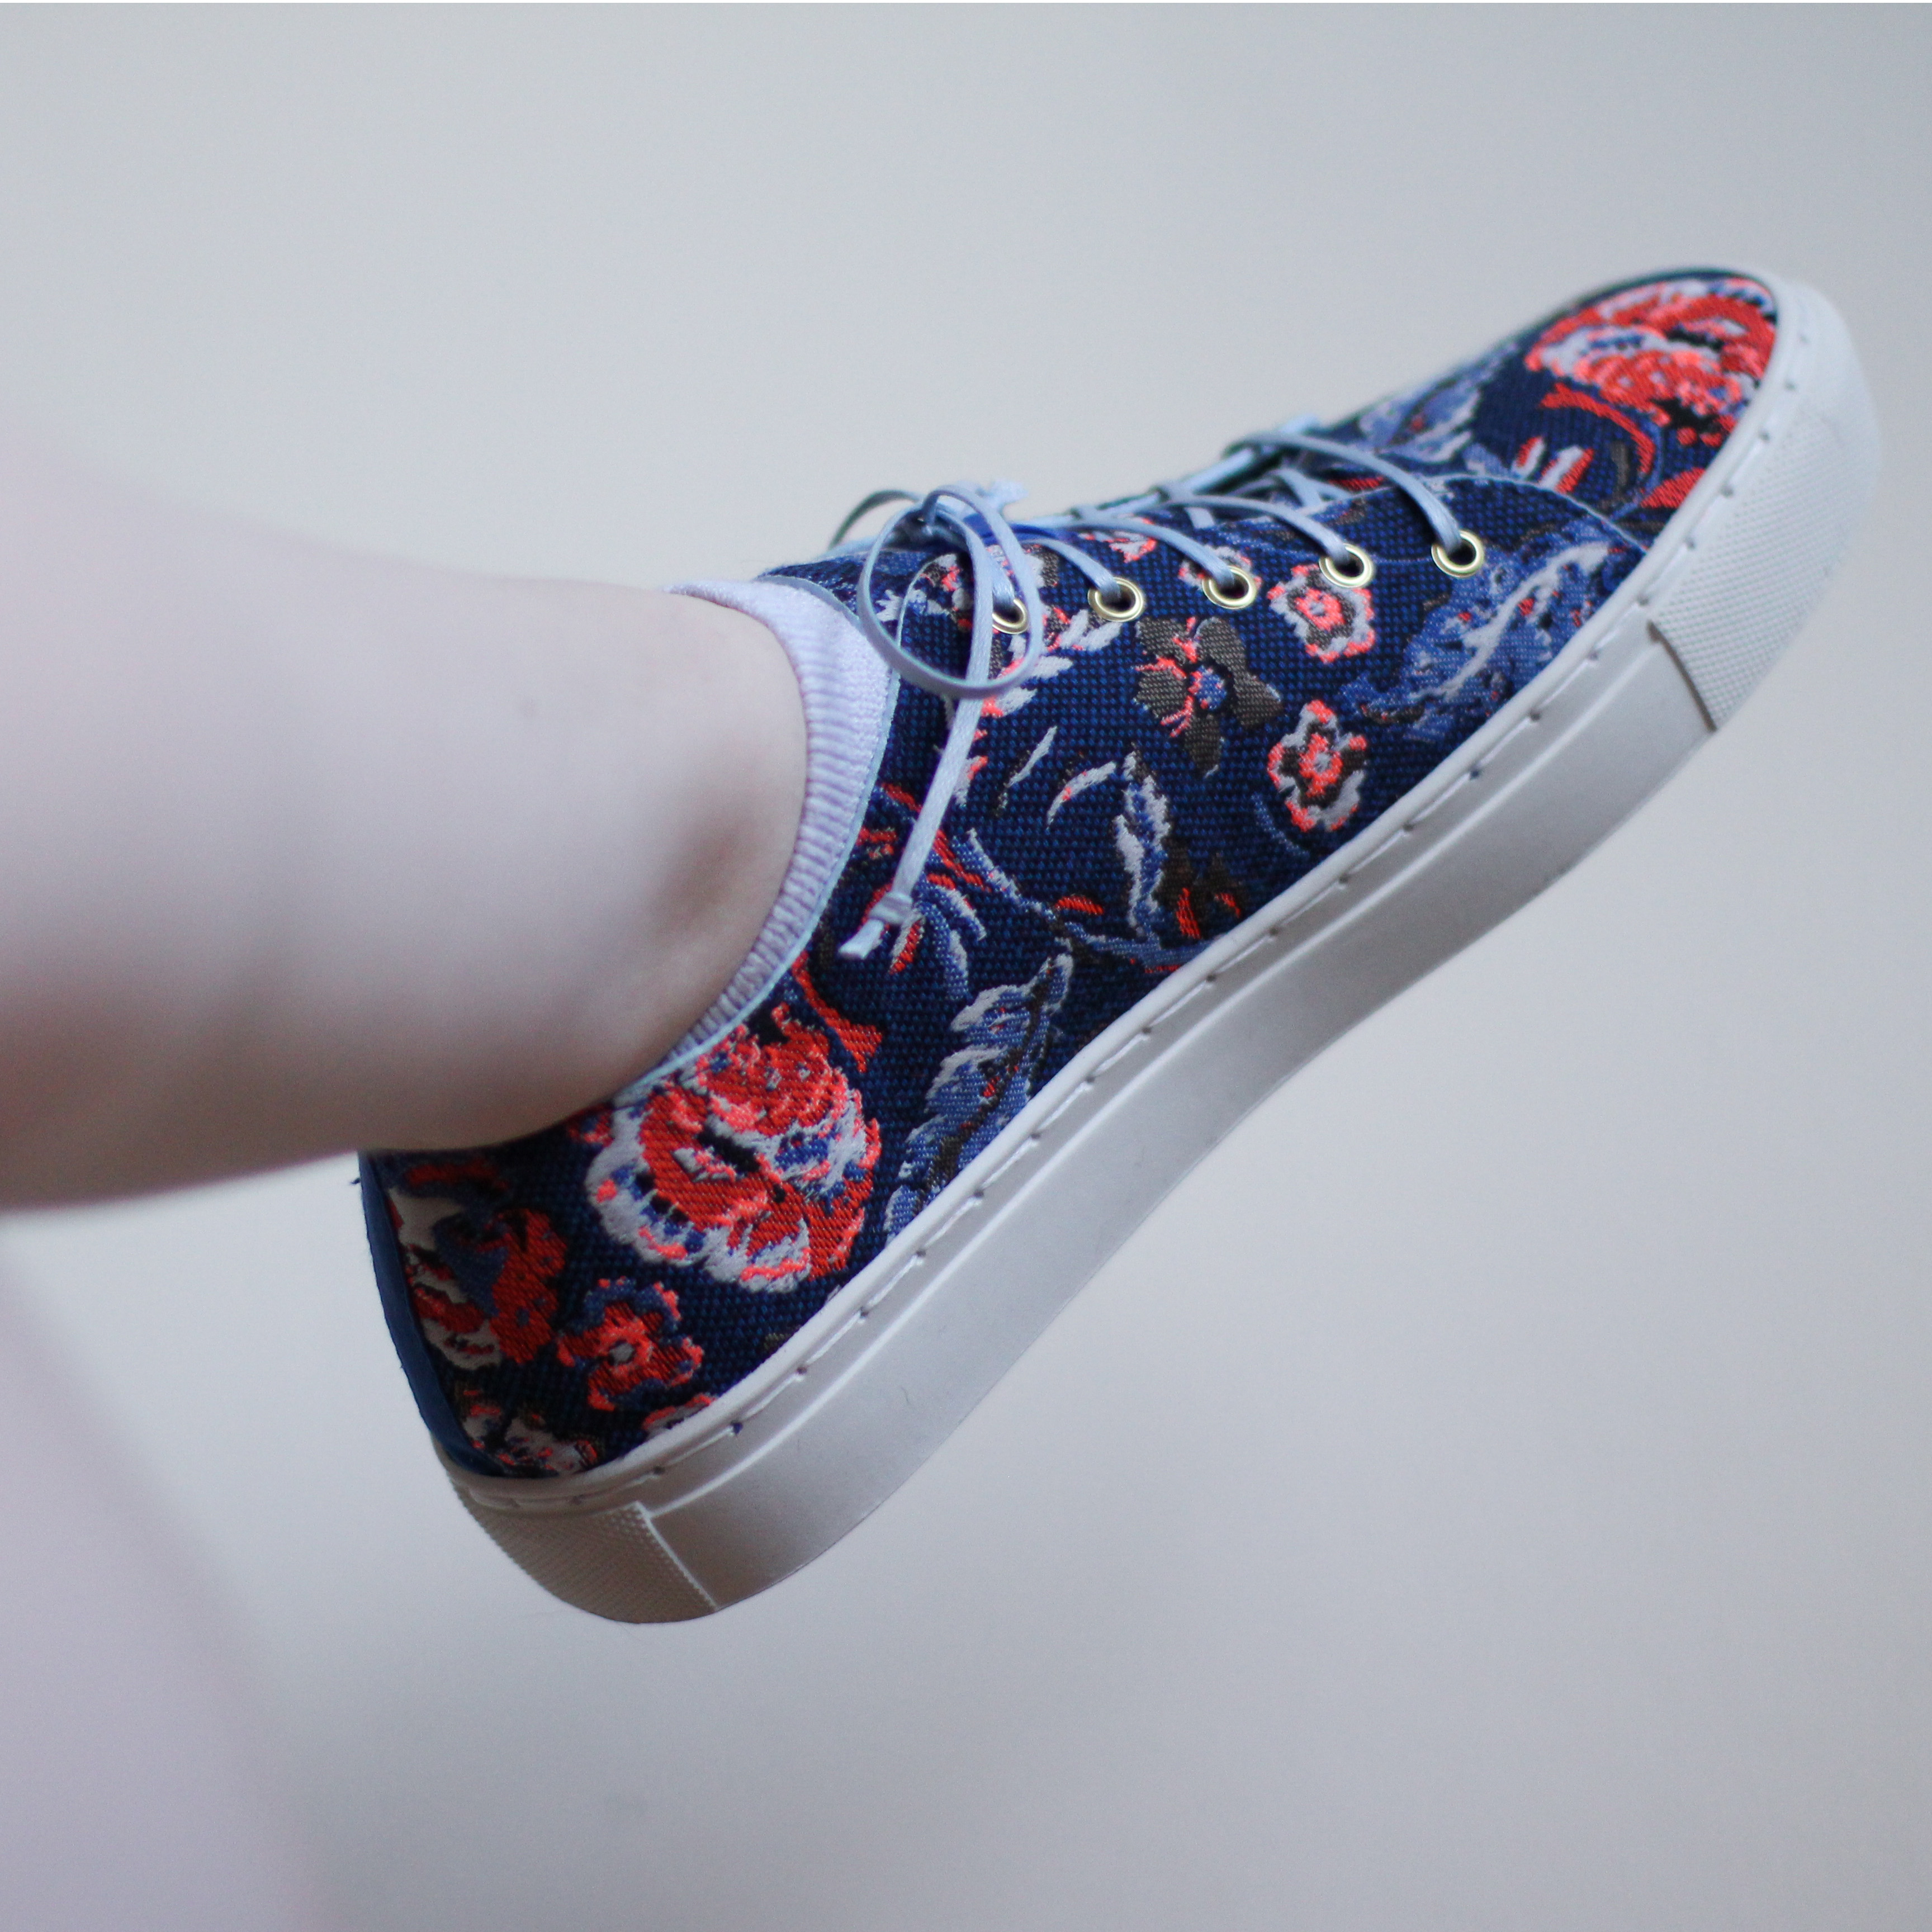
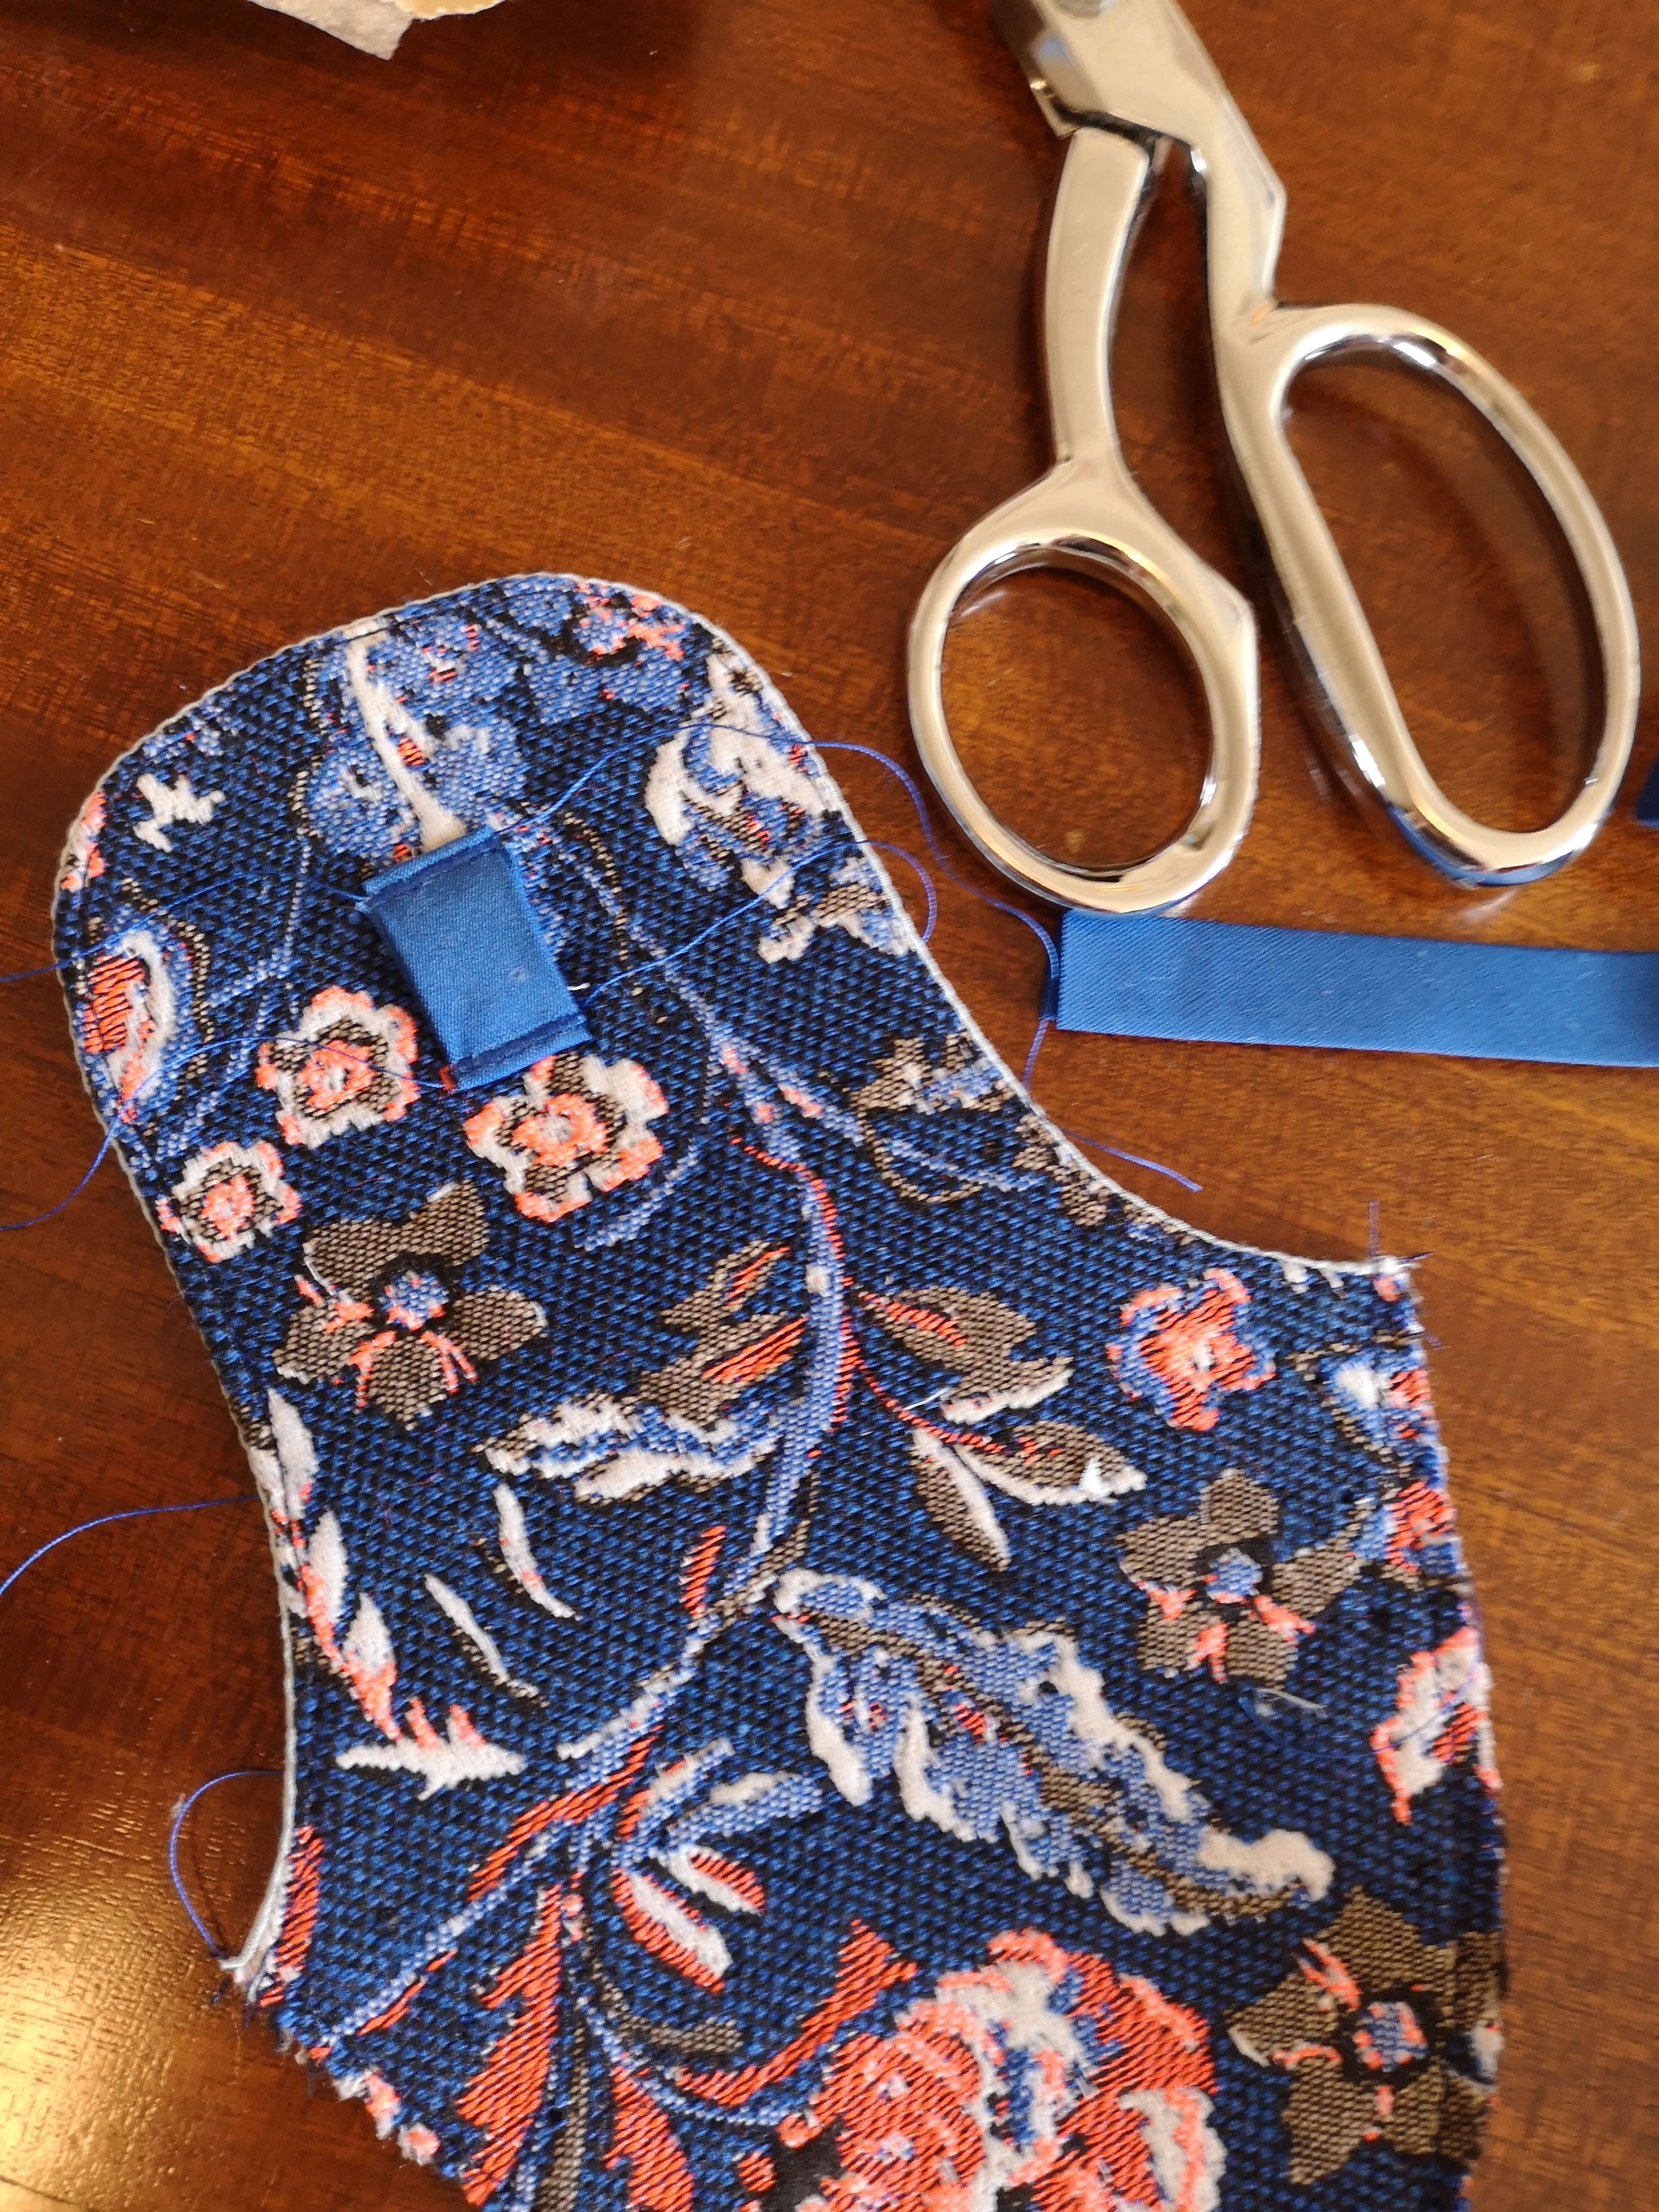
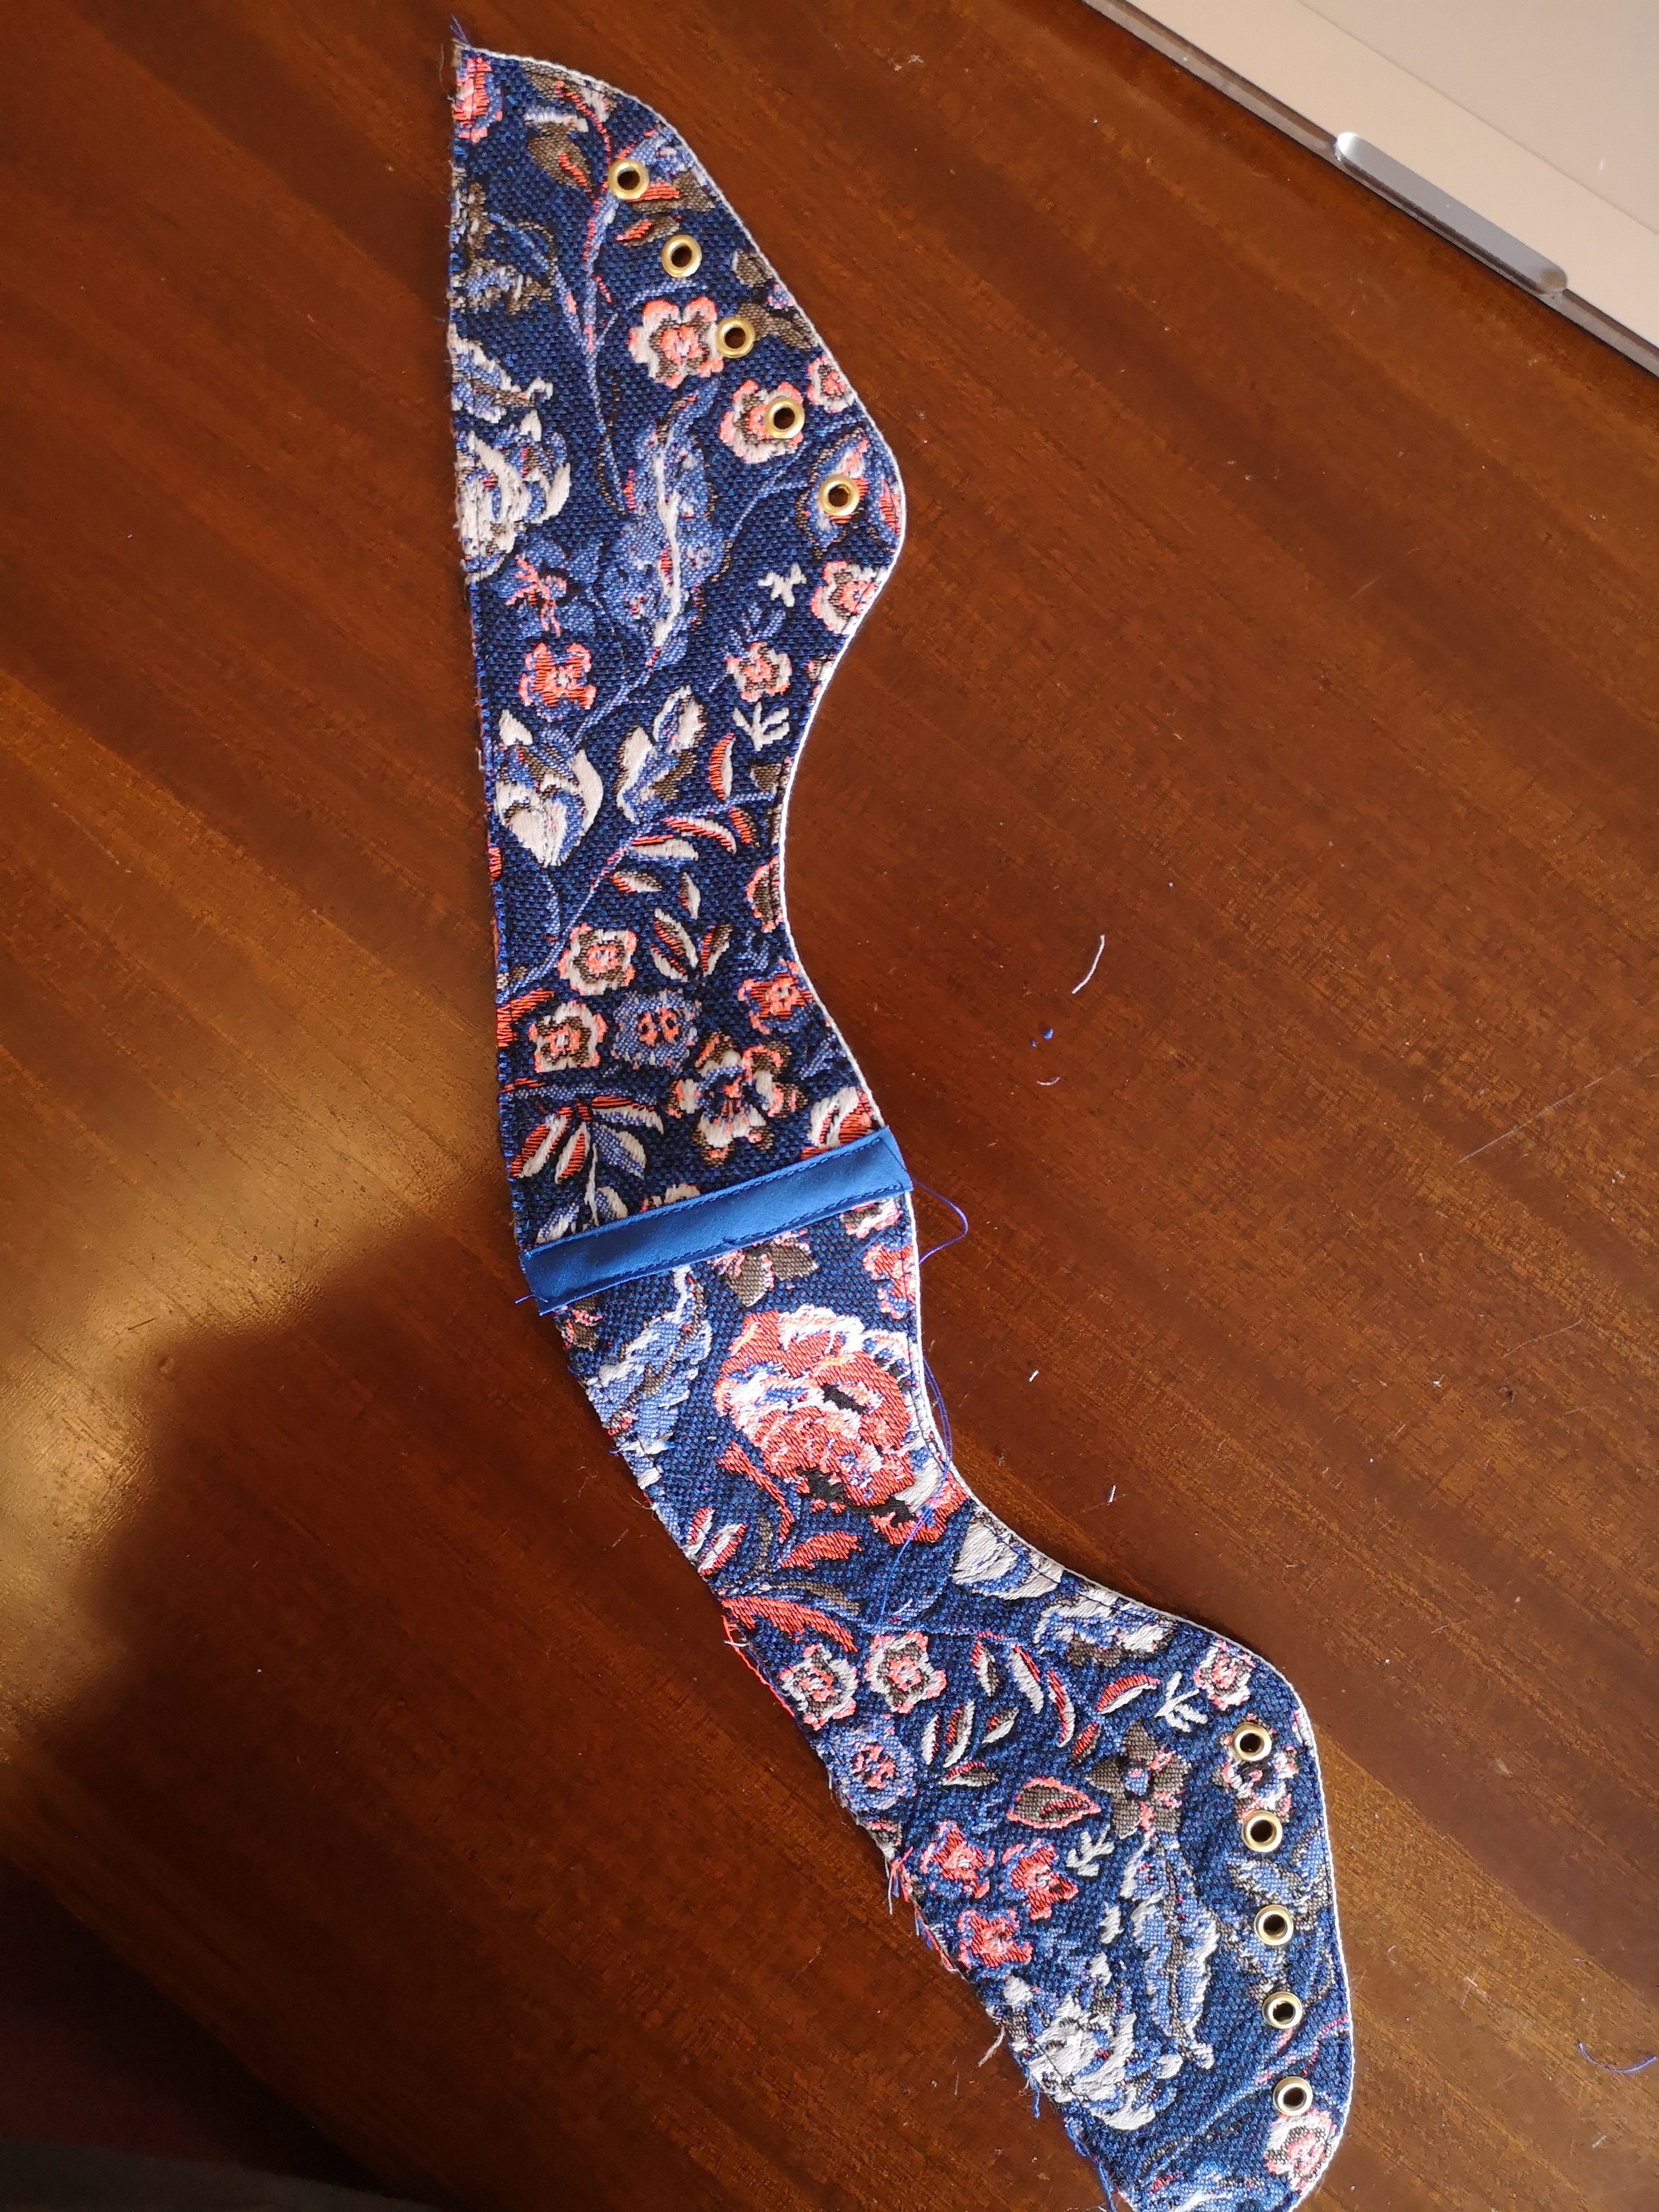
On the tongue, there is supposed to be a little slit in the leather for the laces to be held in place. Since cutting into the fabric would leave an ugly raw edge, I decided to stitch a small piece of bias binding on top of the fabric. I used a very narrow and dense zigzag stitch to tack it in place where marked on the pattern.
I installed eyelets before proceeding. This was a huge pain in the neck. I bought Prym 4mm eyelets in Amsterdam and the tool that came with it kept squishing the eyelets into ovals. To fix this, I used the little hole-punch that came with it and did one or two knocks with the hammer using the tapered end (the end that doesn’t have a hole-cutting…circle) and this helped get things going in the right direction. I then finished them off using the little tool.
Once all the pieces were ready for assembly, I sewed bias binding onto pieces P1 and P3 (at the back) instead of using the small rectangular piece in the pattern (I used the machine for this – it sewed fine through the Decovil using a size 80 needle). I also found that at this point the fabric was fraying on all my pieces, so I covered each raw edge in fray check.
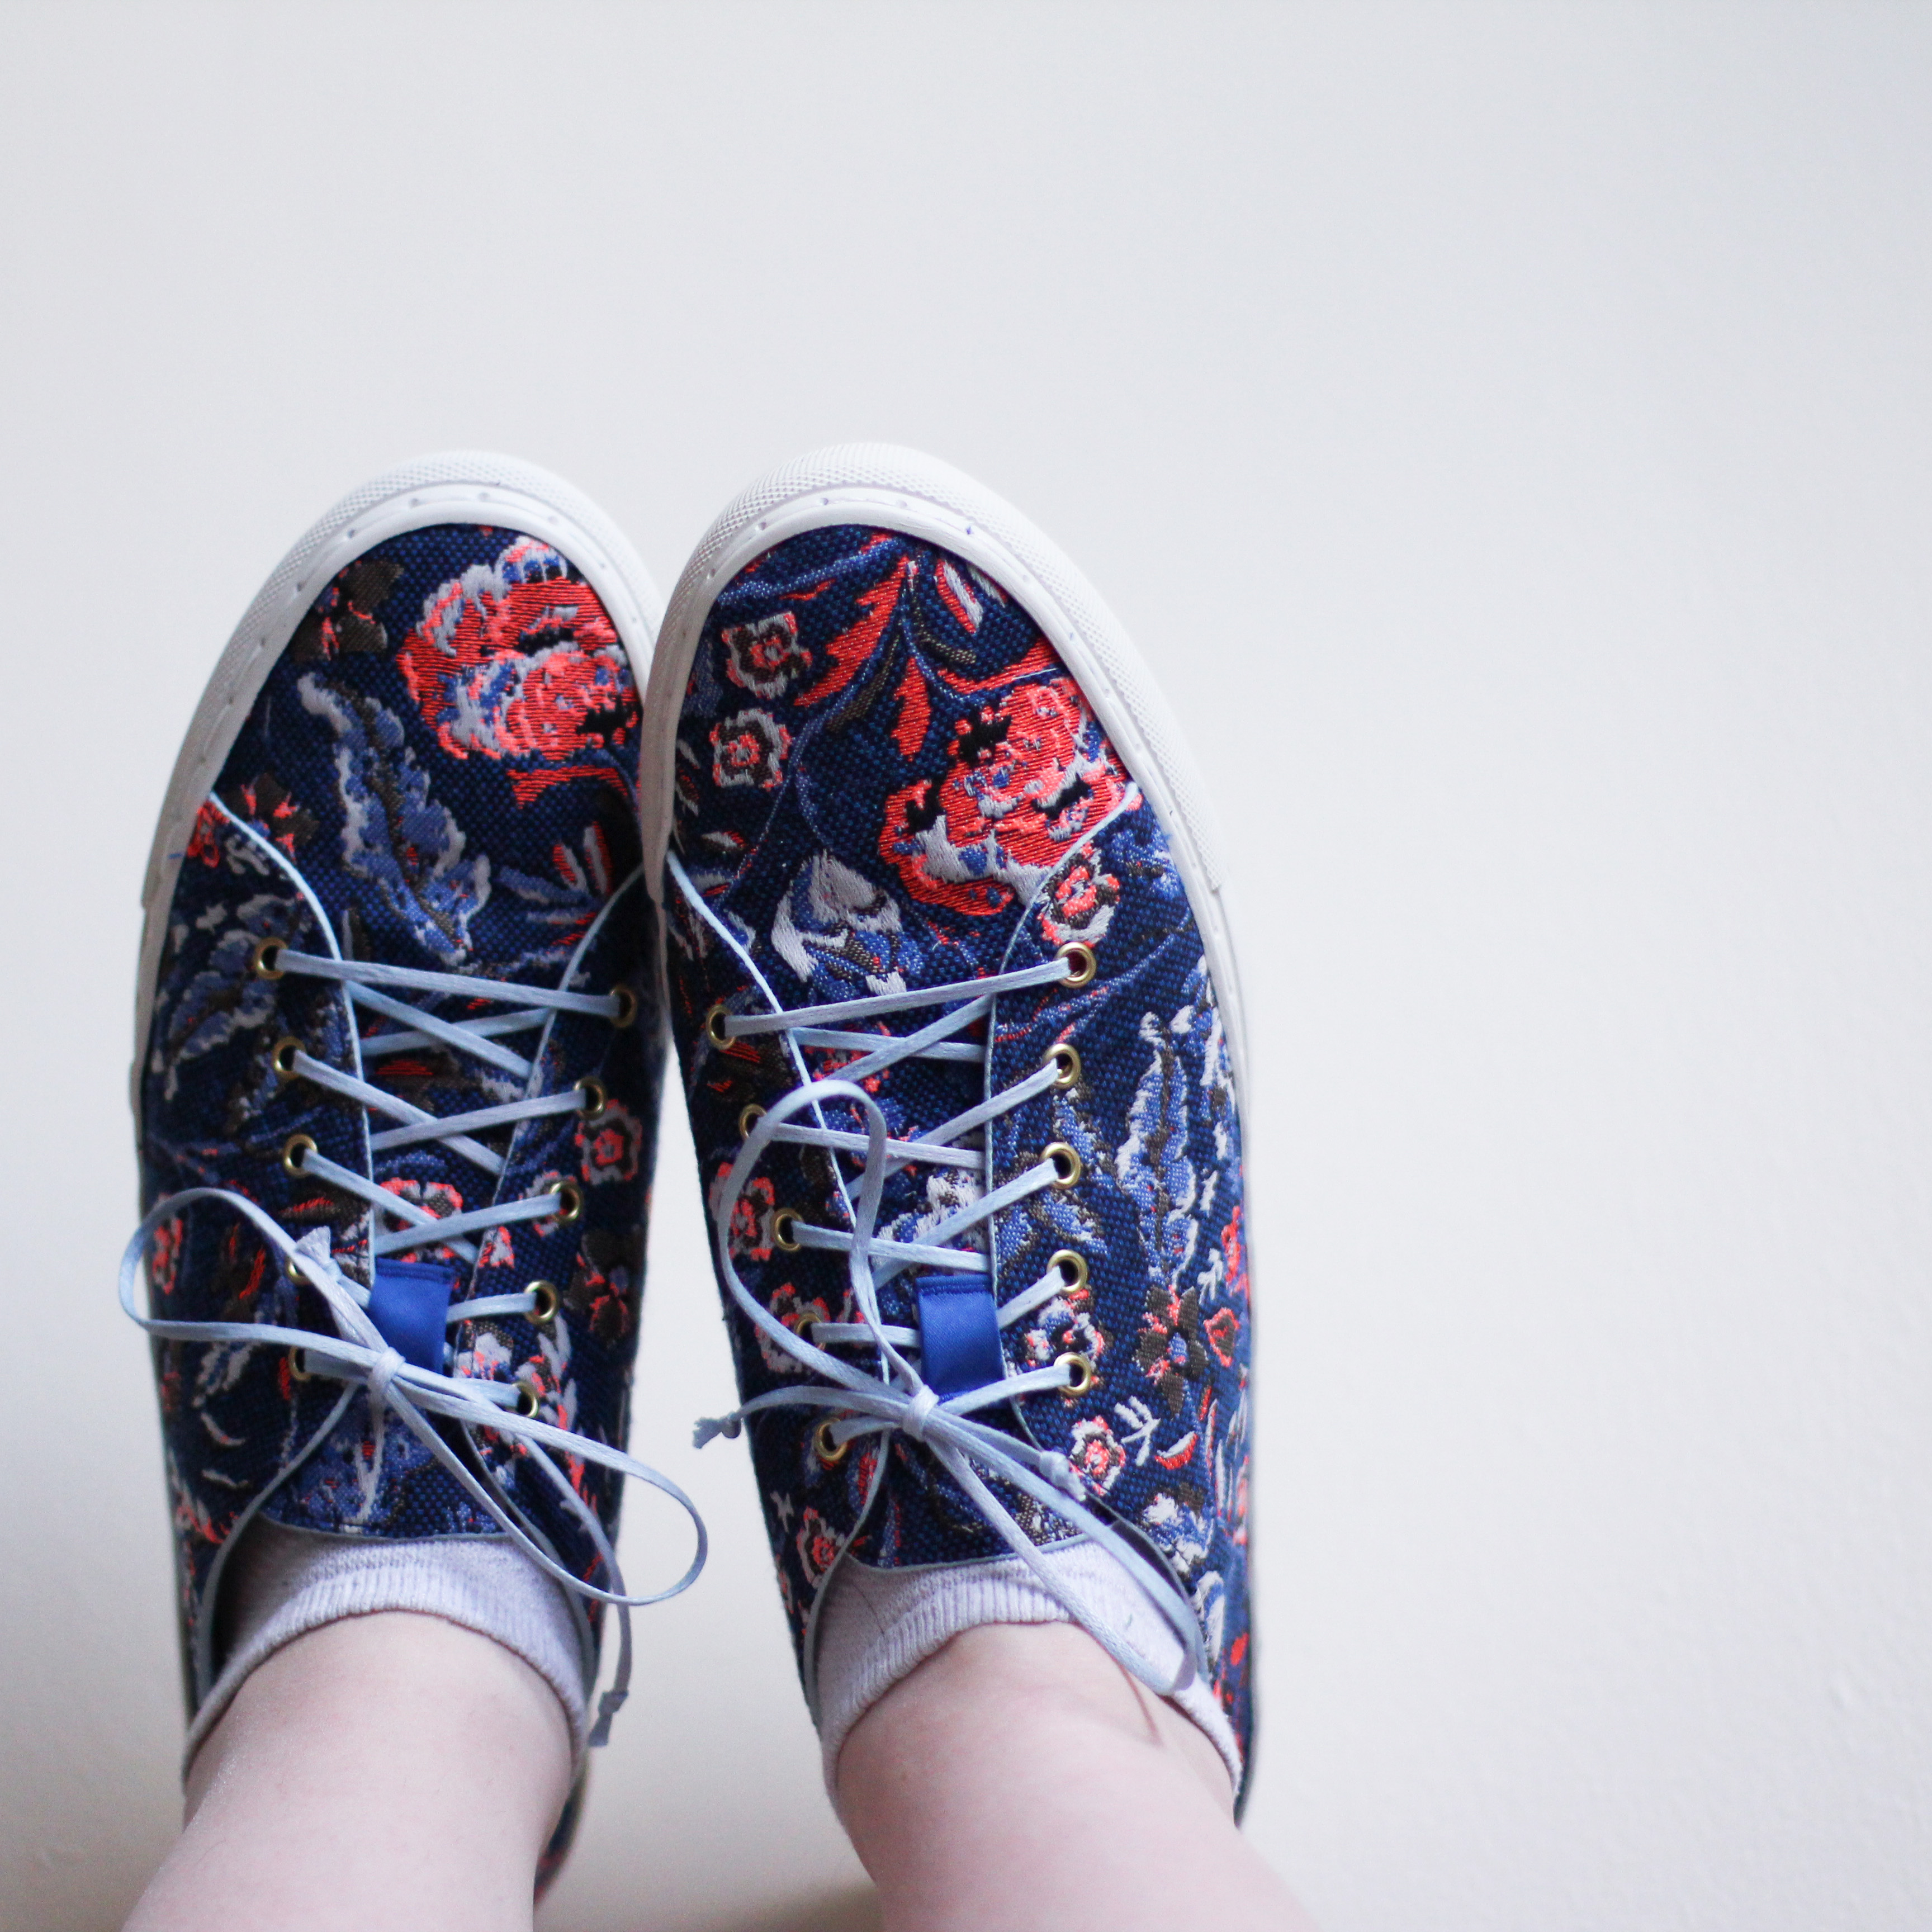
After that point, I assembled the sneakers according to the Sneaker Kit instructions! And that’s it! They say you can finish SneakerKit in a day, but with all the prep I had to do with the Decovil, the lining, and the eyelets, it took me two. Still, not too shabby for a new handmade pair of shoes!